
As I was flipping through old recipe cards, I stumbled upon a delightful no-bake gem: Cookies and Cream Dessert Cups. The thought of a crunchy Oreo crust layered with fluffy, creamy goodness instantly transported me back to summer picnics and joyful gatherings with friends. These dessert cups are not only a breeze to whip up but are also a guaranteed crowd-pleaser, making them perfect for any occasion. With minimal effort and zero oven time, you’ll impress your loved ones while satisfying sweet cravings in no time. Curious about how to bring this nostalgic treat to life? Let’s dive into the simple steps that will have you serving up smiles in no time!
Why Are These Dessert Cups So Irresistible?
Decadent Flavors: The fusion of creamy filling and crunchy Oreo crust creates a flavor explosion that’s hard to resist.
No-Bake Convenience: Perfect for busy schedules, these dessert cups require no baking, making them a quick favorite for gatherings or just a sweet treat at home.
Versatile Variations: Feel free to customize! Swap chocolate cookies for vanilla wafers or add layers of fruit puree to suit your taste.
Impressive Presentation: These cups not only taste divine but also look stunning, making them a showstopper on your dessert table alongside treats like Blueberry Cream Cheese Puff Pastry.
Crowd-Pleaser Appeal: Loved by both kids and adults, they’re perfect for birthdays or family reunions, guaranteeing smiles all around!
Make-Ahead Magic: Prepare them a day in advance for stress-free entertaining, just like with my Cranberry Cream Cheese treat!
Ingredients for Cookies and Cream Dessert Cups
For the Crust
• Crushed Chocolate Sandwich Cookies – These provide the essential crunchy base; other chocolate cookies can be substituted.
• Butter (melted) – Helps bind the cookie crumbs together for a solid crust.
For the Filling
• Cream Cheese (room temperature) – Adds a rich, creamy texture; ensure it’s softened for easy mixing.
• Granulated Sugar – Balances the cream cheese’s richness with sweetness.
• Vanilla Extract – Perfect for enhancing flavor; almond extract can be a delightful swap.
• Heavy Cream – Key for whipping into a fluffy filling; avoid using milk for this recipe.
For Texture
• Additional Crushed Chocolate Sandwich Cookies – Folded into the filling for delightful bites of crunch.
For Garnish
• Mini Chocolate Sandwich Cookies – Ideal for topping each dessert cup, making them visually appealing.
These Cookies and Cream Dessert Cups promise a delightful mix of flavors and textures in every bite!
Step‑by‑Step Instructions for Cookies and Cream Dessert Cups
Step 1: Prepare Crust
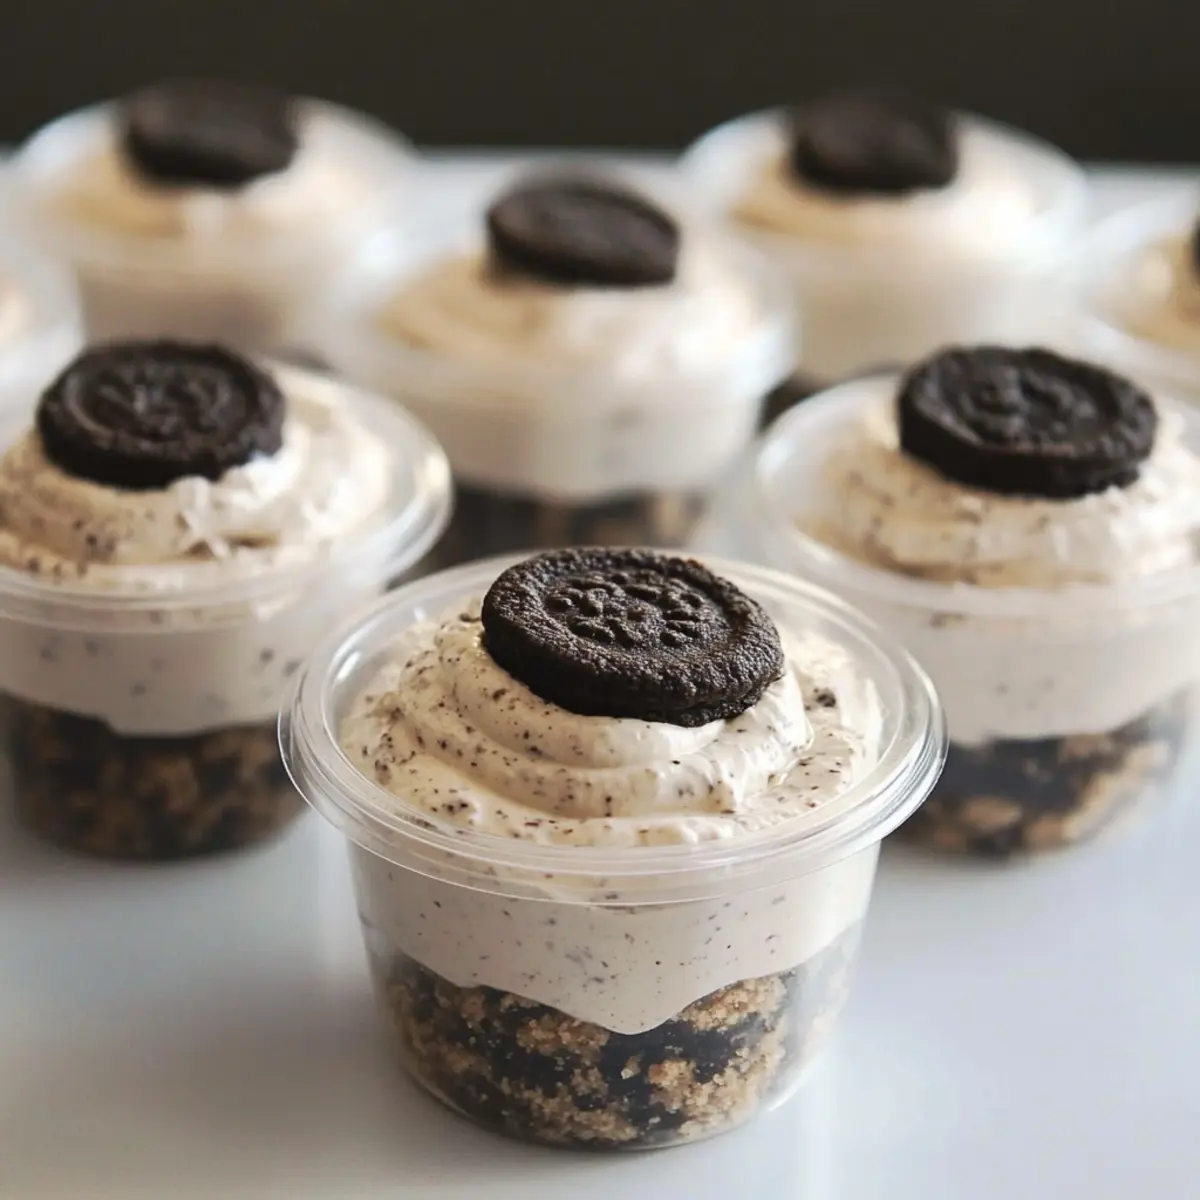
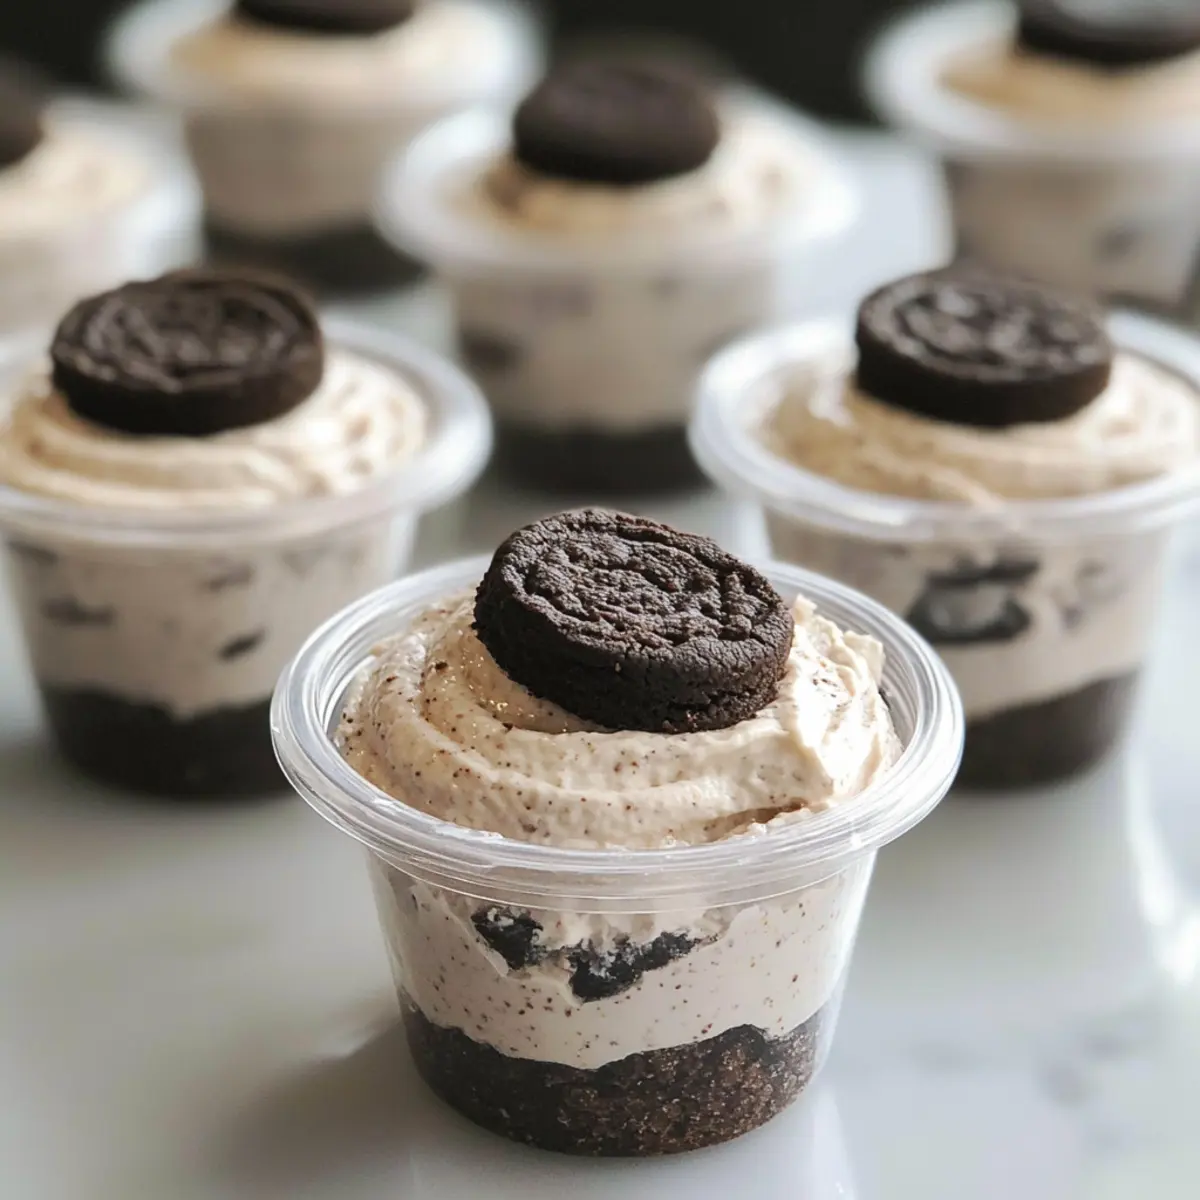
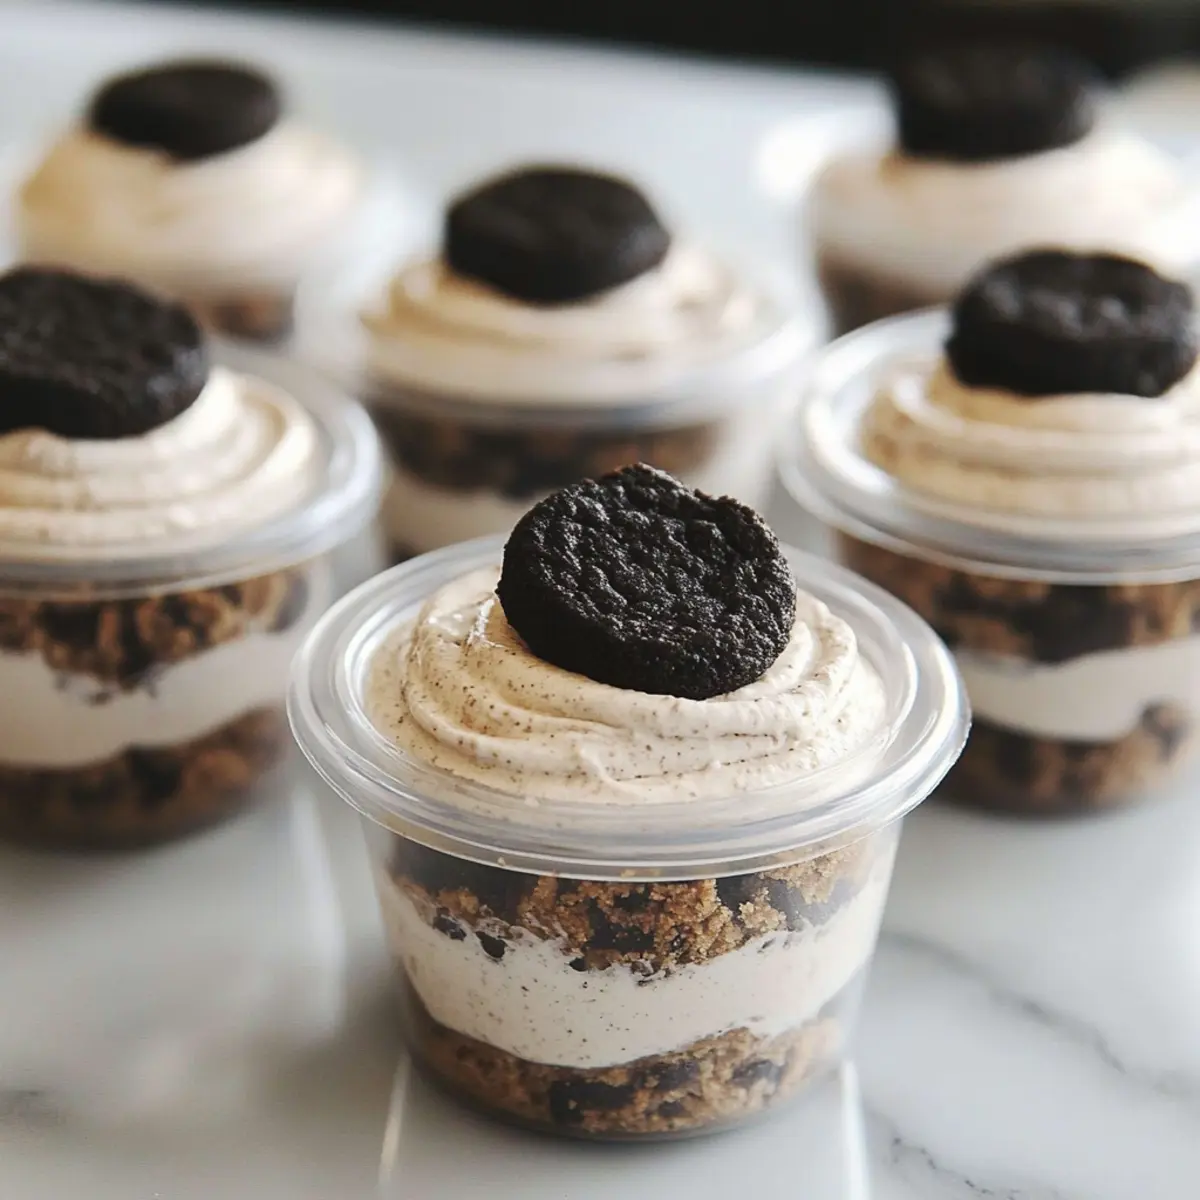
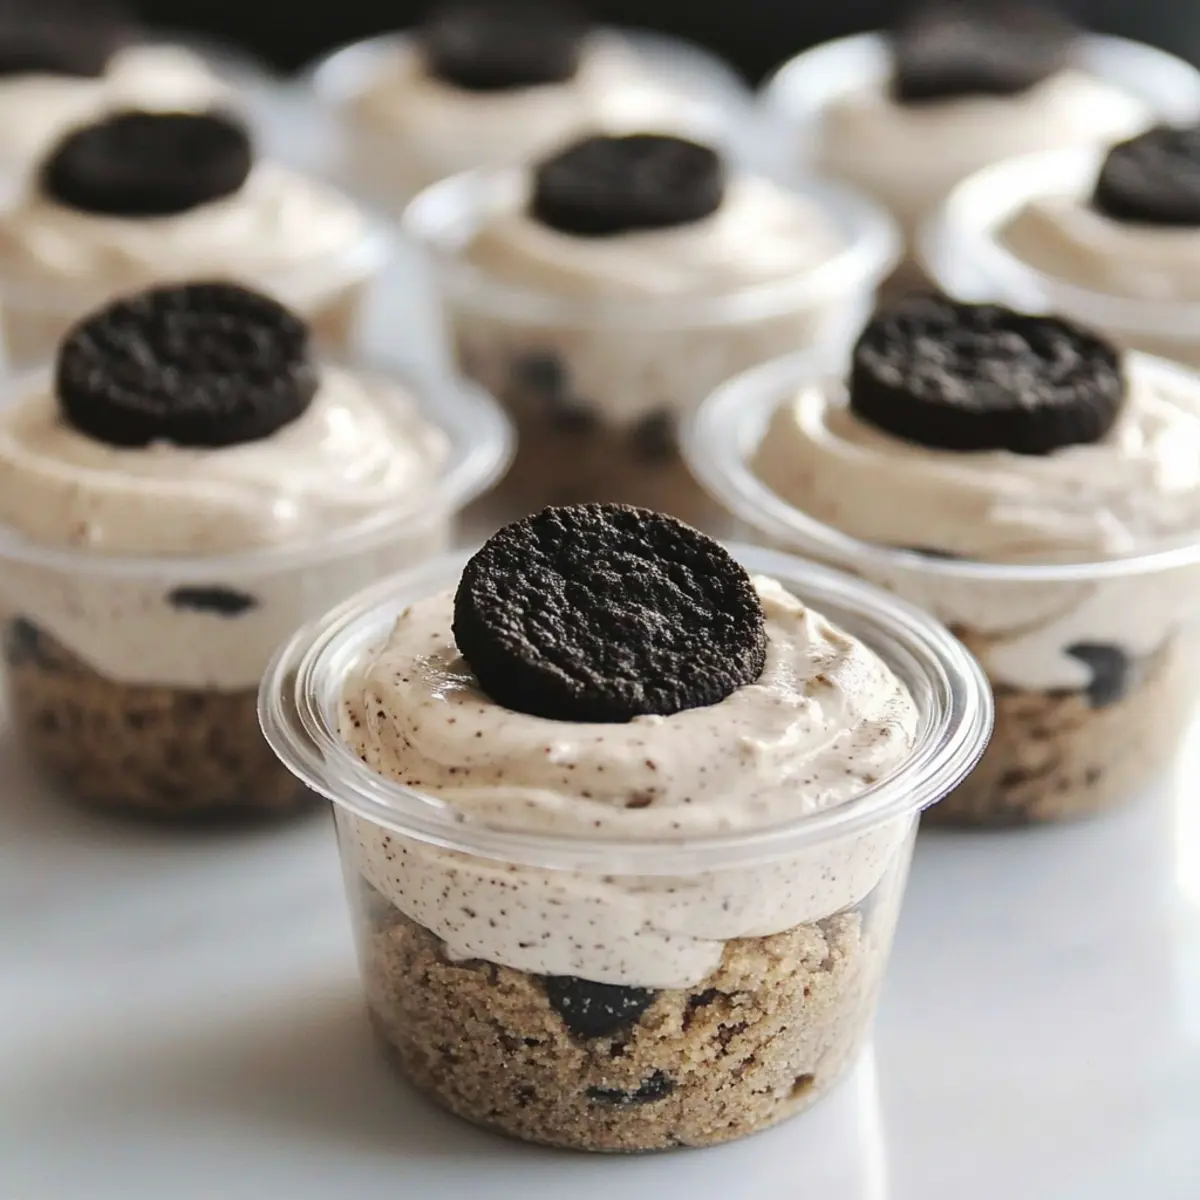
In a medium bowl, combine crushed chocolate sandwich cookies with melted butter until fully incorporated. The mixture should resemble wet sand. Distribute the mixture evenly into 28 plastic dessert cups, firmly pressing down with the back of a spoon to create a solid crust base. Once completed, set these cups aside to allow the crust to firm up while you prepare the filling.
Step 2: Mix Filling
In a separate large bowl, beat the room temperature cream cheese and granulated sugar with an electric mixer on medium speed until smooth and creamy, about 2 minutes. Gradually add in the heavy cream and vanilla extract while continuing to mix, whipping the mixture on high speed until it thickens and becomes fluffy, roughly 3-4 minutes. You’re looking for soft peaks to form that will hold their shape.
Step 3: Add Texture
Once your filling is fluffy, gently fold in the additional crushed chocolate sandwich cookies with a spatula. This step ensures each bite of your Cookies and Cream Dessert Cups will have delightful bits of cookie for added crunch and flavor. Be careful not to overmix; you want to maintain the light texture of the filling.
Step 4: Assemble Cups
Using a piping bag fitted with a large round tip (or a plastic bag with a corner snipped off), fill each dessert cup with the fluffy filling until they are about 3/4 full. This not only creates a beautiful layered effect but helps keep the filling from overflowing. Aim for even distribution to keep all cups looking uniformly delicious.
Step 5: Garnish
To make the dessert cups visually appealing, carefully place a mini chocolate sandwich cookie on top of each filled cup. Alternatively, sprinkle additional cookie crumbs across the top to enhance the presentation. This final touch adds texture and an irresistible Chocolate allure to your Cookies and Cream Dessert Cups.
Step 6: Chill
Cover the cups with plastic wrap or a tight lid and refrigerate for at least 30 minutes before serving. This chilling time allows the filling to set properly, enhancing the overall texture of your dessert. The Cookies and Cream Dessert Cups can be prepared a day ahead for even easier entertaining; just keep them stored in the fridge until you’re ready to serve.
Cookies and Cream Dessert Cups Variations
Feel free to explore these fun twists and substitutions to make these dessert cups your own! Each variation adds a new layer of flavor and excitement.
-
Vanilla Wafer Swap: Replace chocolate cookies with vanilla wafers for a lighter, unique flavor profile. This twist will brighten the dessert while still keeping it creamy and delightful.
-
Fruit Layering: Add layers of fruit puree, like raspberry or strawberry, between the filling for a fruity burst. This not only enhances flavor but also adds a beautiful visual contrast to your dessert cups.
-
Nutty Crunch: Toss in some chopped nuts, like walnuts or pecans, into the filling for added crunch. This nutty element beautifully complements the creamy texture, making each bite even more satisfying.
-
Minty Freshness: Substitute vanilla extract with peppermint extract for a refreshing minty twist. This variation is especially perfect for holiday gatherings, evoking a festive spirit with every spoonful.
-
Caramel Drizzle: Drizzle caramel sauce on top of the filling before adding the mini chocolate cookies for a rich, indulgent layer of sweetness. This simple addition elevates the dish into a gourmet dessert that will wow your guests.
-
Coffee Infusion: Mix a teaspoon of instant espresso powder into the cream cheese filling for a coffee-flavored variation. It’s a delightful change and an excellent pick-me-up after a heavy meal.
-
Coconut Cream: Swap regular heavy cream with coconut cream for a tropical flavor twist. This variation is great for those looking to add a bit of island flair to their dessert.
-
Layered Pudding: Include a layer of chocolate or vanilla pudding beneath the filling in the cups to enhance the richness and create a fun textures contrast. It transforms your dessert into a multi-layered treat bursting with flavor!
Consider pairing these dessert cups with a delightful tray of Blueberry Cream Cheese Puff Pastry or some sweet Snowball Cookies Melt for an impressive dessert spread!
What to Serve with No-Bake Cookies and Cream Dessert Cups
Elevate your dessert experience by pairing these delightful cups with complementary dishes that enhance their sweet, creamy flavor and texture.
-
Fresh Berries: The bright, tart flavor of strawberries or raspberries balances the rich, creamy dessert, adding a refreshing burst of color and taste.
-
Whipped Cream: Light and airy, a dollop of homemade whipped cream complements the texture of the dessert cups, creating a dreamy combination with each bite.
-
Chocolate Dipped Fruit: Offer some chocolate-dipped strawberries or bananas to provide a fun, interactive element that pairs beautifully with the cookies and cream theme.
-
Ice Cream Floats: Splash in some soda with a scoop of vanilla or chocolate ice cream for a nostalgic treat that complements the no-bake cups perfectly.
-
Mini Cupcakes: Serve a selection of mini cupcakes—like vanilla or chocolate—to give guests a variety of sweets that still harmonize wonderfully with the dessert cups.
-
Coffee or Espresso: A rich cup of coffee or a shot of espresso enhances the dessert’s flavors, making it a sophisticated pairing that brings out the chocolate and creaminess.
-
Chocolate Sauce Drizzle: A warm drizzle of chocolate sauce over the dessert cups adds an indulgent touch, making each bite more decadent and visually appealing.
-
Mint Leaves: Garnish with fresh mint leaves to bring a refreshing contrast, both visually and in flavor, especially if you include any minty elements in your variations.
Expert Tips for Cookies and Cream Dessert Cups
-
Perfectly Softened Cream Cheese: Ensure your cream cheese is at room temperature before mixing; it blends much easier and yields a smooth, creamy filling.
-
Fine Cookie Crumbs: Use a food processor to achieve fine cookie crumbs for a more uniform crust, leading to a better texture in your Cookies and Cream Dessert Cups.
-
Chill for Texture: Don’t skip the chilling step! Refrigerating for at least 30 minutes firms up the filling, resulting in a gorgeous, easy-to-eat dessert.
-
Easy Filling Method: For a mess-free filling, use a piping bag or a zip-top bag with a corner snipped off. This approach makes filling the cups simple and elegant.
-
Freeze for Convenience: These dessert cups can be made ahead and frozen for up to 30 days. Just thaw in the fridge the day before serving to enjoy their delightful flavors!
Make Ahead Options
These delectable Cookies and Cream Dessert Cups are perfect for meal prep and can be made up to 24 hours in advance! You can prepare the crust and filling a day ahead; simply combine the crushed chocolate sandwich cookies with melted butter and press it into the cups. Prepare the creamy filling and store it separately (covering tightly) in the refrigerator to maintain its fluffy texture. When you’re ready to serve, just fill the cups with the filling, garnish with mini chocolate cookies or extra cookie crumbs, and chill briefly to enhance flavor before delighting your guests. With this prep ahead strategy, you’ll save time on busy days while impressing everyone with a delicious dessert!
How to Store and Freeze Cookies and Cream Dessert Cups
Fridge: Keep the dessert cups sealed with plastic wrap or in an airtight container. They will stay fresh for up to 3 days, perfect for indulging whenever sweet cravings hit.
Freezer: You can freeze these Cookies and Cream Dessert Cups for up to 30 days. Just make sure to wrap them tightly to prevent freezer burn.
Thawing: To enjoy after freezing, simply transfer the cups to the refrigerator and let them thaw overnight before serving; this keeps their texture delightful.
Serving Temperature: It’s best to keep them chilled until just before serving to maintain that smooth, creamy filling and crunchy crust combination.
Cookies and Cream Dessert Cups Recipe FAQs
What kind of chocolate cookies should I use for the crust?
Absolutely! Crushed chocolate sandwich cookies, like Oreos, are perfect for the crust, but feel free to switch it up with any chocolate cookie you enjoy. For a different flavor twist, vanilla wafers can also work beautifully.
How long can I store these dessert cups in the fridge?
You can keep the dessert cups in the refrigerator, tightly sealed with plastic wrap or in an airtight container, for up to 3 days. This allows you to prepare them ahead of time for parties or just to indulge yourself!
Can I freeze the Cookies and Cream Dessert Cups? How?
Yes! These dessert cups can be a great make-ahead treat. To freeze, wrap each cup tightly with plastic wrap or place them in an airtight container. They can be frozen for up to 30 days. When you’re ready to enjoy them, simply transfer them to the fridge and let them thaw overnight for the best texture.
What if my filling isn’t fluffy enough?
If the filling isn’t achieving that fluffy texture, ensure your heavy cream is cold and that you’re whipping it at high speed! It often takes about 3-4 minutes of mixing to get those soft peaks. If you’re still having trouble, you might consider rewhipping the cream separately and gently folding it back in to lighten everything up.
Are these dessert cups suitable for anyone with allergies?
These Cookies and Cream Dessert Cups contain dairy and gluten, so they may not be suitable for those with lactose intolerance or gluten sensitivities. For a gluten-free version, check for gluten-free chocolate sandwich cookies, and use lactose-free cream cheese and heavy cream for a delicious alternative. Always double-check ingredient labels for any hidden allergens!
Can I prepare them days in advance?
Yes, indeed! I often make these dessert cups a day ahead of time to help keep my party prep simple. Just make sure they’re stored in the fridge. The flavors develop nicely overnight, and you’re ready to impress your guests with zero stress on the day of the event!
Irresistible No-Bake Cookies and Cream Dessert Cups to Devour
Ingredients
Equipment
Method
- In a medium bowl, combine crushed chocolate sandwich cookies with melted butter until fully incorporated. Press mixture into dessert cups to create a solid crust base.
- In a large bowl, beat cream cheese and granulated sugar until smooth. Gradually add heavy cream and vanilla, whipping until fluffy.
- Gently fold in additional crushed chocolate sandwich cookies into the fluffy filling.
- Fill each dessert cup with the fluffy filling using a piping bag until 3/4 full.
- Top each filled cup with a mini chocolate sandwich cookie.
- Cover cups and refrigerate for at least 30 minutes before serving.
Leave a Reply