
As I stood in my kitchen, the sunlight streaming through the window, I felt a spark of inspiration to whip up something delightfully simple yet so satisfying. Enter the Easy One-Bowl Yogurt Cake—a moist, low-sugar treat that’s as comforting as it is versatile. This recipe is a game-changer, offering both a quick preparation time and minimal cleanup—perfect for those of us who love homemade goodies without the fuss. With flavors of lemon and a hint of fruity jam, this yogurt cake becomes a delightful centerpiece for any gathering or a cozy family treat. And the best part? You can easily swap ingredients to make it your own, whether you need a gluten-free option or want to play with flavors. Ready to create something memorable? Let’s dive into this easy and delicious journey together!
Why Choose This Yogurt Cake Recipe?
Simplicity at Its Finest: This one-bowl yogurt cake is incredibly easy to whip up, which means less mess and faster baking!
Low-Sugar Delight: You can enjoy a moist, decadent cake without the guilt, perfect for those watching their sugar intake.
Versatile Flavors: Feel free to get creative with flavors—switch out lemon zest for orange or add dark chocolate chips to suit your taste buds.
Budget-Friendly: With easily accessible ingredients, this cake is a perfect choice for home bakers who want deliciousness without draining the wallet.
Perfect for Any Occasion: Whether it’s breakfast, an afternoon treat, or dessert, this cake’s comforting nature pleases everyone!
For a delightful twist, consider serving it with some freshly whipped cream or alongside Baked Yogurt Berries for a fresh touch!
Yogurt Cake Ingredients
• Discover the essentials for a perfect yogurt cake!
For the Cake
- Plain Yogurt – The primary moisture source; low-fat or flavored yogurt works too, but avoid Greek yogurt to keep the texture light.
- All-Purpose Flour or Light Spelt Flour – Provides structure; you can use gluten-free flour like rice flour with minor adjustments to baking time.
- White or Unrefined Cane Sugar – Adds sweetness; feel free to reduce the amount for a lower sugar option or swap it for any sugar you have on hand.
- Vegetable Oil (Canola preferred) – Ensures moisture and richness; cold-pressed olive oil or other neutral oils make great substitutes.
- Eggs (room temperature) – Essential for structure; remember to let all ingredients reach room temperature to avoid curdling.
- Baking Powder – This leavening agent helps the cake rise to perfection.
- Vanilla Essence – A delightful flavor enhancer that’s optional but highly recommended.
- Lemon Zest – For that refreshing, bright flavor; increase the amount if you crave a stronger citrus kick.
- Salt – Balances the overall flavor beautifully.
Optional Glaze
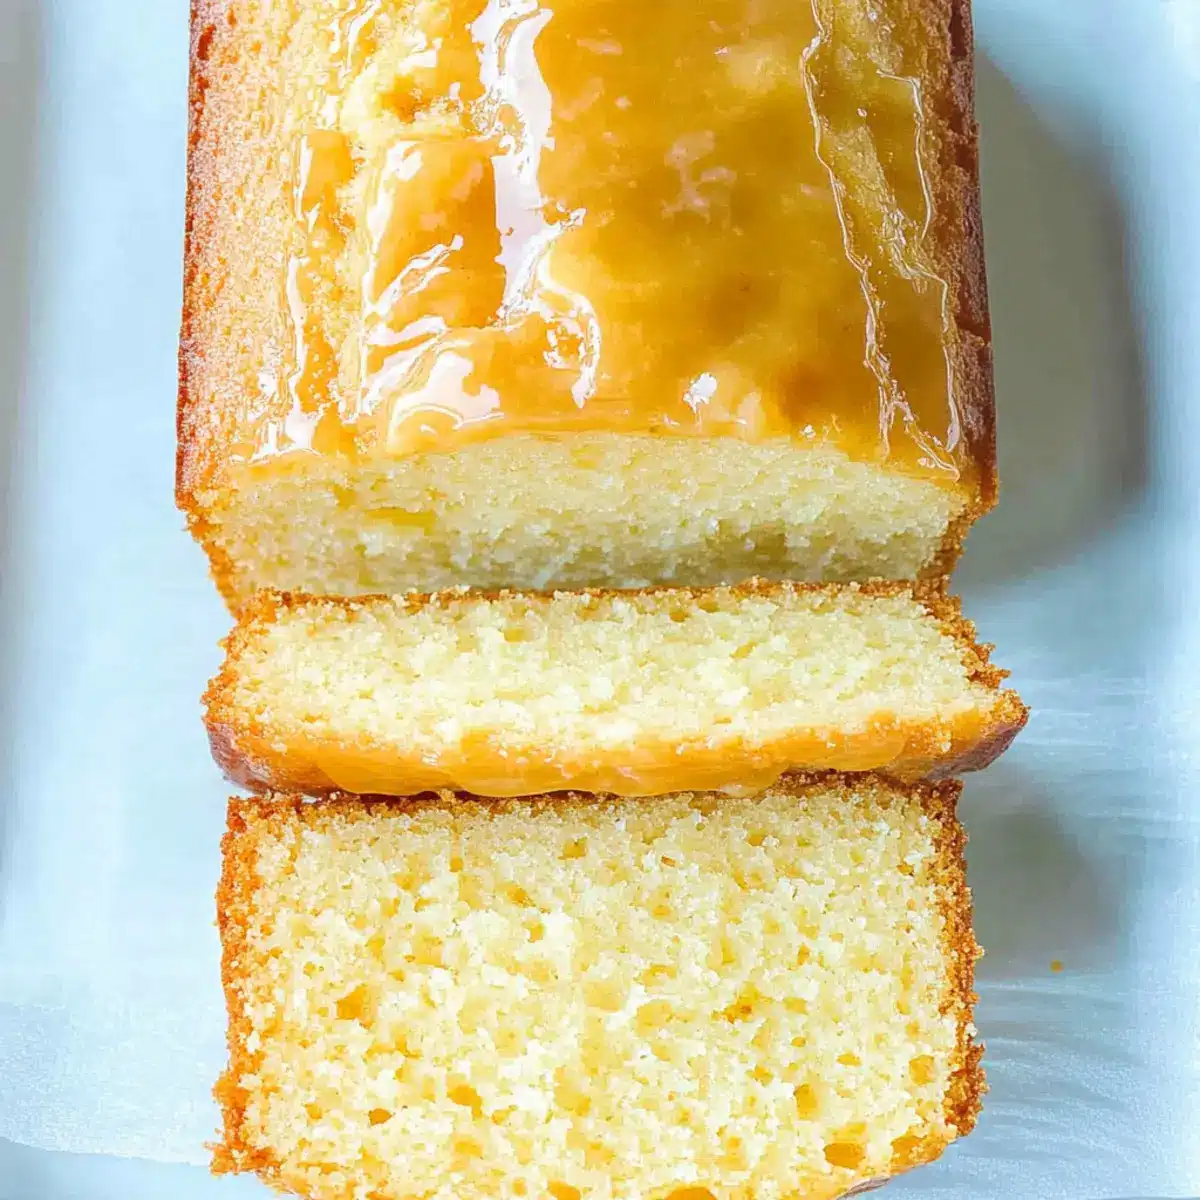
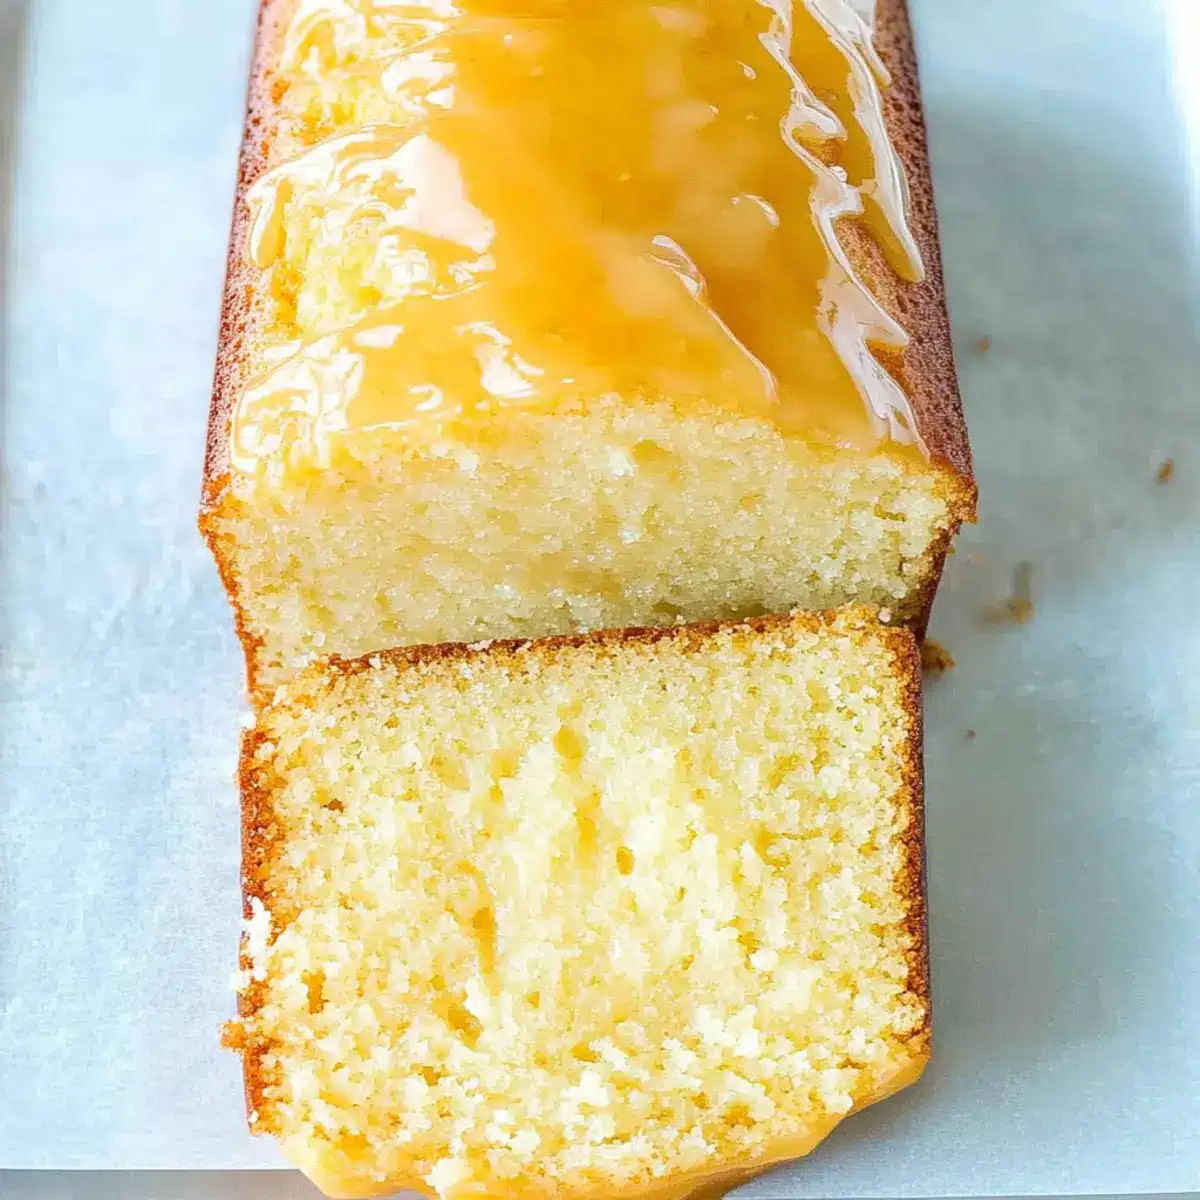
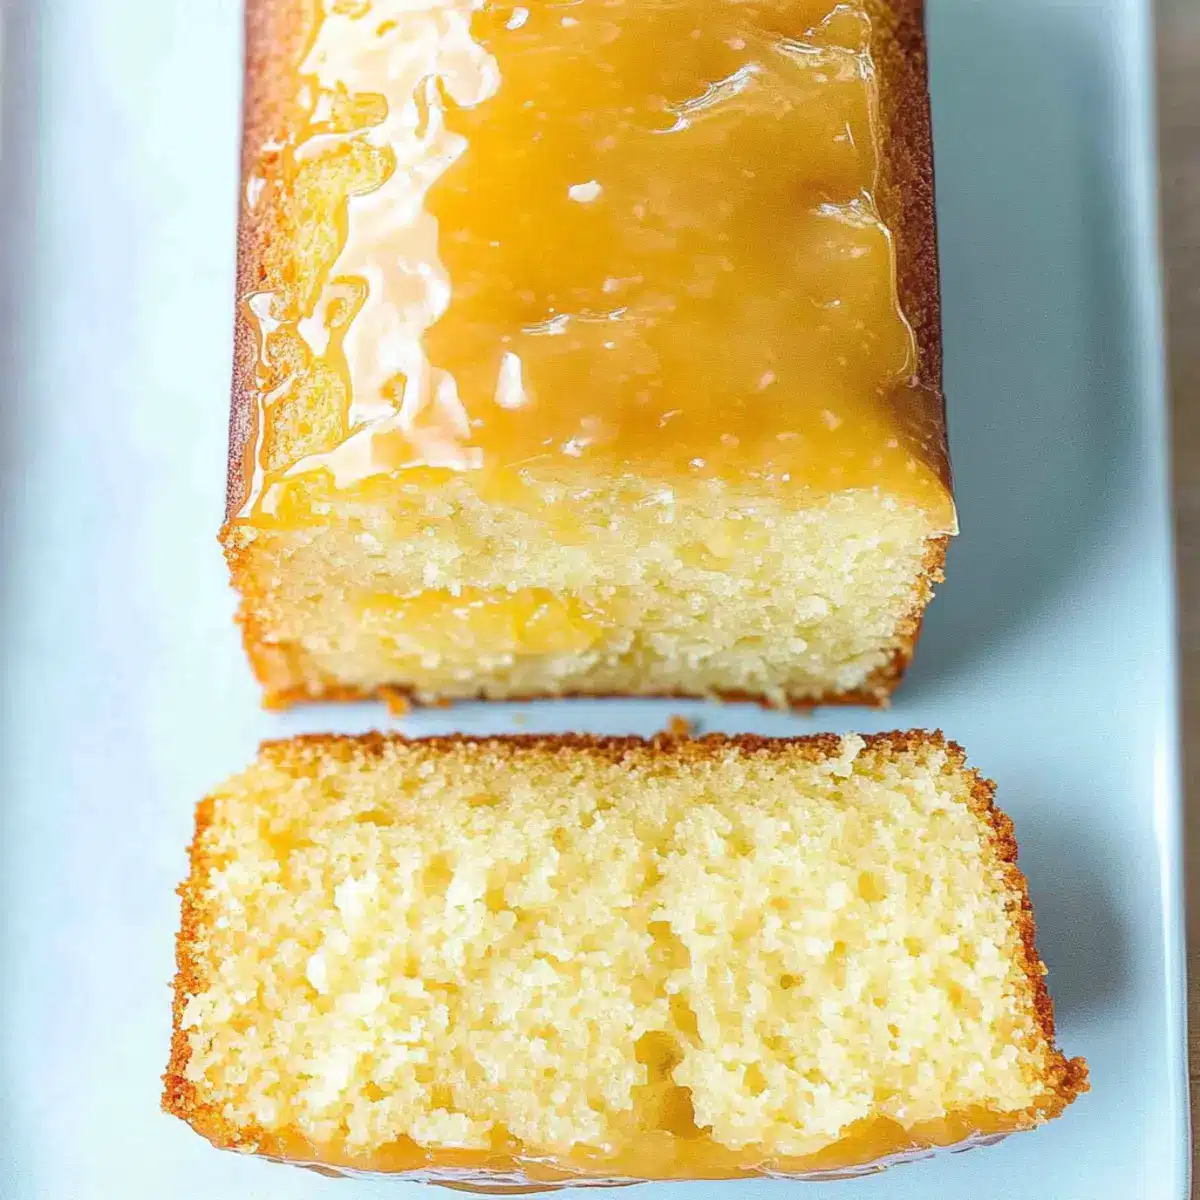
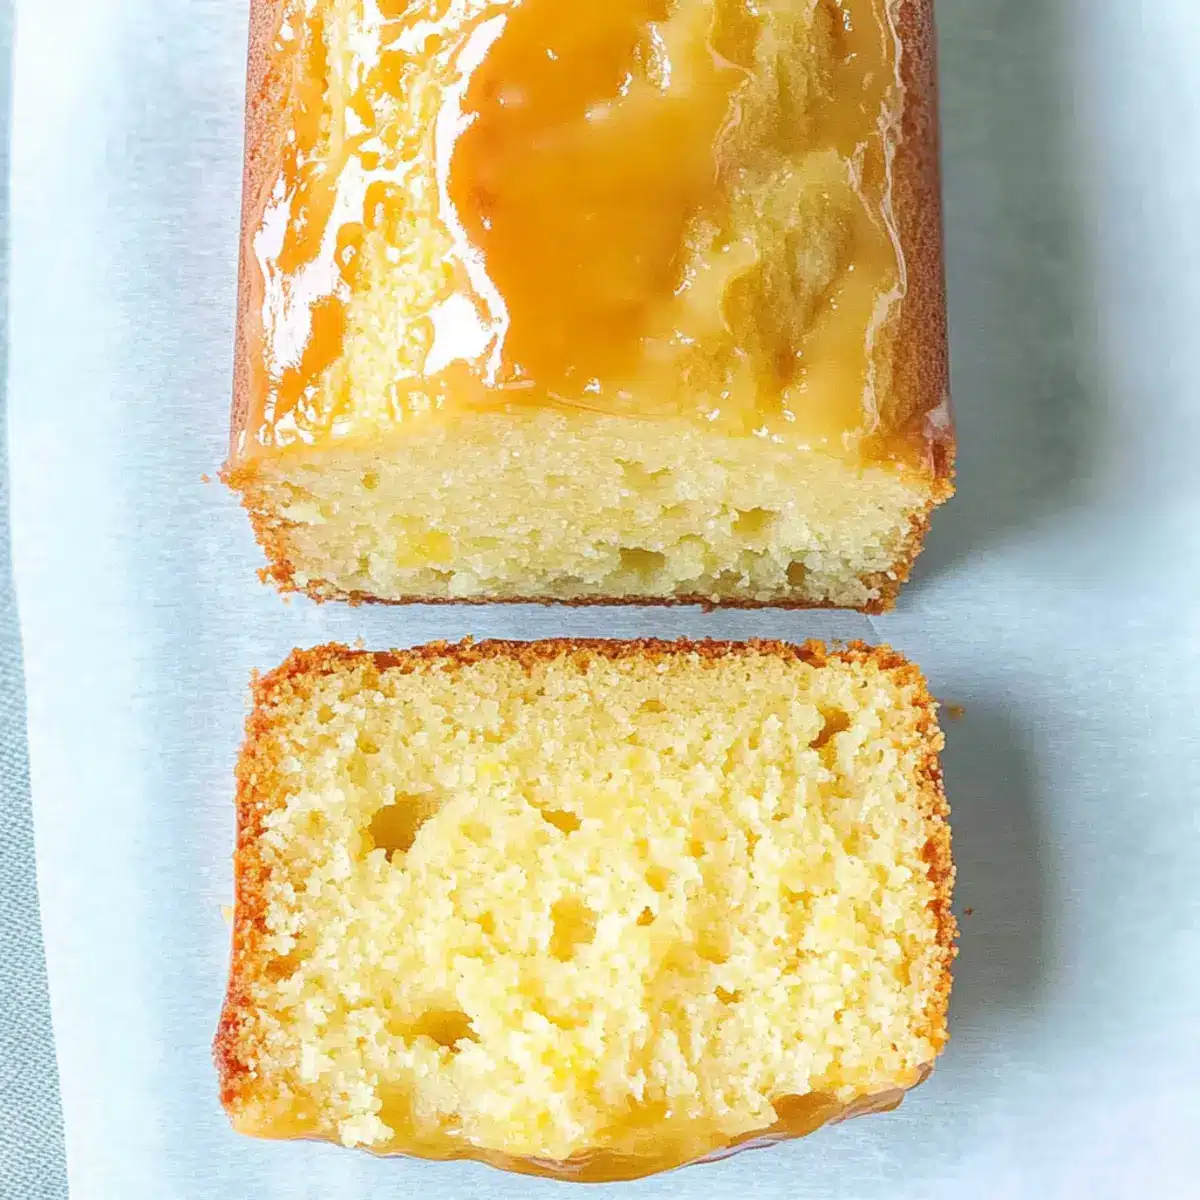
- Apricot or Orange Jam – Brush on for a shiny finish; adjust the consistency with warm water if needed for a perfect glaze.
Step‑by‑Step Instructions for Yogurt Cake
Step 1: Preheat the Oven
Begin by preheating your oven to 350°F (180°C). Position the oven rack in the middle to ensure even baking. This initial step is crucial for achieving the perfect rise and texture in your yogurt cake, so make sure to give your oven adequate time to reach the right temperature before moving on to preparing the batter.
Step 2: Prepare the Pan
While the oven is heating, grease a 9x5x2.5 inch loaf pan with vegetable oil or line it with parchment paper for easier removal. Properly preparing your pan will ensure that your yogurt cake releases easily after baking and maintains its beautiful shape. Take a moment to ensure the pan is well-coated or lined to avoid any sticking.
Step 3: Mix Eggs and Sugar
In a large mixing bowl, whisk together the room-temperature eggs and sugar until fully combined and slightly frothy, about 1-2 minutes. This step helps to aerate the mixture, contributing to the light and fluffy texture of the yogurt cake. Visual cues include a pale color and slight increase in volume; be sure not to rush this important action.
Step 4: Add Wet Ingredients
Next, incorporate the vegetable oil, lemon zest, and vanilla essence into the egg and sugar mixture. Whisk until everything is well blended and smooth. The addition of these ingredients infuses the yogurt cake with moistness and wonderful flavor. Take care to achieve a homogenous mixture—it’s time for some tasty magic to happen!
Step 5: Incorporate the Yogurt
Carefully mix in the plain yogurt until the batter is uniformly combined. Aim for a smooth consistency, as this crucial step will help ensure the cake remains beautifully moist. Watching for bubbles forming on the surface will be a good indication that your batter is ready for the next step.
Step 6: Combine Dry Ingredients
In a separate bowl, combine the all-purpose flour, baking powder, and salt. Gently fold the dry mixture into the wet ingredients until just combined, being mindful not to overmix. Overmixing can lead to a denser yogurt cake, so stop as soon as you see no visible flour. Your batter should look slightly lumpy but well incorporated.
Step 7: Pour into the Pan
Pour the batter into your prepared loaf pan, smoothing out the top with a spatula for an even surface. This ensures your yogurt cake bakes evenly, resulting in a nice rise and lovely presentation. Take care not to leave any batter behind in the bowl—every bit counts towards that delicious final product!
Step 8: Bake the Cake
Place your filled loaf pan in the preheated oven and bake for 35-40 minutes. Start checking for doneness at the 35-minute mark by inserting a skewer into the center; it should come out clean or with a few moist crumbs attached. Once baked, the yogurt cake will have a golden hue, indicating it’s ready to come out of the oven.
Step 9: Cool the Cake
Once your yogurt cake has finished baking, remove it from the oven and let it cool in the loaf pan for about 10 minutes. Then, carefully transfer it to a wire rack to cool completely. This cooling period is essential for allowing the flavors to develop and the cake to settle into its delightful texture.
Step 10: Optional Glaze
If you choose, brush a warm apricot or orange jam glaze over the top of your cooled yogurt cake for a shiny finish. To achieve the perfect consistency, simply adjust the jam with a little warm water if necessary. This final touch adds a lovely sweetness and appeal, making your yogurt cake even more tempting when served.
Yogurt Cake Variations & Substitutions
Feel free to let your creativity shine while perfecting this yogurt cake; the possibilities are truly delightful!
- Gluten-Free Flour: Swap all-purpose flour for a gluten-free blend. Adjust baking time slightly for the best texture.
- Citrus Swap: Replace lemon zest with orange or lime zest for a refreshing twist that brightens the cake.
- Flavored Yogurt: Opt for a fruity yogurt to infuse your cake with exciting flavors like strawberry or peach.
- Add-Ins: Incorporate dark chocolate chips or nuts for additional texture and richness that makes every bite interesting.
- Spice it Up: Experiment by adding spices such as cinnamon or nutmeg. These warm flavors can transform your cake into a delicious autumn treat.
- Fruit Layering: Fold in fresh berries or sliced bananas into the batter for a fruity surprise that enhances both flavor and nutrition.
- Jam Alternatives: Change the glazing jam to raspberry or blackberry for a different, delightful taste pairing!
- Sweetener Swap: Use maple syrup or honey instead of sugar for a natural sweetness that offers a lovely hint of flavor.
With your newfound ideas, this yogurt cake can transform into many delicious variations, making it perfectly suited for anything from breakfast to dessert. Try pairing it with a side of freshly whipped cream or alongside Greek Yogurt Bagels for a delightful brunch spread! Enjoy every bite as you customize this cake to suit your taste!
Expert Tips for Yogurt Cake
-
Room Temperature Ingredients: Ensure your yogurt and eggs are at room temperature to make mixing easier and to prevent the batter from curdling.
-
Don’t Overmix: Mix the batter just until the dry ingredients are incorporated; overmixing can lead to a dense cake instead of the light, fluffy yogurt cake you desire.
-
Check Doneness: Start testing for doneness a few minutes early—baking time can vary based on your oven and pan type. Insert a skewer into the center; if it comes out clean, the cake is ready!
-
Storage Suggestions: For maximum freshness, store your yogurt cake at room temperature in an airtight container for 3-4 days. Refrigeration can dry it out, so resist that urge!
-
Flavor Adjustments: Get creative—experiment with different citrus zests or spices to make each yogurt cake a unique treat. Enjoy personalizing this versatile recipe!
Storage Tips for Yogurt Cake
- Room Temperature: Keep the yogurt cake in an airtight container at room temperature for up to 3-4 days to maintain its moist texture. Avoid refrigeration, as it can dry out the cake.
- Freezer: For longer storage, freeze the cake for up to 1 month. Wrap it tightly in plastic wrap, then place it in a freezer-safe bag to prevent freezer burn.
- Thawing: To enjoy your frozen yogurt cake, thaw it overnight in the fridge or at room temperature for a few hours. Reheat in the microwave for 15-20 seconds if you prefer it warm.
- Reheating: If you like your yogurt cake a bit warm, slice it and microwave individual pieces for about 10-15 seconds, ensuring you don’t overheat and dry them out.
What to Serve with Easy One-Bowl Yogurt Cake
Transform your yogurt cake experience into an unforgettable meal by pairing it with delightful sides and complements that bring out its flavors.
-
Fresh Berries: A mix of ripe strawberries, blueberries, and raspberries adds a burst of freshness and a colorful presentation alongside the moist cake.
-
Whipped Cream: Light and airy whipped cream offers a luxurious touch, balancing the cake’s sweetness while enhancing its delicious lemony notes.
-
Greek Yogurt: A dollop of creamy Greek yogurt provides a tangy contrast to the cake, making it feel even more indulgent and satisfying.
-
Lemon Zest Spritz: A sprinkle of fresh lemon zest right before serving brightens the flavors and adds a refreshing citrus element that complements the cake excellently.
-
Coconut Flakes: Toasted coconut flakes layered on top lend a chewy texture and a delightful nutty flavor that harmonizes beautifully with the yogurt cake’s moist crumb.
-
Hot Tea or Coffee: A warm beverage like chamomile tea or strong coffee makes for a comforting experience, perfect for cozy afternoons or evenings spent enjoying dessert.
-
Chocolate Ganache: For a richer dessert option, drizzle some silky chocolate ganache over the top; the chocolate works surprisingly well with the cake’s fruity notes.
-
Homemade Fruit Compote: A warm fruit compote, perhaps made with apples or cherries, introduces an element of warmth and deep fruity flavor to the final bite.
-
Vanilla Ice Cream: A scoop of creamy vanilla ice cream melting alongside your cake adds a luscious contrast that elevates the dessert to new heights.
-
Savory Cheese Plate: Pair your cake with a selection of soft cheeses like mascarpone or ricotta for a sweet and savory interplay, intriguing the palate in a delightful way.
Make Ahead Options
These Easy One-Bowl Yogurt Cakes are perfect for meal prep enthusiasts! You can prepare the batter up to 24 hours in advance by mixing the wet ingredients and folding in the dry components, then storing the mixture in an airtight container in the refrigerator. This ensures you save time on busy days while keeping the cake deliciously moist. For the best results, allow the batter to sit at room temperature for about 30 minutes before baking for optimal rise and texture. Alternatively, you can also bake the cake ahead of time and store it at room temperature for up to 3 days in an airtight container. Just remember to brush on your jam glaze right before serving for that fresh, appealing touch. Enjoy this effortlessly delightful yogurt cake without the fuss during your week!
Yogurt Cake Recipe FAQs
What type of yogurt should I use for this yogurt cake?
Absolutely! For the best results, use plain yogurt as the primary moisture source. You can also opt for low-fat or flavored yogurt, but I recommend steering clear of Greek yogurt, as it tends to make the cake denser.
How should I store the yogurt cake and how long will it last?
For optimal freshness, store your yogurt cake in an airtight container at room temperature. It will stay moist and delicious for about 3-4 days. I often find that refrigeration can dry the cake out, so it’s best to keep it at room temperature.
Can I freeze the yogurt cake? If so, how?
Yes, you can freeze your yogurt cake for up to 1 month! First, let it cool completely. Then, wrap the cake tightly in plastic wrap and place it in a freezer-safe bag or container to protect it from freezer burn. When you’re ready to enjoy it, thaw the cake overnight in the fridge or for a few hours at room temperature.
What are some common issues I might encounter while making this yogurt cake?
One common hitch is overmixing the batter, which can lead to a denser cake. To avoid this, mix just until the dry ingredients are incorporated—you want a slightly lumpy batter. If your yogurt cake doesn’t rise as expected, it might be due to expired baking powder, so always check the freshness before baking.
Are there any dietary considerations I should keep in mind?
Very! If you have dietary needs, you can easily adapt this yogurt cake recipe. If gluten is a concern, simply substitute all-purpose flour with a gluten-free flour blend. Additionally, feel free to reduce the sugar for a lighter treat or experiment with fruit jams if you have other allergies—just keep an eye on ingredient labels!
Can I make variations of this yogurt cake?
Absolutely! One of the joys of this recipe is its versatility. You can substitute lemon zest with orange or even add in dark chocolate chips or spices like cinnamon for a more unique flavor profile. The more the merrier when it comes to personalizing your yogurt cake!
Moist Yogurt Cake – Easy One-Bowl Wonder Delight
Ingredients
Equipment
Method
- Preheat your oven to 350°F (180°C) and position the oven rack in the middle.
- Grease a 9x5 inch loaf pan with vegetable oil or line with parchment paper.
- Whisk together the eggs and sugar until frothy, about 1-2 minutes.
- Incorporate the vegetable oil, lemon zest, and vanilla essence into the egg mixture.
- Mix in the yogurt until uniformly combined.
- Combine flour, baking powder, and salt in a separate bowl, then gently fold into the wet mixture.
- Pour the batter into the prepared pan, smoothing the top.
- Bake for 35-40 minutes, checking for doneness at the 35-minute mark.
- Cool the cake in the pan for 10 minutes, then transfer to a wire rack.
- Optional: Brush a warm glaze over the cooled cake for a shiny finish.
Leave a Reply