
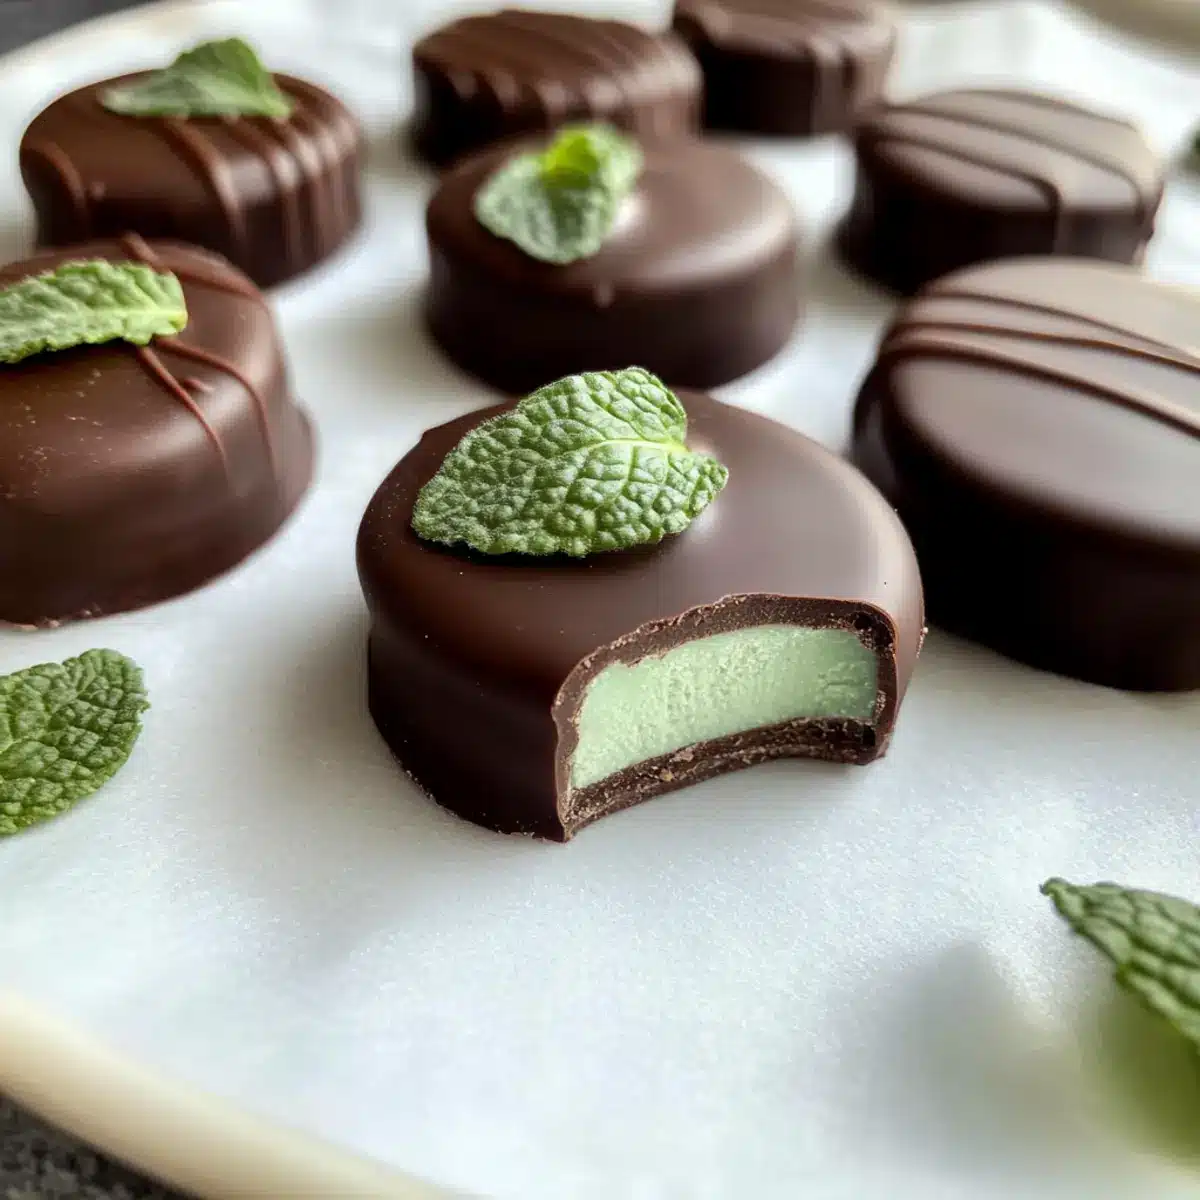
As I unwrapped a store-bought mint chocolate one evening, I realized how far removed they were from the rich, homemade versions that dance on the palate. That’s when I decided it was time to create my own Homemade Andes Mint Chocolates. This easy recipe combines smooth cacao butter and dark chocolate to deliver a delightfully minty experience. Perfectly low in sugar, these treats not only tantalize your taste buds but cater to Paleo, Keto, and Vegan diets, making them an ideal guilt-free dessert for anyone. Whether you’re treating yourself after a long day or impressing guests at your next gathering, these mint chocolates are a must-try! Curious about how simple it is to whip these up in your own kitchen? Let’s dive into the recipe!

Why Make Homemade Mint Chocolates?
Decadent Flavor: Experience the rich, minty explosion that only homemade chocolates can deliver, surpassing anything store-bought.
Guilt-Free Indulgence: Made with low-sugar ingredients, these chocolates fit seamlessly into your Paleo, Keto, or Vegan lifestyle.
Quick Prep Time: With just a few easy steps, you can whip up a batch in less than an hour, freeing up more time for enjoyment.
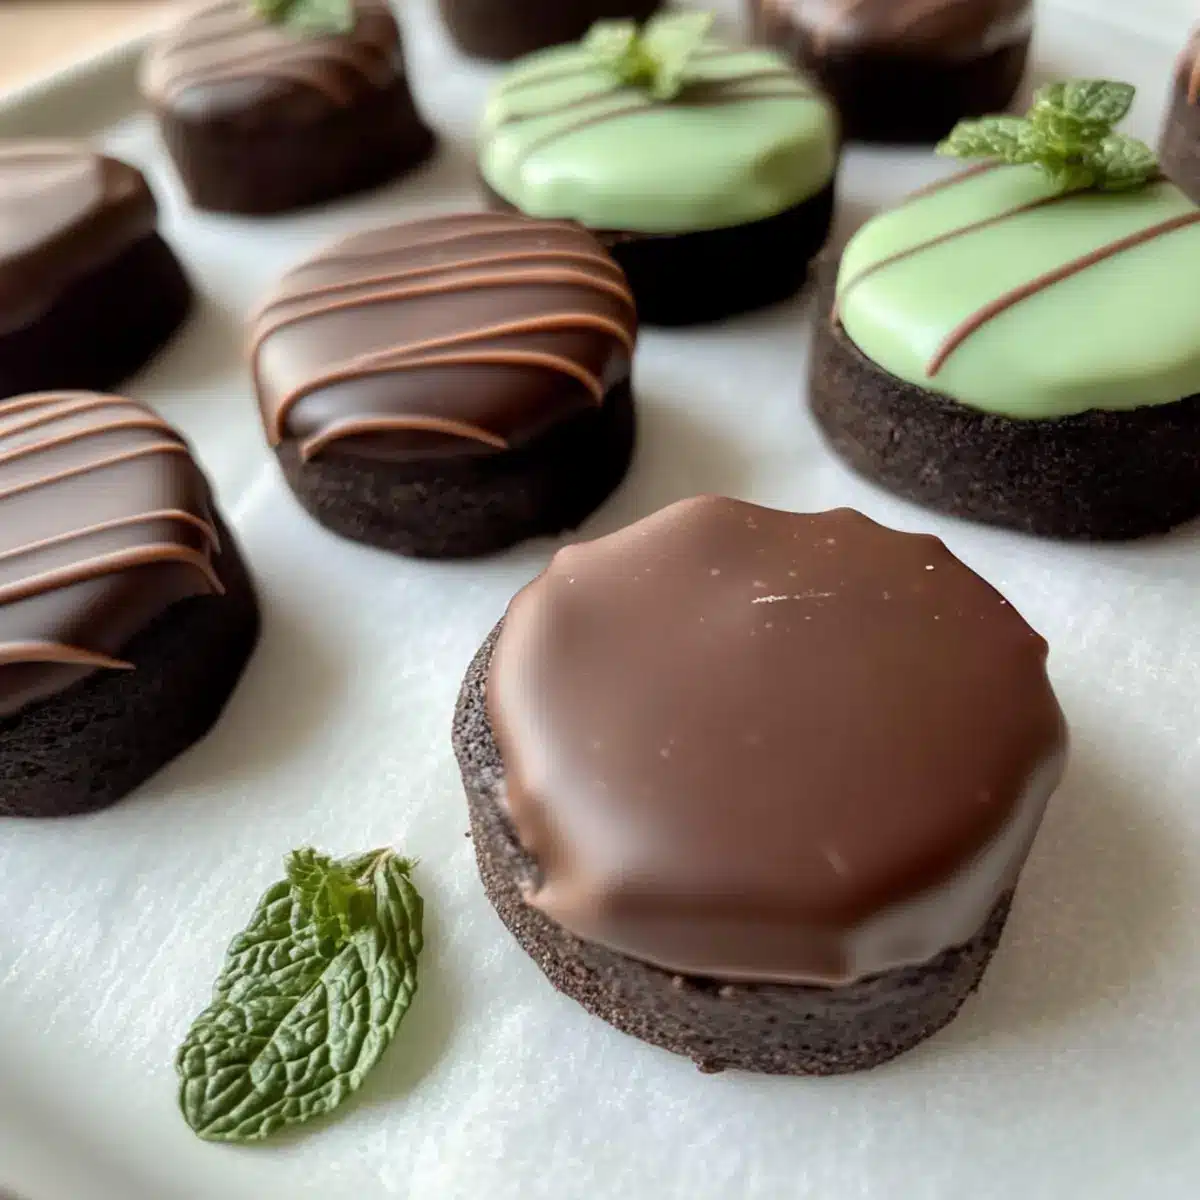
Customization Options: Want to switch things up? Feel free to experiment with flavors and colors, like using almond extract or different natural colorants.
Perfect for Sharing: Whether it’s a festive gathering or just a cozy night in, these mint chocolates are sure to impress friends and family alike! Consider pairing them with my Peppermint Swirl Cookies for an extra special treat.
Mint Chocolates Ingredients
For the Filling
- Cacao Butter – Provides a creamy base for the filling; consider substituting with coconut butter for a slightly different texture.
- Powdered Monk Fruit – Acts as a zero-calorie sweetener; adjust the amount based on your taste preference, or substitute with powdered sugar if desired.
- Peppermint Flavoring – Adds that delightful minty aroma; peppermint extract is also valid but use sparingly due to its potent flavor.
- Spirulina – Gives a natural green color; modify the amount for your desired color intensity or use alternatives like matcha.
For the Coating
- Dark Chocolate Chips – This rich chocolate coating enhances the minty filling; opt for extra dark (85-100% cacao) to maintain the low sugar profile.
These easy-to-make homemade Mint Chocolates will not only satisfy your cravings but cater to various dietary preferences, ensuring everyone can indulge in their deliciousness!
Step‑by‑Step Instructions for Mint Chocolates
Step 1: Melt Cacao Butter
In a small saucepan, set over low heat, melt the cacao butter while stirring frequently. Keep an eye on it to ensure it becomes fully liquid without burning, which should take about 5 to 7 minutes. Once melted, the cacao butter should have a smooth, glossy appearance—perfect for the base of your mint chocolates.
Step 2: Mix Filling
Once the cacao butter is melted, whisk in the powdered monk fruit, peppermint flavoring, and a pinch of spirulina for color. Taste the mixture and adjust the sweetness or mint flavor to your preference before blending until fully combined and smooth. This creamy filling is the heart of your Mint Chocolates, so ensure there are no lumps.
Step 3: Fill Molds
Pour about ½ to 1 tablespoon of the mint filling into each cavity of your silicone mini muffin molds, which should yield approximately 12 chocolates. Spread the filling evenly and then place the molds in the freezer for about 10 to 20 minutes, or until the fillings are firm and set to the touch.
Step 4: Melt Chocolate
Once your filling is solidified, clean your saucepan and set it back on low heat. Add the dark chocolate chips and allow them to melt slowly, stirring consistently for about 5 minutes. The chocolate should become velvety and shiny—perfect for coating your mint chocolates without burning.
Step 5: Dip Chocolates
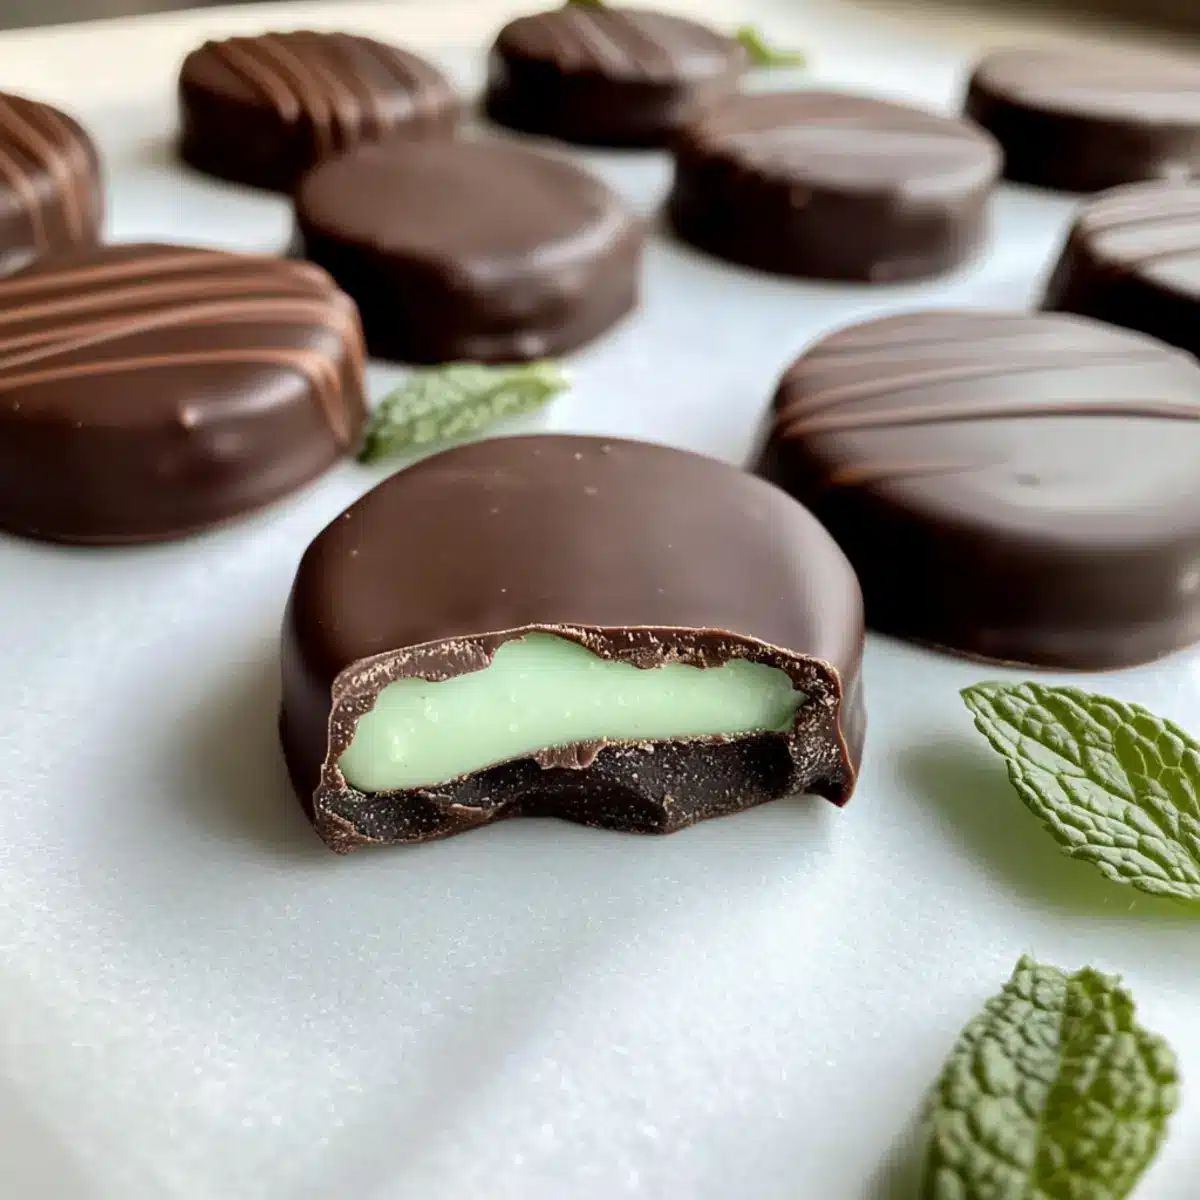
Gently remove the chilled mint fillings from the molds. Using a fork, dip each filling into the melted chocolate, ensuring they are entirely coated. Allow any excess chocolate to drip back into the pan before placing the dipped chocolates on a parchment-lined baking sheet.
Step 6: Final Touch
If you like, drizzle any remaining melted chocolate over the top of the coated chocolates for a decorative finish. Optionally, garnish with fresh mint leaves for an extra touch of elegance. Finally, return the tray to the freezer to set completely for about 10 minutes, allowing your mint chocolates to harden beautifully.
What to Serve with Homemade Andes Mint Chocolates
Indulging in these delectable mint chocolates opens the door to a delightful meal experience that can be complemented with whimsical and refreshing choices.
-
Rich Coffee: A smooth, robust brew enhances the chocolate’s richness, providing a comforting balance of flavors. It invites cozy moments as you savor each stubbornly sweet bite.
-
Fresh Berries: Juicy strawberries or raspberries add a burst of tartness that perfectly contrasts the sweetness, creating a refreshing palate cleanser. Picture enjoying a chocolate with a burst of juicy flavor.
-
Creamy Vanilla Ice Cream: A scoop of vanilla ice cream adds a luscious creaminess that highlights the mint flavor. The cold, creamy texture and the mint together create a symphony of flavors that’s simply irresistible.
-
Nutty Trail Mix: A handful of almond-, pecan-, or walnut-studded trail mix introduces a crunchy texture that contrasts the chocolates’ smoothness, making for a satisfying snack. The combination of sweet and salty keeps your taste buds intrigued!
-
Sparkling Water with Lime: A splash of refreshing sparkling water brightens your palate and cools the hot chocolate notes. This light and zesty drink leave the perfect aromatic finish with each chocolate piece.
-
Mini Fruit Tarts: Dainty fruit tarts filled with custard offer a fruity zest that pairs beautifully with the minty chocolates. The crispy crust and creamy filling provide a welcoming texture surprise alongside the mint chocolates.
-
Chocolate-Stout Brownies: Rich and fudgy brownies add an extra chocolatey twist, creating a dessert lover’s dream. Pair them together for a rich symphony that dances with pure chocolate bliss.
With these delightful companions, your homemade Andes mint chocolates become part of a splendid culinary tapestry, creating moments to cherish and flavors to savor!
How to Store and Freeze Mint Chocolates
Fridge: Store your mint chocolates in an airtight container in the refrigerator for up to 1 week. This helps maintain their freshness, especially if you’ve garnished them with fresh mint.
Freezer: For longer storage, place the chocolates in a single layer in an airtight container or freezer-safe bag. They can be frozen for up to 3 months without compromising flavor.
Thawing: When ready to enjoy, simply transfer the desired amount to the fridge and let them thaw overnight. This will ensure they are perfectly refreshing when you bite into them!
Reheating: If chocolates become too firm in the fridge, let them sit at room temperature for a few minutes before enjoying. Avoid using a microwave, as it can alter the texture.
Make Ahead Options
These Homemade Andes Mint Chocolates are perfect for meal prep, making them an excellent choice for busy home cooks! You can prepare the filling up to 24 hours in advance; simply melt the cacao butter, mix in the monk fruit, peppermint flavor, and spirulina, then pour into molds and freeze as directed. This allows you to focus on the finishing touches when you’re ready to serve. Just before dipping in chocolate, let the filling sit at room temperature for about 10 minutes to soften slightly, ensuring it maintains a smooth, creamy texture. When you’re ready to enjoy, melt the dark chocolate, dip the chocolate-filled molds, and let them set for just 10 more minutes for an effortless yet luxurious treat!
Expert Tips for Mint Chocolates
• Chocolate Temperature: Make sure the chocolate is melted over low heat to prevent burning; high heat can lead to a bitter taste and an undesirable texture.
• Filling Consistency: Aim for a smooth, lump-free filling by whisking thoroughly. A lumpy filling can affect the overall taste and mouthfeel of your mint chocolates.
• Perfect Dipping: Use a fork to dip each filling, allowing excess chocolate to drip off. This ensures a thin, even coating that isn’t clumpy.
• Storage Advice: Keep your mint chocolates in an airtight container in the fridge, especially if garnished with fresh mint, to maintain their freshness and flavor for up to a week.
• Experiment Freely: Don’t hesitate to try different flavor extracts, like almond, or colorants for unique and visually appealing mint chocolates!
Mint Chocolates Variations & Substitutions
Feel free to unleash your creativity and personalize these mint chocolates to suit your taste and dietary preferences!
- Dairy-Free: Swap dark chocolate chips for dairy-free chocolate options to keep it vegan-friendly. You’ll still enjoy that rich chocolatey flavor without the dairy.
- Sugar-Free: Use erythritol or stevia in place of powdered monk fruit for a completely sugar-free treat. Just be sure to adjust the amount to taste!
- Nut-Free: Replace cacao butter with sun butter if you need a nut-free alternative; it will lend a unique flavor to your filling.
- Add Spice: For a surprising twist, try adding a pinch of cayenne pepper to the chocolate coating for a delightful kick. It creates a fun contrast with the mint!
- Flavor Variations: Mix in different extracts like orange or hazelnut for an unexpected flavor combo—perfect for impressing guests! Pair your creations with my Double Chocolate Peppermint for an extra sweet surprise.
- Textured Filling: Stir in some crushed nuts or coconut flakes for added crunch within the creamy filling. This will create a delightful textural contrast in every bite.
- Mini Mints: Try using mini muffin molds instead of regular ones for bite-sized treats that are perfect for parties or snack time!
- Color Swaps: Explore natural colorants like beet powder or matcha to create a rainbow of mint chocolates, perfect for festive occasions or just for fun!
With these variations, there’s no limit to how you can enjoy these delightful mint chocolates!
Mint Chocolates Recipe FAQs
How do I choose the right cacao butter?
Absolutely! When selecting cacao butter, look for high-quality, organic options that are free of additives. The color should be a light cream or pale yellow, and it should have a pleasant, mild aroma. If you want to experiment, coconut butter is a fantastic substitute that also provides a creamy texture, though it has a slightly different flavor profile.
How long can I store mint chocolates in the fridge?
Very! You can keep your mint chocolates in an airtight container in the refrigerator for up to 1 week. If you’ve added fresh mint leaves for garnish, it’s best to consume them within 3 to 5 days for optimal freshness.
Can I freeze mint chocolates, and if so, how?
Of course! To freeze your mint chocolates, place them in a single layer in a freezer-safe container or ziplock bag. Ensure they are sealed tightly to prevent freezer burn and keep their delightful flavor. They can be frozen for up to 3 months. When you’re ready to devour them, simply transfer the desired amount to the fridge and let them thaw overnight.
What should I do if my chocolate coating is too thick?
No worries! If your chocolate coating turns out too thick, it could be due to overheating. To troubleshoot, try melting a little more chocolate and mix it into the thick batch while stirring gently. Alternatively, if it’s clumpy after cooling, you may need to warm it again over low heat and add a tiny bit of coconut oil to thin it out and restore that lovely, smooth consistency.
Are these mint chocolates suitable for pets?
Definitely not! Always remember that chocolate is toxic to pets, especially dogs and cats. If you’re intending to share these delightful mint chocolates with friends or family, keep them safely out of reach of your furry companions to ensure their safety.
Can I make these mint chocolates nut-free?
Absolutely! All yes, to create a nut-free version of these mint chocolates, simply ensure that the chocolate and any flavor extracts used in the recipe are free of nuts. Many brands offer nut-free dark chocolate options that fit within dietary restrictions. Enjoy the minty goodness without worry!
Decadent Mint Chocolates That Are Guilt-Free and Irresistible
Ingredients
Equipment
Method
- Step 1: Melt the cacao butter over low heat, stirring frequently for 5-7 minutes until fully liquid.
- Step 2: Whisk in the powdered monk fruit, peppermint flavoring, and spirulina until smooth.
- Step 3: Pour the filling into silicone molds and freeze for 10-20 minutes until firm.
- Step 4: Melt dark chocolate chips on low heat, stirring for about 5 minutes until velvety and shiny.
- Step 5: Dip each filling in melted chocolate, coating entirely and placing on a parchment-lined sheet.
- Step 6: Drizzle remaining chocolate for decoration and freeze for another 10 minutes.
Leave a Reply