
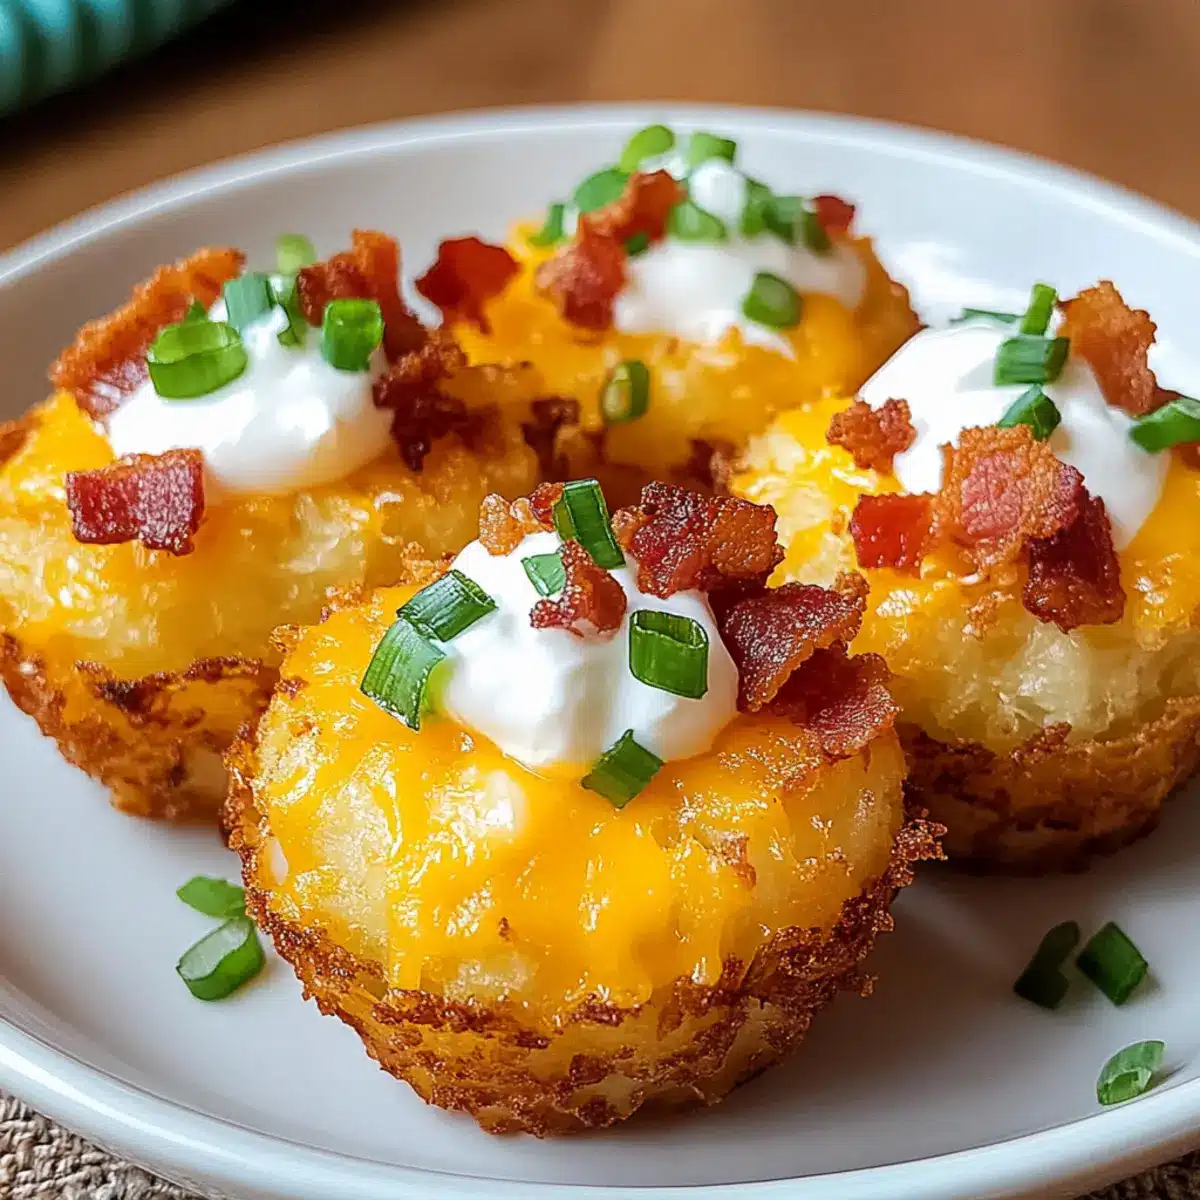
“Imagine walking into a gathering where the aroma of crispy tater tot appetizer cups fills the air.” That’s what happened the first time I served these delightful bites to friends, and believe me, the reaction was priceless! My Crispy Tater Tot Appetizer Cups with Cheesy Bacon Delight are not just an appetizer; they’re a playful twist on a classic comfort food that everyone loves. With just a few simple ingredients and the magic of frozen tater tots, you can create a customizable snack that’s both beginner-friendly and a guaranteed crowd-pleaser. Plus, they’re perfect for any occasion, making your hosting duties a breeze. Ready to elevate your appetizer game with these tasty cups? Let’s dive in!

Why Are Tater Tot Appetizer Cups So Great?
Irresistible Crunch: With each bite, you’ll enjoy the delightful crispiness of tater tots transformed into adorable cups.
Cheesy Goodness: Filled with melty cheddar and smoky bacon, these bites deliver rich, savory flavors that please any palate.
Customizable: Add your favorite toppings like jalapeños or diced bell peppers to craft a unique dish for any gathering!
Beginner-Friendly: No complicated techniques here! This recipe is easy enough for novice cooks, making it a perfect starter project.
Party Perfect: These cups are sure to steal the spotlight at any event, whether you’re hosting a casual get-together or a festive celebration.
For a delightful accompaniment, consider serving these with a side of Cheesy Thumbprint Appetizers to further impress your guests!
Tater Tot Appetizer Cups Ingredients
For the Cups
• Frozen Tater Tots – These are essential for shaping the perfect crunchy base; fresh tater tots may not hold well.
• Cooking Spray – Prevents sticking to the muffin tin; any non-stick spray or oil works.
For the Filling
• Shredded Cheddar Cheese – Offers rich creaminess; substitute with Monterey Jack for a different flavor profile.
• Cooked and Crumbled Bacon – Adds that smoky crunch everyone loves; consider turkey bacon for a lighter version.
For the Toppings
• Sour Cream – This tangy staple brightens up the flavor; Greek yogurt is a great healthy alternative.
• Chopped Green Onions – Adds a mild onion flavor and a pop of color; chives can be swapped for a similar taste.
• Salt and Pepper – Enhances overall flavor; feel free to adjust to your liking.
These Tater Tot Appetizer Cups are not just easy to assemble, but also allow for plenty of customizing to please every guest’s appetite!
Step‑by‑Step Instructions for Tater Tot Appetizer Cups
Step 1: Preheat the Oven
Begin by preheating your oven to 425°F (220°C). This high temperature will ensure your Tater Tot Appetizer Cups become perfectly golden and crispy. While the oven heats up, gather your ingredients and equipment, including a mini muffin tin and cooking spray for non-stick coverage.
Step 2: Prepare the Muffin Tin
Generously grease a mini muffin tin with cooking spray to prevent sticking. Make sure each cup is well-coated, as this will help the crispy tater tots release easily after baking. Give a gentle spray to the edges and bottoms of the cups for the best results.
Step 3: Place the Tater Tots
Carefully set one frozen tater tot inside each muffin cup, ensuring that they are evenly spaced. The tater tots will serve as the structure for your cups. Visually, they should look snug and secure in the tins, ready to be transformed into delicious appetizer holders.
Step 4: Bake the Tater Tots
Slide the muffin tin into the preheated oven and bake the tater tots for 12–15 minutes. You’ll know they are ready when they start turning a light golden brown and are slightly softened. This initial baking is crucial for achieving that crispy foundation for your Tater Tot Appetizer Cups.
Step 5: Form the Cups
Once browned, remove the muffin tin from the oven and take a spoon to gently press down the center of each tater tot, forming small cups. Aim for a shallow indentation that will hold your filling later. This step creates the perfect shape for holding all the delicious toppings.
Step 6: Add Cheese and Bacon
Now, fill each cup with a generous amount of shredded cheddar cheese and crumbled bacon, generously distributing the mixture. Season lightly with salt and pepper to enhance the flavors. The cheese will melt deliciously, creating an irresistible filling for your Tater Tot Appetizer Cups.
Step 7: Bake Again
Return the muffin tin to the oven and bake for another 10 minutes or until the cheese is melted and bubbly. Keep an eye on them, looking for that golden, cheesy goodness to form on top. This second bake will firm up the cups while ensuring everything is beautifully melted.
Step 8: Cool and Remove
Once out of the oven, let the Tater Tot Appetizer Cups cool slightly before carefully removing them from the tin. A gentle twist should help release the cups without breaking them. Arrange them on a serving platter as they cool briefly to maintain their shape.
Step 9: Add Toppings
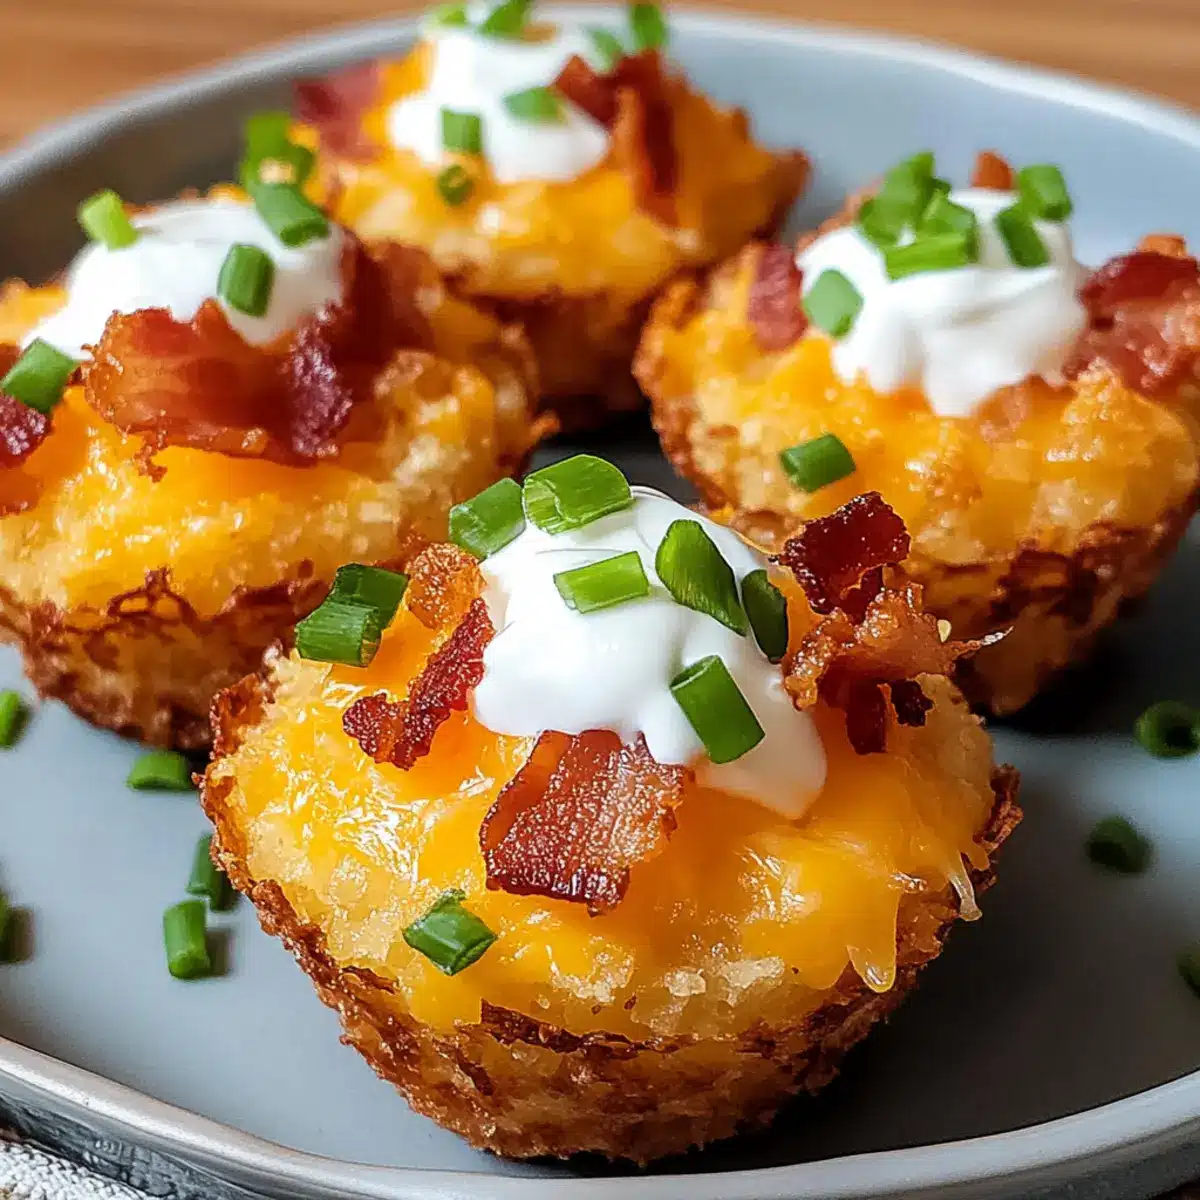
Before serving, take the time to dollop a spoonful of sour cream on top of each cup, followed by a sprinkle of chopped green onions for added flavor and color. These finishing touches will not only enhance the taste but also make your Tater Tot Appetizer Cups visually appealing for your guests.
Make Ahead Options
These Tater Tot Appetizer Cups are a fantastic choice for making ahead of time, especially for busy weeknights or entertaining! You can prepare the filling (cheese and bacon) and store it in the refrigerator for up to 3 days in advance. Additionally, you can even form the tater tot cups and assemble them without baking, then refrigerate them until you’re ready to cook—up to 24 hours ahead of serving. Just remember to cover the muffin tin tightly with plastic wrap to keep them fresh. When ready to bake, simply preheat your oven and bake the assembled cups according to the instructions, adding an extra couple of minutes if they were chilled. With this prep, you’ll have delicious, crispy Tater Tot Appetizer Cups ready with minimal effort when it’s time to enjoy your gathering!
Helpful Tricks for Tater Tot Appetizer Cups
-
Avoid Overcrowding: Ensure there’s enough space between the tater tots in the muffin tin to achieve maximum crispiness during baking. Overcrowding can lead to soggy cups.
-
Monitor Baking Time: Keep a close eye on the tater tots during their initial bake; a perfect golden brown is key for a crunchy exterior that holds the filling beautifully.
-
Reheat for Crispiness: For any leftover Tater Tot Appetizer Cups, reheating them in the oven instead of the microwave helps maintain their delicious crunch, making them enjoyable even on day two.
-
Customize Your Fillings: Feel free to experiment with different cheeses or toppings based on personal preferences or dietary needs. The beauty of these cups lies in their versatility!
-
Cool Before Serving: Letting the cups cool slightly before removing them from the tin prevents them from breaking apart and ensures they hold their shape beautifully.
Tater Tot Appetizer Cups: Endless Possibilities
Feel free to get creative with your Tater Tot Appetizer Cups and make them your own with these fun variations!
-
Add Heat: Spice things up by adding jalapeños or diced serrano peppers for a kick that brings the heat!
-
Veggie Delight: For a fresher twist, mix in diced bell peppers or zucchini. These colorful additions brighten up the cups with extra flavor and nutrition.
-
Cheese Swap: Try out different cheeses like pepper jack for a spicy bite or crumbled feta for a bold flavor upgrade that will make your taste buds dance.
-
Savory Alternatives: Incorporate cooked sausage or crumbled turkey sausage as a hearty filling. The savory flavor pairs wonderfully with the crispy tater tots.
-
Herb Infusion: Add herbs like fresh thyme or parsley into your filling for a fragrant burst of flavor that elevates each bite.
-
Creamy Finish: Instead of sour cream, consider topping with avocado crema. This creamy, tangy substitute adds a richer mouthfeel that complements the cups beautifully.
-
Sweet & Savory: For an unexpected twist, drizzle some honey or maple syrup over your finished cups for a sweet contrast that balances the saltiness of bacon.
-
Try a Fusion: Give your Tater Tot Appetizer Cups a global twist by incorporating ingredients like kimchi or sriracha mayo. This adds a unique flavor profile that your guests will love.
Consider pairing these delicious Tater Tot Appetizer Cups with some Apple Dessert Cups for a delightful sweet touch after the savory!
How to Store and Freeze Tater Tot Appetizer Cups
Fridge: Store leftover Tater Tot Appetizer Cups in an airtight container in the refrigerator for up to 3 days. This keeps them fresh while you’re planning your next snack.
Freezer: For longer storage, freeze uncooked prepared cups on a baking sheet, then transfer to a freezer bag for up to 1 month. Bake from frozen, adding a few extra minutes to the cooking time.
Reheating: To maintain crispiness, reheat any leftovers in the oven at 350°F (175°C) for about 10 minutes. This revives that delightful crunch you love.
Prepare Ahead: You can assemble the cups in advance, refrigerate them until ready to bake, or freeze them to have a quick appetizer ready for unexpected gatherings.
What to Serve with Tater Tot Appetizer Cups?
Imagine a delightful gathering where every bite is bursting with flavor and warmth. These crispy cups offer the perfect canvas for an array of mouthwatering accompaniments!
-
Creamy Ranch Dip: This herby and tangy dip pairs beautifully, enhancing the savory notes of the cheesy bacon filling.
-
Zesty Guacamole: Fresh and creamy guacamole balances the crispy texture, providing a delightful contrast perfect for any gathering.
-
Crunchy Coleslaw: The cool, crunchy coleslaw brings brightness to the table, balancing the heartiness of the Tater Tot Appetizer Cups wonderfully.
-
Mini Meatballs: Bite-sized meatballs add a savory option that’s perfect for a fun twist. Serve them with a sweet and tangy sauce on the side.
-
Spicy Jalapeño Poppers: For those who love a kick, these stuffed peppers will spice things up and complement the tater tots beautifully.
-
Mixed Green Salad: A light, refreshing salad with a zesty vinaigrette provides a crisp contrast, making your meal feel lighter and more balanced.
-
Craft Beer: Pairing these appetizers with a smooth, craft beer enhances the flavors and makes for a relaxed, enjoyable experience.
-
Sangria: A fruity pitcher of sangria brings a refreshing sweetness, while its bold flavors will elevate your gathering to new heights.
-
Brownie Bites: For dessert, these fudgy treats offer a rich finish to your delicious meal, ensuring guests leave with satisfied smiles.
Tater Tot Appetizer Cups Recipe FAQs
What type of frozen tater tots should I use for the best results?
Absolutely! For the best flavor and structure, stick to classic frozen tater tots. Fresh tater tots may not hold well, potentially resulting in a soggy cup. Look for brands that have a crispy outside and fluffy interior—those are perfect for forming your cups!
How do I store leftover Tater Tot Appetizer Cups?
For any leftovers, store your Tater Tot Appetizer Cups in an airtight container in the refrigerator. They should stay fresh for about 3 days. When you’re in the mood for a snack, just pop them in the oven to restore their crunch!
Can I freeze the prepared cups before baking?
Very much so! You can freeze uncooked prepared cups by placing them on a baking sheet until frozen solid. Then, transfer them to a freezer bag for up to 1 month. When you’re ready to enjoy them, bake directly from frozen, adding about 5–7 minutes to the cooking time.
What should I do if my tater cups are soggy?
If you find your cups are soggy after baking, it might be due to overcrowding the muffin tin. Next time, make sure there’s enough space between tater tots for optimal airflow, which helps keep them crispy. Additionally, avoid underbaking; the initial baking should give the cups a good, golden color before adding toppings.
Can I modify this recipe to be more allergy-friendly?
Definitely! You can substitute the shredded cheddar cheese with dairy-free cheese alternatives for dairy allergies, and swap bacon with chickpeas or a meat alternative for a vegetarian or vegan option. For gluten-free needs, ensure your tater tots and any additional toppings are certified gluten-free. Personalizing your cups is part of the fun!
How can I make sure my Tater Tot Appetizer Cups are extra crispy?
To achieve maximum crispiness, follow these steps: make sure to grease your muffin tin thoroughly, don’t overcrowd the tater tots, and monitor the baking time closely. The first bake should allow them to brown nicely, and remember to reheat any leftovers in the oven rather than the microwave for that perfect crunch!

Tater Tot Appetizer Cups: Crunchy, Cheesy Perfection!
Ingredients
Equipment
Method
- Preheat your oven to 425°F (220°C).
- Generously grease a mini muffin tin with cooking spray.
- Carefully set one frozen tater tot inside each muffin cup.
- Bake the tater tots for 12-15 minutes until light golden brown.
- Gently press down the center of each tater tot to form small cups.
- Fill each cup with shredded cheddar cheese and crumbled bacon, seasoned lightly with salt and pepper.
- Bake for another 10 minutes or until the cheese is melted and bubbly.
- Let the Tater Tot Appetizer Cups cool slightly before removing from the tin.
- Dollop sour cream on top of each cup and sprinkle with chopped green onions.
Leave a Reply