
The kitchen was silent, save for the gentle rustle of oats being poured into a bowl. It’s moments like these that remind me how simple ingredients can transform into something special. Today, I’m thrilled to share my recipe for 4-Ingredient No-Bake Chocolate Oat Cookies, a delightful treat that’s both quick to make and gluten-free. With just four wholesome ingredients, you can whip up a delicious snack that satisfies the sweet tooth without requiring an oven. These cookies are perfect for busy days or those lazy afternoons when you crave a healthy indulgence. Plus, they store beautifully in the fridge, making them a handy treat for the week ahead. What’s your favorite way to enjoy chocolate in the kitchen? Let’s dive into the recipe!
Why are these cookies a game-changer?
Simplicity at Its Best: With just four ingredients, these no-bake chocolate oat cookies are a breeze to prepare.
Deliciously Indulgent: Each bite delivers a rich, chocolatey flavor balanced by the wholesome texture of oats.
Quick to Make: Perfect for those busy days when time is tight, you can whip these up in under 15 minutes.
Nutritious Delight: Packed with fiber and healthy fats, they’re a tasty yet guilt-free snack that fits into any balanced diet.
Versatile Snack: Enjoy them chilled with a glass of almond milk or even alongside a hot cup of coffee. And if you’re feeling adventurous, try adding some dried fruits or a sprinkle of vanilla to elevate the flavor!
4-Ingredient No-Bake Chocolate Oat Cookies
• A sweet snack with simple ingredients!
For the Cookies
• Oats – Provide structure and chewiness; opt for rolled oats for the best texture.
• Nut Butter – Acts as a binding agent and adds creaminess; substitute with sunflower seed butter for a nut-free option.
• Honey or Maple Syrup – Adds sweetness and moisture; maple syrup is a great vegan alternative among these 4-ingredient options.
• Cocoa Powder – Contributes rich chocolate flavor and extra nutrients; ensure it’s unsweetened to control sweetness.
Step‑by‑Step Instructions for 4-Ingredient No-Bake Chocolate Oat Cookies
Step 1: Combine Dry Ingredients
In a large mixing bowl, add 1 cup of rolled oats and 1/3 cup of unsweetened cocoa powder. Stir them together using a whisk or a fork until well blended. This step is essential as it ensures that the chocolate flavor is evenly distributed throughout the oats, creating a delicious base for your no-bake chocolate oat cookies.
Step 2: Mix Wet Ingredients
In a separate bowl, measure 1/2 cup of your choice of nut butter and 1/4 cup of honey or maple syrup. Use a whisk or a spoon to mix the ingredients until you have a smooth, creamy consistency. If your nut butter is too thick, microwave it for 10–15 seconds to make mixing easier. This creamy mixture will bind your cookies and add richness to the flavor.
Step 3: Combine Wet and Dry Mixtures
Gradually pour the wet mixture into the dry ingredients, stirring continuously with a spatula or spoon. Mix until the oats are thoroughly coated and the mixture holds together when pressed. Aim for a uniform consistency that should feel sticky yet manageable—this will form the foundation of your 4-ingredient no-bake chocolate oat cookies.
Step 4: Shape the Cookies
Using a cookie scoop or your hands, portion out the mixture and place it on a lined baking sheet. Shape each portion into neat rounds, about 1 inch thick, for uniformity. Leave a little space between each cookie for easy handling. Visualize the chewy texture you’re after, as they will retain their shape beautifully once set in the fridge.
Step 5: Chill and Set
Place the baking sheet in the refrigerator for at least 30 minutes, allowing the no-bake chocolate oat cookies to firm up. Check for firmness after 30 minutes; they should feel set and hold their shape when removed from the sheet. This cooling step is crucial as it enhances the flavors and helps maintain the delightful texture of your treats.
Step 6: Serve and Store
Once firm, transfer the cookies to an airtight container. Enjoy them chilled alongside a refreshing almond milk or steaming coffee. These cookies can be stored in the refrigerator for up to one week, making them a convenient snack option. With just four simple ingredients, your delicious high protein egg white bites can sit alongside these wholesome treats, offering a satisfying and healthy indulgence.
Make Ahead Options
These 4-Ingredient No-Bake Chocolate Oat Cookies are perfect for meal prep enthusiasts looking to save time during busy weeks! You can prepare the mixture up to 24 hours in advance by combining the oats, cocoa powder, nut butter, and honey, and then refrigerating it in an airtight container. This prevents the oats from becoming stale and ensures the flavors marry perfectly. When you’re ready to serve, simply scoop and shape the mixture into cookies and chill for at least 30 minutes to firm up. This way, you’ll have delicious, healthy snacks ready in no time, allowing you to snack guilt-free anytime!
What to Serve with 4-Ingredient No-Bake Chocolate Oat Cookies
Indulging in these rich treats sparks the perfect culinary adventure where flavors harmonize beautifully.
- Creamy Almond Milk: This smooth, nutty drink accentuates the chocolatey taste and provides a refreshing contrast after each bite.
- Fruity Smoothie: A vibrant, berry-packed smoothie adds a fresh, tangy twist, balancing the cookies’ sweetness with a burst of flavor.
- Sliced Fresh Fruit: Think apple or banana slices—crisp and juicy companions that complement the rich texture of the cookies.
- Vanilla Greek Yogurt: The creamy yogurt offers a delightful dip for the cookies, enhancing flavor while adding a protein kick.
- Coffee or Espresso: A warm cup of coffee brings a cozy element, with its bitter notes perfectly countering the sweetness of the treats.
- Nutty Granola: Sprinkling some granola on top not only adds a satisfying crunch but also elevates the health factor, creating a delightful texture contrast.
- Dark Chocolate Dips: Melted dark chocolate provides an indulgent touch, deepening the chocolate flavor while adding a luxurious element to each bite.
- Chilled Herbal Tea: A glass of iced herbal tea, perhaps mint or chamomile, refreshes the palate and is ideal for a sunny afternoon snack.
Storage Tips for 4-Ingredient No-Bake Chocolate Oat Cookies
Fridge: Store the cookies in an airtight container in the refrigerator for up to 1 week. This keeps them fresh and chewy for your snacking pleasure.
Freezer: If you want to keep them longer, freeze the cookies in a single layer with parchment paper between each layer. They can last up to 3 months in the freezer.
Reheating: For a warm treat, allow frozen cookies to thaw in the fridge overnight, then gently microwave for a few seconds until just warmed, enhancing that delicious high protein taste.
Portion Control: Consider wrapping individual cookies before storing them, making it easy to grab a quick and healthy snack whenever the craving hits!
Expert Tips for 4-Ingredient No-Bake Chocolate Oat Cookies
• Consistency Check: Ensure the mixture holds together when pressed. If it’s too dry, add a splash more nut butter to achieve the perfect texture.
• Parchment Paper: Always line your baking sheet with parchment paper for easy removal and to prevent sticking, ensuring your cookies stay intact.
• Chill Time: Be patient! Allowing at least 30 minutes in the fridge is essential for the cookies to firm up and enhance their delightful flavors.
• Chocolatey Add-Ins: For an extra decadent treat, fold in a handful of chocolate chips before chilling. This will make your cookies irresistibly delicious.
• Healthy Substitutes: Feel free to experiment with different nut butters or sweetener options. This way, you can customize your no-bake chocolate oat cookies to fit your dietary preferences.
Delicious High Protein Egg White Bites Variations
Feel free to let your creativity shine and customize these cookies to suit your taste bud desires!
-
Nut-Free Substitute: Use sunflower seed butter instead of nut butter to make these cookies nut-free while still keeping them deliciously creamy.
-
Sweetener Swap: Try agave syrup in place of honey or maple syrup for a different flavor profile without changing the sweetness.
-
Texture Twist: Swap a portion of oats with crushed graham crackers for a crunchy element that complements the soft cookie.
-
Fruit & Nut Boost: Add in dried fruits like raisins or cranberries and a handful of nuts for added texture and bursts of flavor.
-
Flavor Enhancer: Incorporate a splash of almond or vanilla extract to elevate these cookies with a lovely aromatic twist.
-
Chocolate Lover’s Upgrade: For a truly decadent experience, fold in dark chocolate chips or chunks for gooey bites of melted chocolate with every chew.
-
Spicy Kick: Sprinkle in a hint of cinnamon or cayenne pepper for a unique twist that adds a mild heat to the sweet chocolate flavor.
-
Protein Punch: Boost the nutritional value by mixing in some protein powder for an extra lift that pairs wonderfully as a snack with Delicious High Protein Egg White Bites.
Now that we’ve stirred up some delicious possibilities, don’t hesitate to experiment with these variations, and savor the magic in your kitchen!
4-Ingredient No-Bake Chocolate Oat Cookies Recipe FAQs
How do I choose the right oats for this recipe?
Absolutely! For the best texture in your no-bake chocolate oat cookies, opt for rolled oats. They provide that perfect chewiness and structure that holds the cookies together beautifully. Avoid instant oats, as they can turn mushy and won’t give the same satisfying bite!
How long can I store these cookies in the fridge?
These delightful cookies can stay fresh in an airtight container in your refrigerator for up to one week. Just keep an eye on them—if you see any dark spots developing, it’s time to toss them! Enjoy them chilled for a refreshing treat.
Can I freeze the cookies for later?
Very! To freeze your no-bake chocolate oat cookies, lay them out in a single layer on a baking sheet lined with parchment paper. Once frozen solid, transfer them to an airtight container, interleaving with parchment for easy separation. They can last up to 3 months, making them a handy snack to have on hand!
What should I do if my cookie mixture is too dry?
No worries! If you find the mixture is crumbling apart and too dry, simply add a little more nut butter—about a tablespoon at a time—until it reaches the right sticky consistency. This will help bind the ingredients together, creating the chewy texture that makes these cookies irresistible.
Are there any dietary considerations I should keep in mind?
Absolutely! If you have nut allergies, you can easily substitute the nut butter with sunflower seed butter or tahini for a nut-free alternative. Also, to make this recipe vegan, use maple syrup instead of honey, and ensure your cocoa powder is dairy-free!
How can I enhance the flavor of these cookies?
If you’re looking to elevate your cookies, think about folding in chocolate chips or adding a pinch of sea salt to the mixture. You could also experiment by incorporating dried fruits like raisins or cranberries for a touch of natural sweetness! The more, the merrier when it comes to flavor!
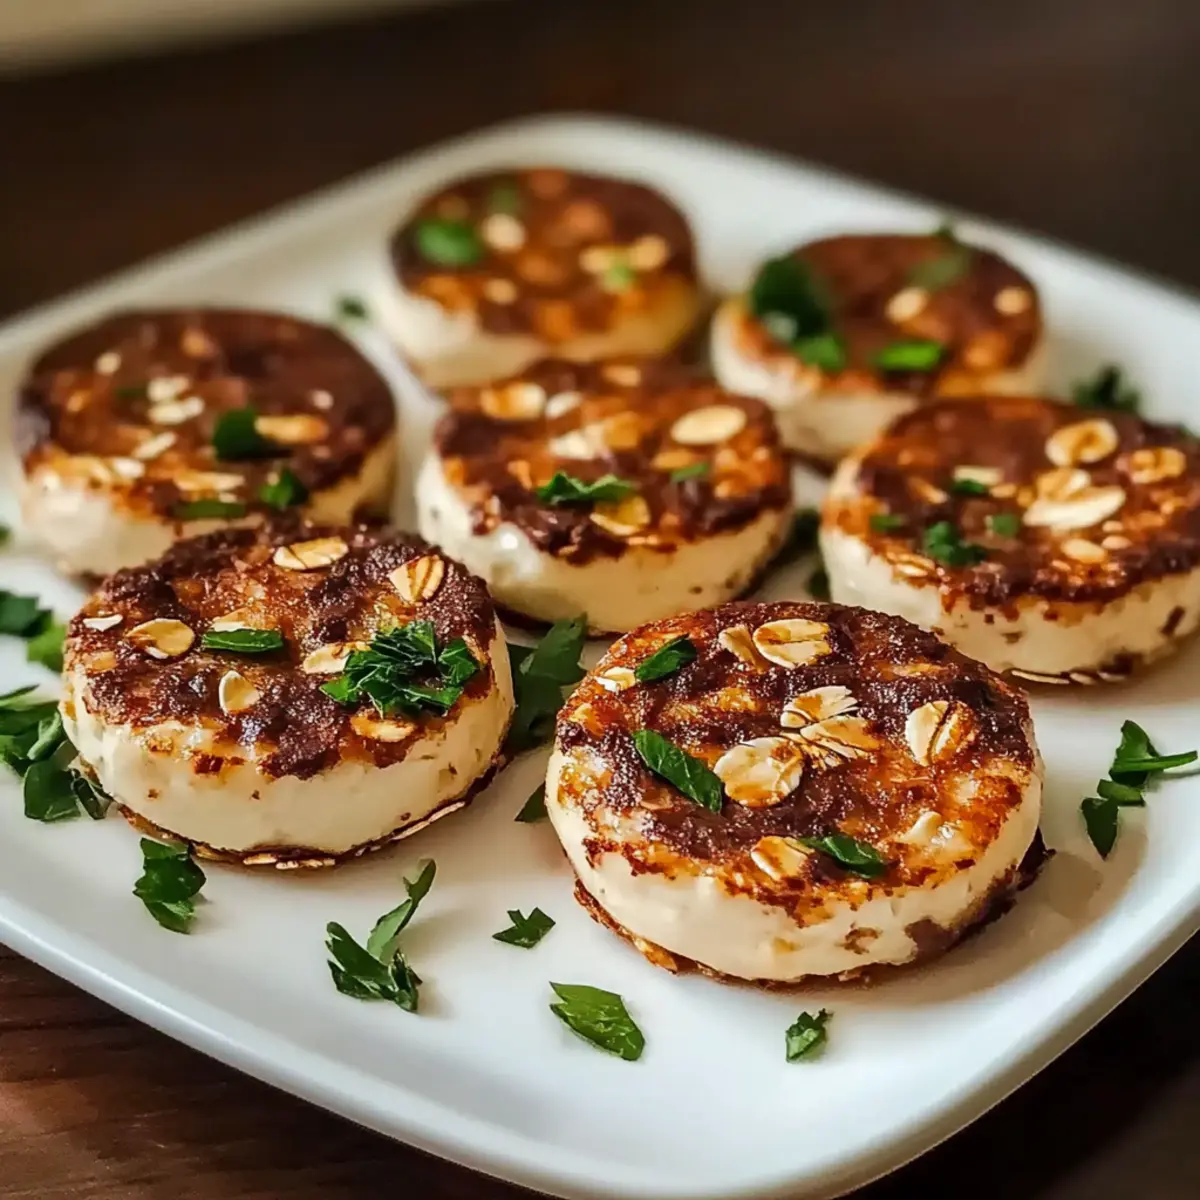
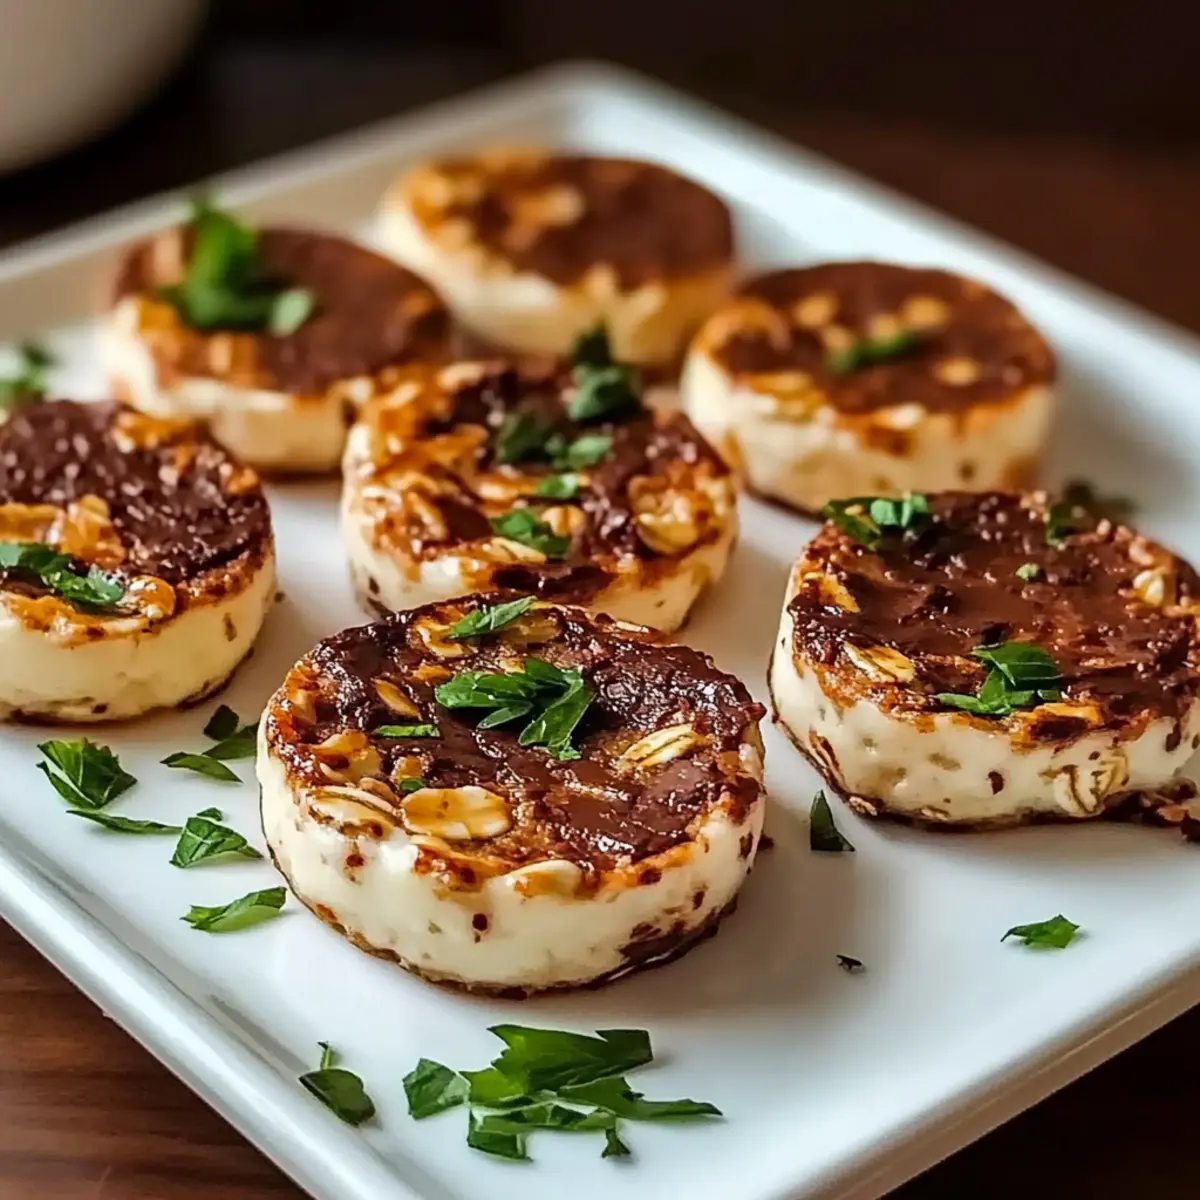
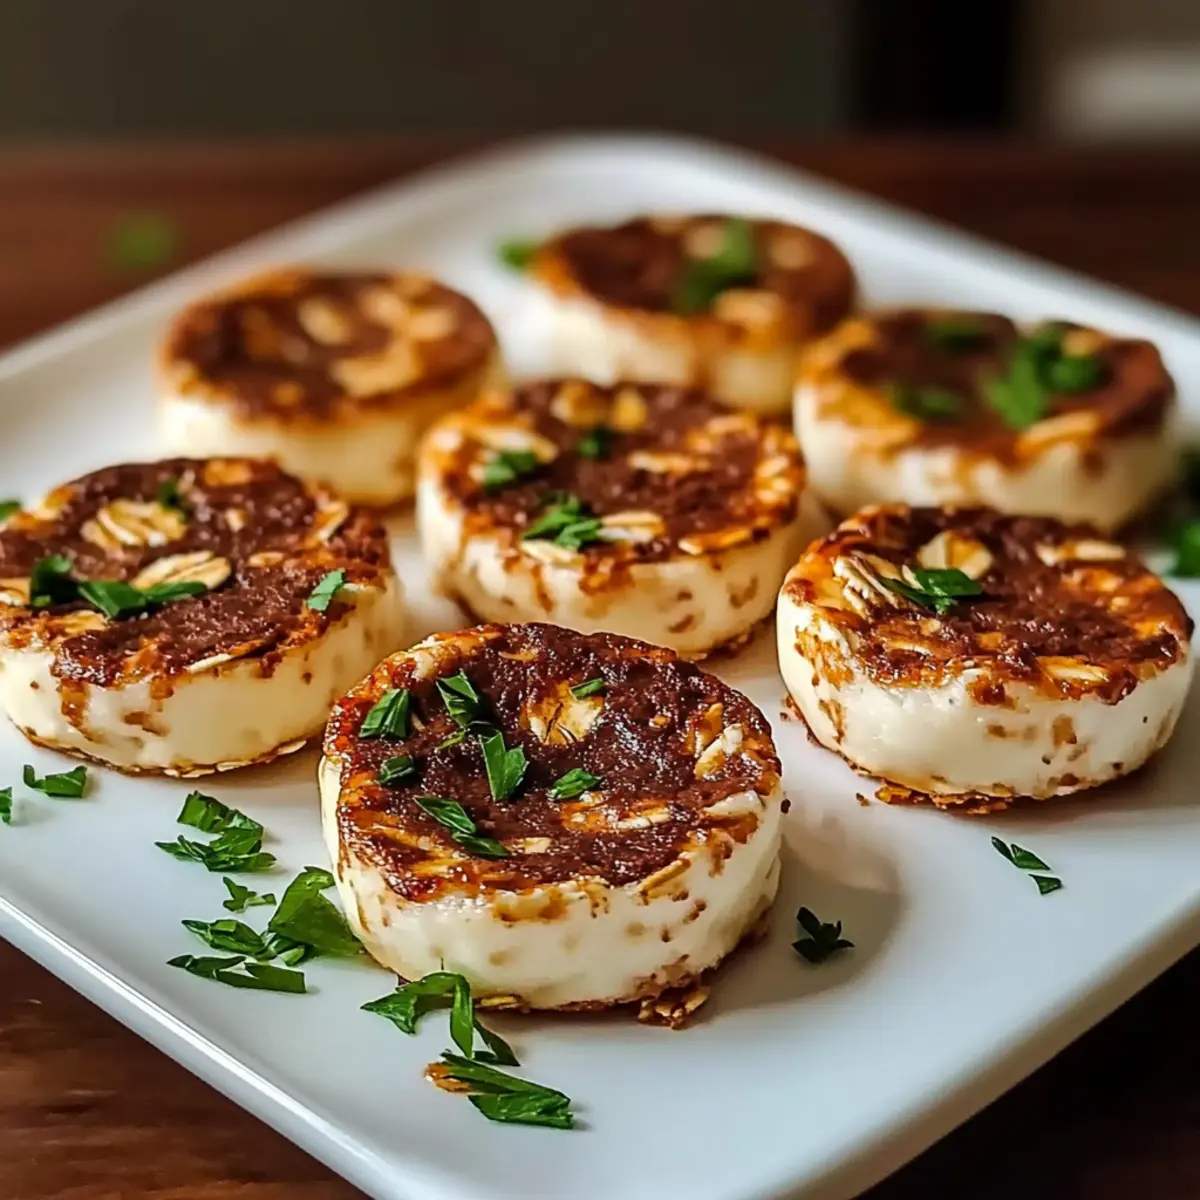
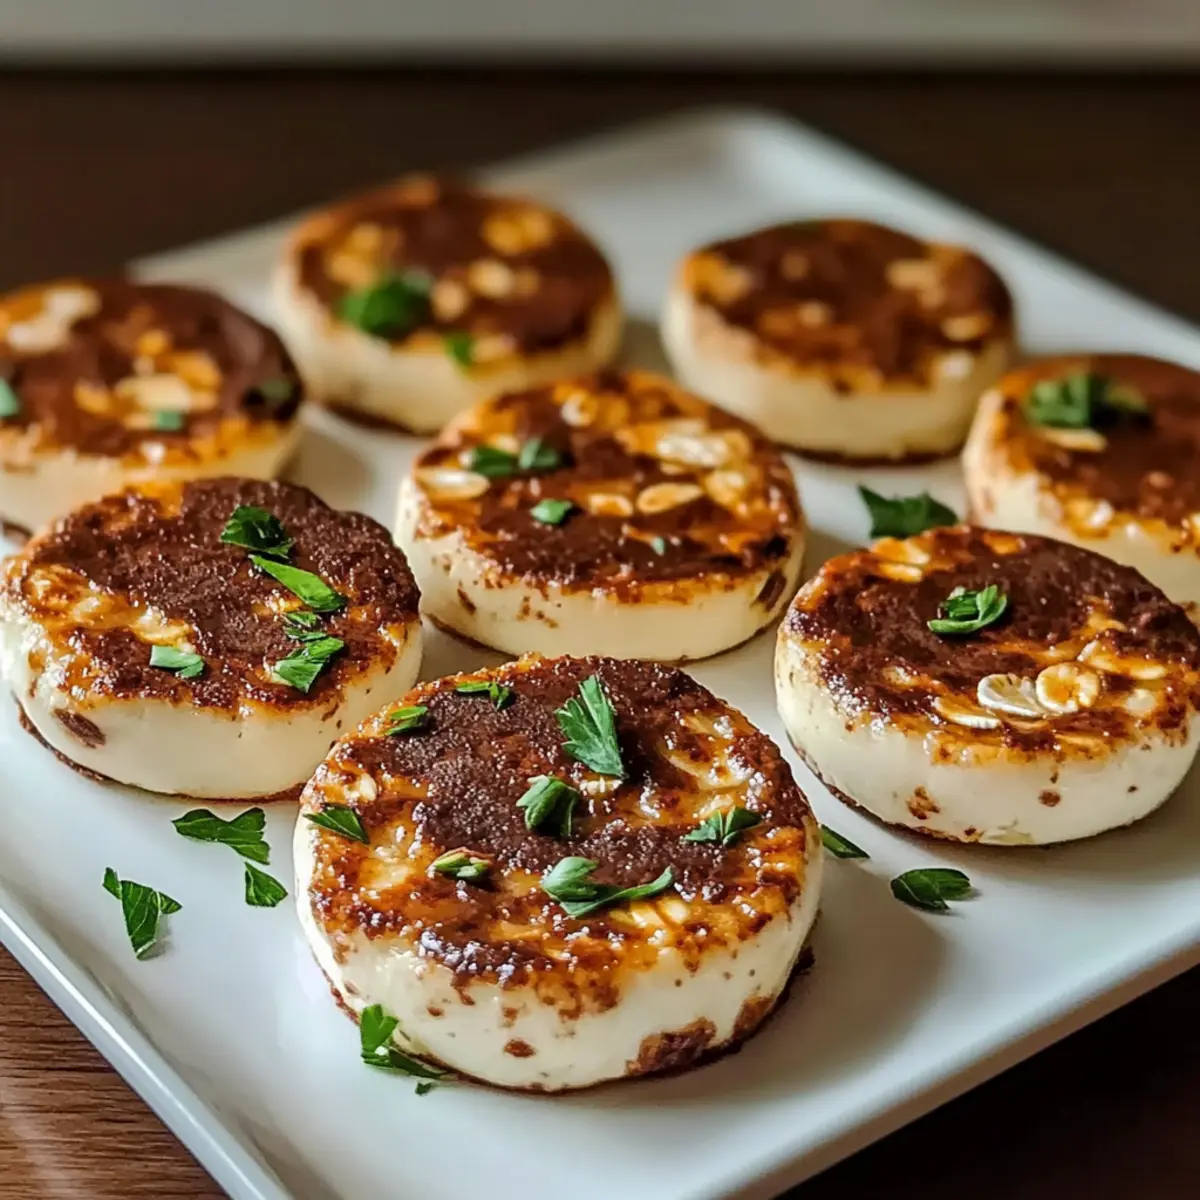
Delicious High Protein Egg White Bites for Easy Healthy Snacking
Ingredients
Equipment
Method
- In a large mixing bowl, combine the oats and cocoa powder.
- In a separate bowl, mix together the nut butter and honey or maple syrup until smooth.
- Gradually combine the wet mixture with the dry ingredients, stirring until everything is mixed well.
- Scoop the mixture onto a lined baking sheet and shape into rounds.
- Refrigerate for at least 30 minutes to firm up.
- Once firm, store in an airtight container and enjoy.
Leave a Reply