
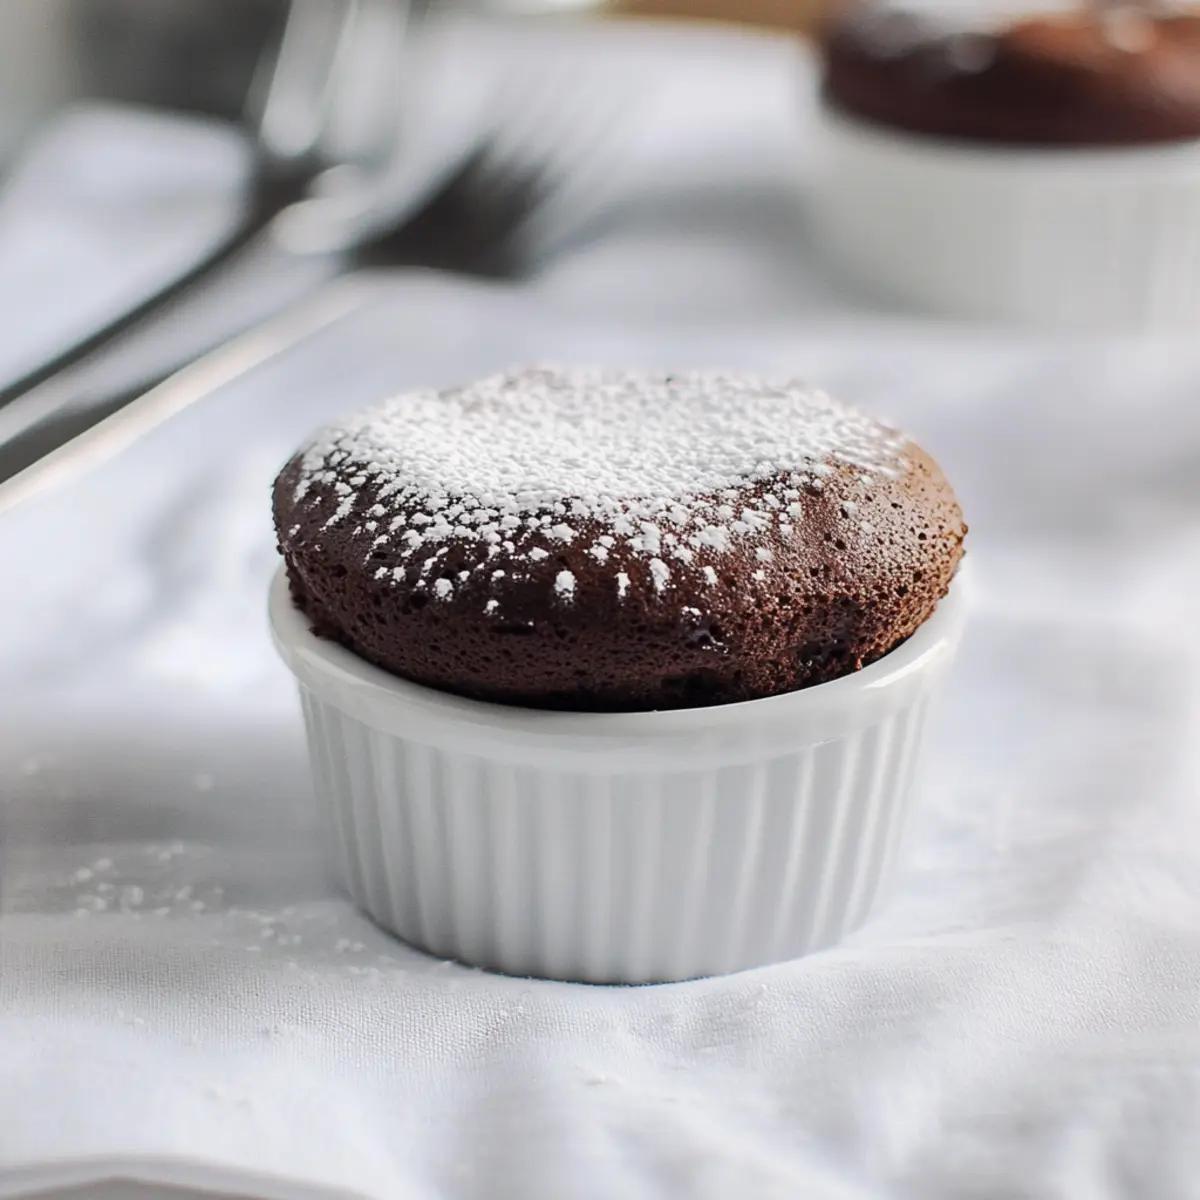
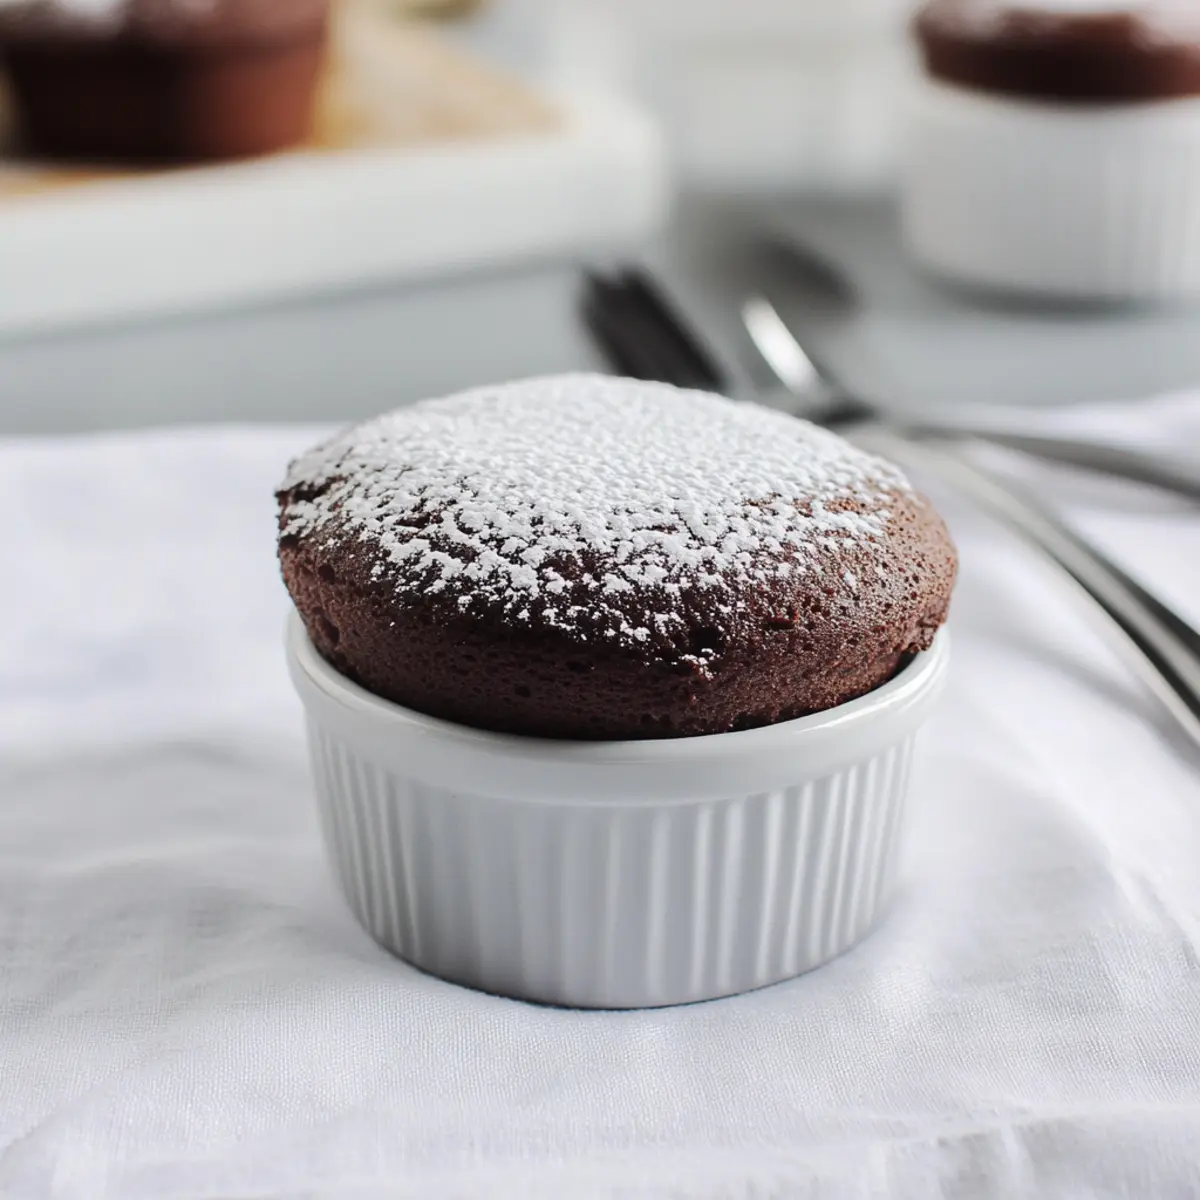
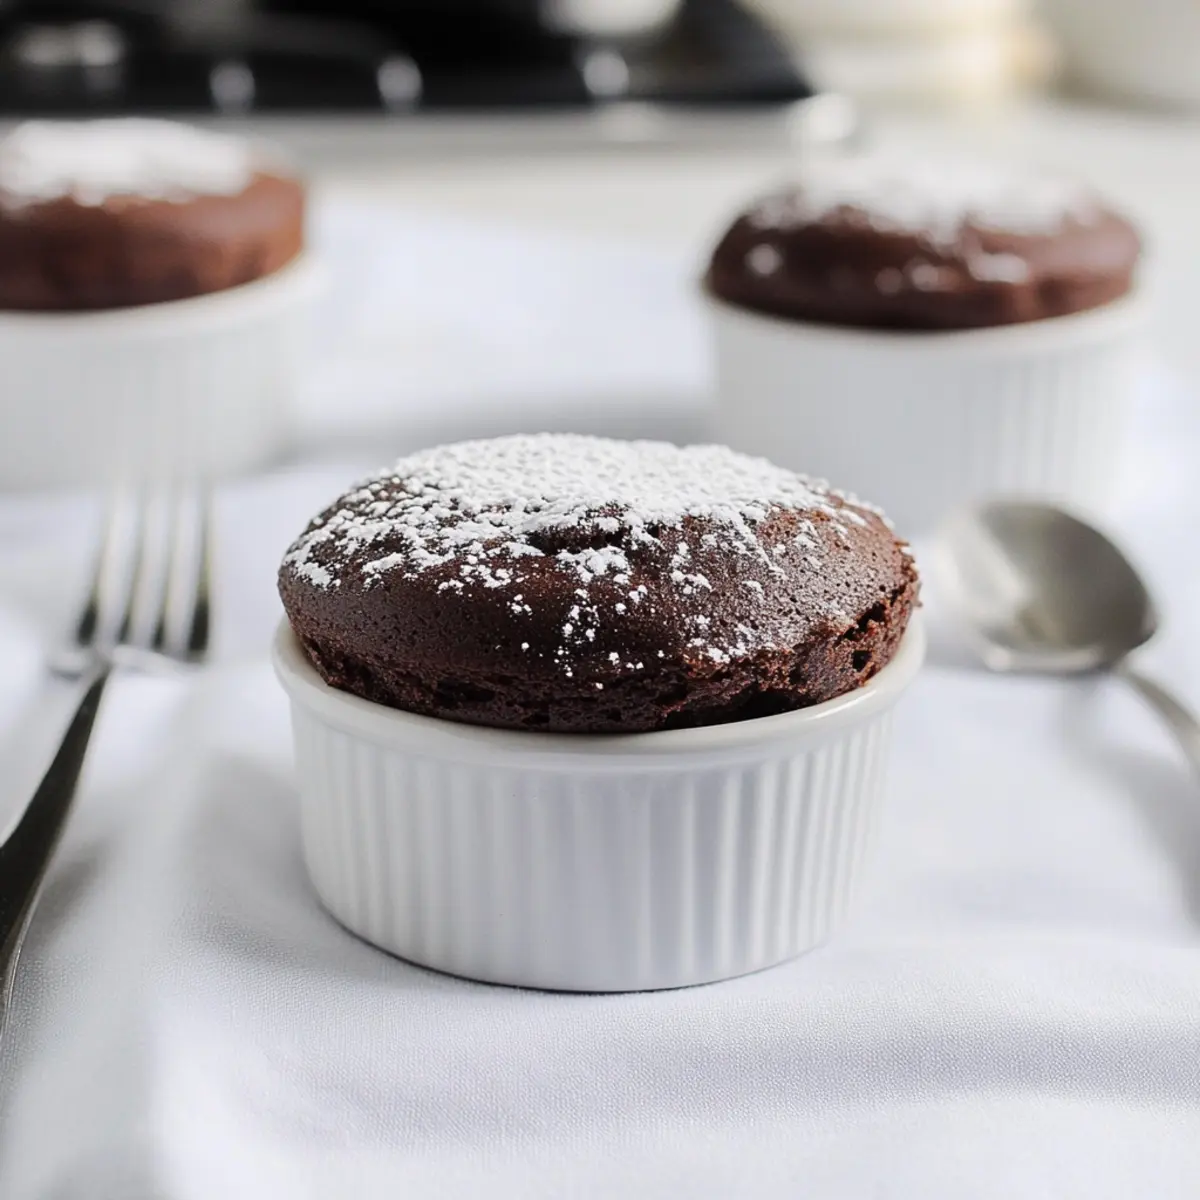
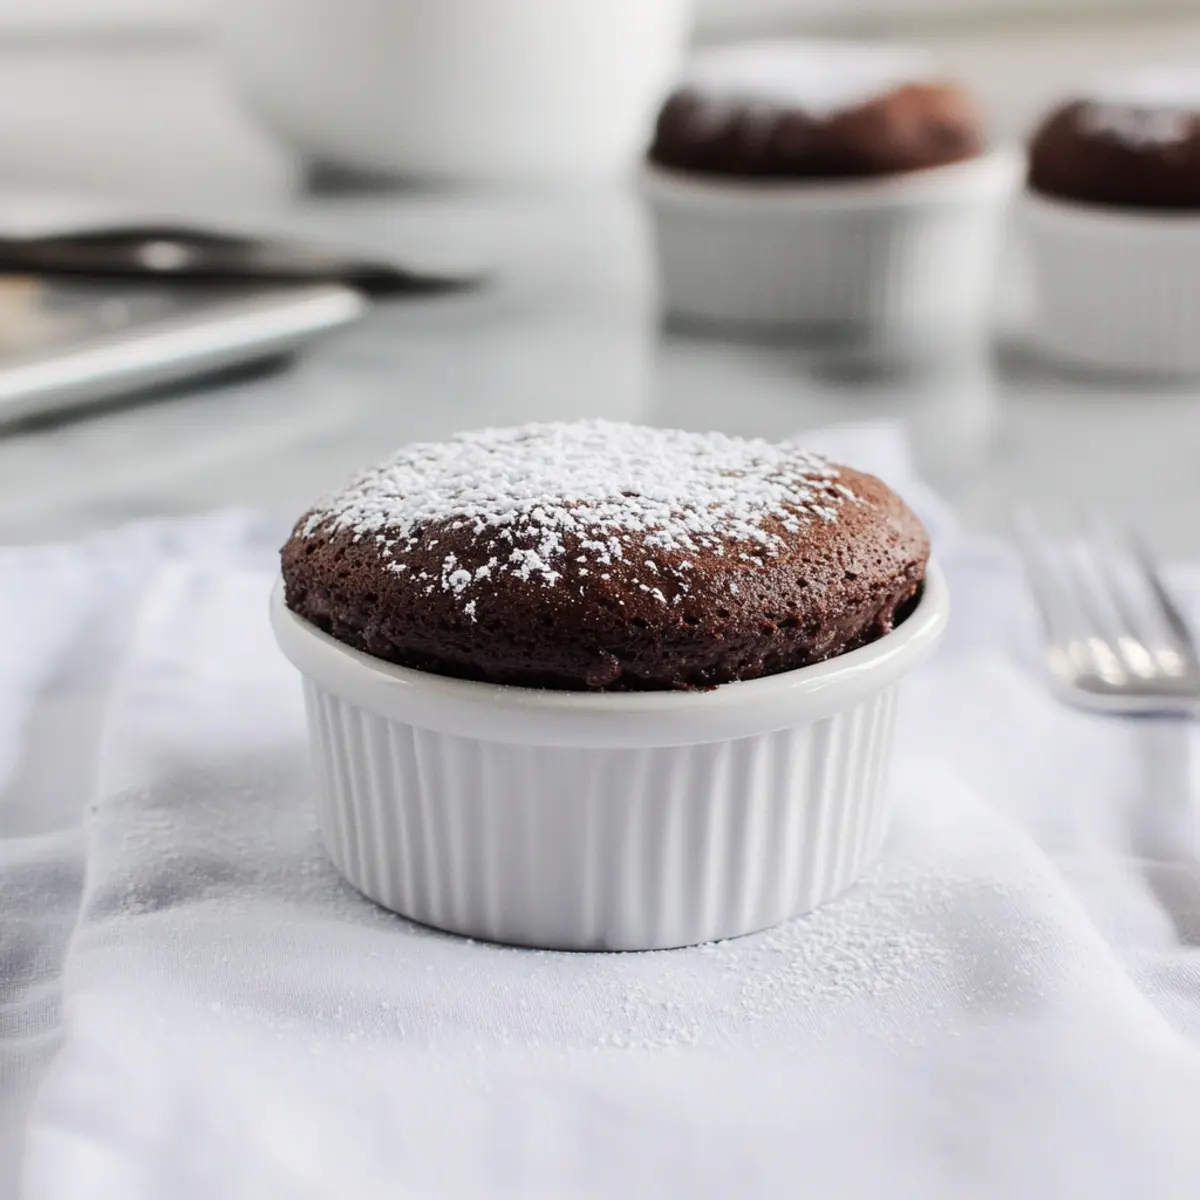
As I stood in my kitchen, the warm aroma of chocolate filling the air, I realized something magical was about to happen. This Low-Fat Chocolate Soufflé is a delightful twist on the classic French dessert, allowing us to indulge our sweet cravings without the guilt. With just 25 minutes of prep time, it’s the perfect solution for those last-minute dinner parties or a cozy evening at home. Not only is this decadent treat much lighter, but it also transforms into a show-stopping centerpiece that dazzles with its airy texture and deep chocolate flavor. Who knew a luxurious dessert could be so easy and healthy? Ready to impress your taste buds and your guests? Let’s dive into this delightful recipe!
Why is this soufflé a must-try?
Indulgent yet light: This Low-Fat Chocolate Soufflé offers a rich, deep flavor while sacrificing none of the satisfaction.
Quick to prepare: With only 25 minutes of prep, it’s an ideal choice for busy chefs.
Versatile dessert: Easily adapt the recipe with different cocoa powders or add a hint of espresso for a unique twist!
Impressive presentation: Serve it dusted with powdered sugar for a stunning centerpiece.
Guilt-free sweetness: At just 127 calories per serving, you can enjoy this delicious treat without the worry of overindulgence. For another decadent option, check out my Peanut Butter Chocolate cookies!
Chocolate Soufflé Ingredients
• Let’s gather everything you need for this delightful treat!
For the Batter
- Cooking Spray – Prevents soufflés from sticking to ramekins; any non-stick spray will do!
- Granulated Sugar (5 tsp) – Optional coating for ramekins; adds a touch of sweetness to the soufflé’s crust.
- Powdered Sugar (1 cup) – Adds sweetness and smooth texture to the soufflé; can be substituted with a sweetener for a sugar-free option.
- Unsweetened Dutch-Process Cocoa Powder (1/2 cup) – Provides rich chocolate flavor; Valrhona is recommended but regular cocoa works too.
- Flour (2 tbsp) – Helps to stabilize the structure of the soufflé; almond flour can be used for a gluten-free version.
- Low-Fat Milk (1/2 cup) – Adds creaminess with fewer calories; unsweetened almond milk can be used for a dairy-free version.
- Water (1/2 cup) – Hydrates the batter and is essential for the recipe; no substitutions needed.
- Egg Whites (4) – Provides lift and volume, crucial for the soufflé’s airy texture; no substitutions here!
- Cream of Tartar (pinch) – Stabilizes egg whites during whipping; optional, but highly recommended for best results.
- Granulated Sugar (3 tbsp + 1 tsp) – For whipping egg whites; enhances sweetness and contributes to the soufflé’s texture.
- Egg Yolks (2) – Enriches the flavor and texture; essential for the classic soufflé. No substitutions allowed.
- Vanilla Extract (1/2 tsp) – Adds depth of flavor; swap with almond extract for a twist.
For Serving
- Powdered Sugar (2-3 tbsp) – To dust for serving; optional but it adds a nice presentation touch.
This Chocolate Soufflé is as delightful to prepare as it is to serve! Ready to get started? Let’s whip up some magic in the kitchen!
Step‑by‑Step Instructions for Low-Fat Chocolate Soufflé
Step 1: Preheat the Oven
Begin by preheating your oven to 350°F (175°C). This step is critical for achieving that perfect soufflé rise. While the oven warms up, gather your ingredients and prepare your ramekins. Having everything ready will streamline the process and ensure your soufflé bakes evenly and beautifully.
Step 2: Prepare the Ramekins
Lightly coat each ramekin with cooking spray to prevent sticking, then dust the insides with granulated sugar if desired. This optional step not only adds a touch of sweetness but also helps to create a lovely golden crust on your Low-Fat Chocolate Soufflé. Set the prepared ramekins aside while you mix the batter.
Step 3: Combine Dry Ingredients
In a medium bowl, whisk together the powdered sugar, cocoa powder, and flour until well combined. This mixture forms the base of our soufflé and ensures a rich chocolate flavor. The key here is to incorporate air into the mix, so whisk vigorously until no lumps remain and it is light and airy.
Step 4: Heat Milk and Water
In a small saucepan, combine the low-fat milk and water over medium heat, bringing it to a gentle simmer. Gradually pour this warm liquid into the dry mixture, stirring continuously until smooth. This technique helps to properly hydrate the batter, creating a silky texture for your chocolate soufflé.
Step 5: Whip the Egg Whites
In a separate mixing bowl, add the egg whites and a pinch of cream of tartar. Using an electric mixer, whip the egg whites on medium-high speed until soft peaks form. Gradually add 3 tablespoons of granulated sugar, continuing to whip until the mixture reaches stiff peaks, which indicates that your soufflé will have the perfect lift.
Step 6: Mix Egg Yolks and Chocolate Base
In another bowl, whisk the egg yolks and vanilla extract until blended. Then, gently fold this mixture into the still-warm chocolate batter, being careful not to deflate it. This step adds richness and flavor to your Low-Fat Chocolate Soufflé and is crucial for achieving a light texture.
Step 7: Fold in Egg Whites
Next, gently fold the whipped egg whites into the chocolate batter in three additions. Use a spatula to combine, carefully maintaining the volume of the whipped egg whites. This step is vital for achieving the soufflé’s airy texture—work with grace and assurance to keep everything light and fluffy.
Step 8: Fill the Ramekins
Evenly divide the soufflé batter among the prepared ramekins, filling them about three-quarters full. Avoid overfilling as the soufflés will rise significantly during baking. This is a pivotal moment in making a spectacular Low-Fat Chocolate Soufflé, so ensure you’ve transferred the batter gently into each ramekin.
Step 9: Bake the Soufflés
Place the filled ramekins in the preheated oven and bake for about 20 minutes. During this time, watch as they puff up beautifully—look for a slight jiggle in the center when you gently shake the ramekins. Once they’re set and have risen, it’s time to take them out and admire your work!
Step 10: Serve Immediately
Once baked, remove the soufflés carefully from the oven and dust them with powdered sugar for a lovely finishing touch. Serve your Low-Fat Chocolate Soufflé immediately while they’re still warm and puffed, as they will begin to deflate quickly. Enjoy this impressive dessert with friends or family for a delightful treat!
How to Store and Freeze Chocolate Soufflé
Room Temperature: Store any cooled soufflé at room temperature for up to 2 hours, but it’s best enjoyed fresh.
Fridge: If you have leftovers, cover them loosely and refrigerate for up to 2 days. Note that the soufflé will lose its airy texture after refrigeration.
Freezer: For longer storage, freeze the unbaked soufflé batter in the ramekins, covered tightly, for up to 1 month. Bake directly from the freezer, adding a few extra minutes to the baking time.
Reheating: If baked soufflés are refrigerated, gently reheat them in a preheated oven at 350°F (175°C) for about 10 minutes to help restore some fluffiness before serving.
What to Serve with Low-Fat Chocolate Soufflé
The perfect soufflé deserves company; let’s create a delightful feast to share with family and friends!
-
Fresh Berries: Bright and juicy, fresh strawberries or raspberries add a tart contrast that complements the rich chocolate flavor beautifully.
-
Whipped Cream: A dollop of light whipped cream enhances the soufflé’s airy texture while adding a touch of indulgence to each bite.
-
Low-Fat Ice Cream: Serve with a scoop of vanilla or mint ice cream for a creamy touch that pairs perfectly with the warm, fluffy soufflé.
-
Chocolate Drizzle: A light drizzle of dark chocolate sauce on top emphasizes the chocolate flavor, intensifying every decadent moment.
-
Espresso or Coffee: A strong cup of espresso or a rich coffee can round out the meal, providing an ideal balance to the sweet dessert.
-
Almond Biscotti: Crunchy almond biscotti add texture and a delightful nutty flavor that pairs wonderfully with the soufflé’s softness.
Feel free to mix and match these options to create the ultimate dessert experience that will have everyone wishing for more!
Expert Tips for Chocolate Soufflé
- Egg White Care: Ensure egg whites are free from yolk contamination for optimal whipping. This is crucial for achieving the right texture in your chocolate soufflé.
- Baking Speed: Work swiftly once your soufflé batter is ready. The longer it sits, the more it risks deflating before baking.
- Extra Lift: Consider adding an additional egg white for more stability and lift, but be cautious as it may dilute the sweetness of your chocolate soufflé.
- Whipping Technique: When whipping the egg whites, stop at stiff peaks for the best volume and rich texture. Over-whipping can lead to dryness.
- Greasing Ramekins: Don’t skip greasing your ramekins! Proper preparation will prevent sticking and ensure your soufflés release beautifully.
Make Ahead Options
These Low-Fat Chocolate Soufflés are perfect for meal prep enthusiasts! You can prepare the batter up to 24 hours in advance and refrigerate it in the ramekins, which helps deepen the chocolate flavor while maintaining its light texture. To avoid the soufflés from deflating, cover them tightly with plastic wrap before chilling. When you’re ready to serve, simply remove them from the fridge and bake at 350°F (175°C) for about 20 minutes until puffed and set. This make-ahead method allows you to impress your guests with minimal last-minute effort, ensuring just as delicious results, ready to enjoy whenever the craving hits!
Chocolate Soufflé Variations & Substitutions
Feel free to get creative with this Low-Fat Chocolate Soufflé and personalize it to your taste preferences!
- Dairy-Free: Substitute low-fat milk with unsweetened almond milk for a lactose-free version that maintains creaminess.
- Gluten-Free: Replace regular flour with almond flour to cater to gluten sensitivities while keeping the soufflé light.
- Sweetener Swap: Use a sugar substitute in place of powdered sugar to create a sugar-free soufflé option without compromising taste.
- Flavor Infusion: Add a teaspoon of espresso powder to elevate the chocolate flavor—you’ll be amazed at the depth it brings!
- Cocoa Variety: Experiment with different types of cocoa powders, like dark cocoa for a rich, intense taste or spiced cocoa for a cozy twist.
- Nutty Addition: Fold in finely chopped nuts, like walnuts or hazelnuts, for a delightful crunch and a nutty aroma that complements the chocolate beautifully.
- Decadent Topping: Serve with a dollop of low-fat whipped cream or a scoop of low-fat ice cream for an extra indulgence that balances the light soufflé.
- Zesty Twist: Incorporate a hint of orange zest into the batter for a refreshing pop of citrus that pairs wonderfully with chocolate!
Feeling adventurous? Try combining some of these variations and explore the different flavors! You might even be inspired to make a lovely indulgence like my Double Chocolate Peppermint cookies for another delightful treat!
Low-Fat Chocolate Soufflé Recipe FAQs
How do I choose the right cocoa powder for my soufflé?
Absolutely! I recommend using high-quality unsweetened Dutch-process cocoa powder, as it provides a rich and deep chocolate flavor. A brand like Valrhona is exceptional, but if you have regular cocoa powder on hand, that works too! Look for cocoa that has a dark, rich color for the best results.
How should I store my leftover chocolate soufflé?
If you have any cooled soufflé left, store it at room temperature for up to 2 hours for the best texture. For longer storage, loosely cover the soufflé and refrigerate it for up to 2 days. Keep in mind that the soufflé will lose some of its airy texture when refrigerated, but it’s still delicious!
Can I freeze the soufflé batter? How?
Absolutely! To freeze your soufflé batter, simply fill the prepared ramekins and cover them tightly with plastic wrap or aluminum foil. Store in the freezer for up to 1 month. When ready to bake, preheat your oven and place the frozen soufflés directly in. Just add a few extra minutes to the baking time, and you’ll have a delightful treat ready to impress!
What should I do if my soufflé doesn’t rise?
Very! If your soufflé doesn’t rise, it could be due to a few common issues. First, ensure your egg whites were whipped to stiff peaks—they need to be incorporated gently yet thoroughly to maintain their volume. If the soufflé was left too long before baking, that can cause deflation, so bake it as soon as the batter is prepared!
Are there any dietary considerations for my guests?
Definitely! This recipe is low in fat, making it a bit lighter, but be cautious with guests who have allergies. The soufflé contains eggs—essential for the structure—so it’s not suitable for those with egg allergies. To make it dairy-free, you can substitute low-fat milk with unsweetened almond milk without compromising the taste!
Can I make this soufflé ahead of time?
Yes, and here’s how: Prepare the batter in advance, cover the filled ramekins, and refrigerate them for up to 1 day. When you’re ready to serve, simply bake them fresh for a delightful, airy soufflé that’s sure to wow your guests!
Light & Airy Chocolate Soufflé That Will Wow Your Guests
Ingredients
Equipment
Method
- Preheat your oven to 350°F (175°C).
- Lightly coat each ramekin with cooking spray, then dust the insides with granulated sugar if desired.
- In a medium bowl, whisk together the powdered sugar, cocoa powder, and flour until well combined.
- In a small saucepan, combine the low-fat milk and water over medium heat until it simmers, then add to the dry mixture, stirring continuously.
- In a separate bowl, whip the egg whites with cream of tartar until soft peaks form; gradually add 3 tbsp granulated sugar until stiff peaks form.
- In another bowl, whisk the egg yolks and vanilla extract, then gently fold into the chocolate batter.
- Gently fold the whipped egg whites into the chocolate batter in three additions.
- Evenly divide the soufflé batter among the prepared ramekins, filling them about three-quarters full.
- Bake for about 20 minutes until puffed up and slight jiggle in the center.
- Remove from oven, dust with powdered sugar, and serve immediately.
Leave a Reply