
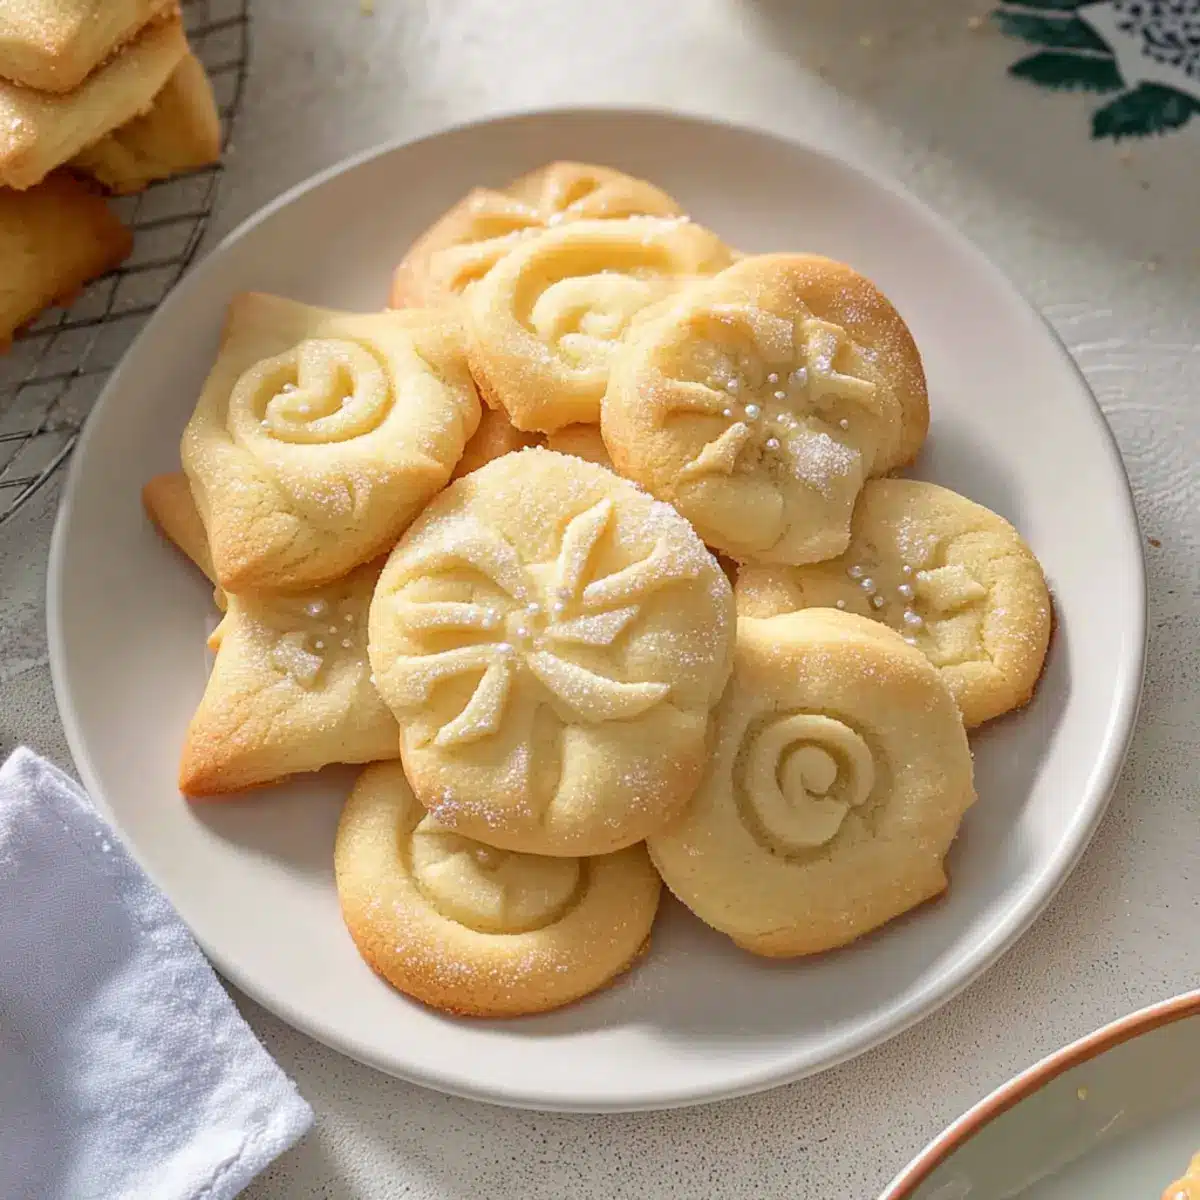
Amid the chaos of holiday preparations, I stumbled upon a cherished childhood memory—a tin overflowing with Danish butter cookies, their buttery fragrance wafting through the air. These melt-in-your-mouth Danish Butter Cookies are not just a treat; they evoke warmth, nostalgia, and the joy of sharing. With only seven simple ingredients, you can whip up a batch that’s perfect for gifting or indulging during family gatherings. The best part? You can enjoy their rich buttery flavor without overwhelming sweetness, making them a delightful addition to your holiday spread. So, are you ready to create your own batch of these timeless cookies that will bring smiles and sweet memories all around?
Why Are Danish Butter Cookies Beloved?
Melt-in-your-mouth bliss: These cookies deliver a texture that’s simply irresistible, delighting your taste buds with every bite.
Nostalgic flavors: Each batch transports you back to childhood moments filled with warmth and family traditions during the holidays.
Super easy: With just seven simple ingredients, even novice bakers can whip up a delightful batch in no time.
Perfect for gifting: Pack these up in a beautiful tin, and you’ll have a heartfelt gift that friends and family will cherish.
Feeling inspired? Check out my Snowball Cookies Melt for another crowd-pleaser!
Danish Butter Cookies Ingredients
• Here’s what you need for these delightful treats!
For the Cookie Dough
- European Salted Butter – This gives a rich, buttery flavor and tender texture; unsalted butter works too if you add 1/4 teaspoon salt.
- Granulated Sugar – Not only sweetens but also aids in achieving that perfect crispy texture.
- Salt – Enhances the overall flavor profile of your Danish butter cookies.
- Egg Yolks – They contribute to a moist, rich cookie that melts in your mouth.
- Vanilla Extract – Infuses your cookies with a warm, sweet aroma that creates a cozy vibe.
- Whole Milk – Helps to soften the dough, making it easier to pipe cookie shapes.
- All-Purpose Flour – Provides structure to your cookies; can substitute with all-purpose flour only if cake flour isn’t available.
- Cake Flour – This crucial ingredient ensures a lighter, melt-in-your-mouth texture in your Danish butter cookies.
Get ready to create a batch that wraps you in nostalgia and warmth during this beautiful holiday season!
Step‑by‑Step Instructions for Danish Butter Cookies
Step 1: Prep Chilling
Clear space in your refrigerator and line baking sheets with parchment paper while you prepare the cookie dough. Shaping the cookies is vital, so once you’ve piped them, chill the formed shapes for 20-30 minutes. This will prevent overspreading during baking, ensuring your Danish butter cookies maintain their lovely form.
Step 2: Cream Butter Mixture
In the bowl of a stand mixer, add room temperature European salted butter and beat it on medium speed until it’s smooth and creamy, about 2 minutes. Gradually sprinkle in granulated sugar and a pinch of salt, mixing until the mixture turns light and fluffy—this process should take another 2-3 minutes, creating an airy texture that’s the foundation of your cookies.
Step 3: Incorporate Eggs & Vanilla
Add two egg yolks, vanilla extract, and whole milk to the creamed butter mixture. Beat on low speed just until everything is well combined, taking care not to over-mix. The mixture should appear glossy and smooth, imparting a delightful aroma that promises delicious Danish butter cookies.
Step 4: Combine Dry Ingredients
In a separate bowl, whisk together all-purpose flour and cake flour until evenly blended. Gradually incorporate the flour mixture into the wet ingredients while mixing on low speed. Keep mixing until no flour streaks remain visible; if the dough seems too thick, add an extra splash of milk to reach the perfect piping consistency.
Step 5: Pipe Cookies
Transfer the dough to a piping bag fitted with a star tip for a classic look. Carefully pipe your desired shapes—whether rosettes or straight lines—onto the prepared baking sheets, leaving space between each shape. Once piped, return the sheets to the refrigerator to chill again while you preheat your oven.
Step 6: Bake
Preheat your oven to 350°F (175°C). Once the cookies are nicely chilled, place them in the oven for 10-15 minutes. Keep watching for the edges to turn lightly golden; this is your cue that the melt-in-your-mouth Danish butter cookies are ready to come out. Allow them to cool slightly on the sheets before transferring to a wire rack.
Danish Butter Cookies Variations & Substitutions
Feel free to customize your Danish butter cookies with these delightful variations that will spark joy in every bite!
-
Gluten-Free: Substitute all-purpose flour with a gluten-free blend for an equally delicious treat that caters to dietary needs.
You won’t miss the gluten; it’s all about the buttery flavor still shining through! -
Almond Extract: Swap vanilla extract for almond extract to add a nutty twist that pairs beautifully with the buttery texture.
This subtle change adds warmth and depth, perfect for a festive touch. -
Festive Sprinkles: Decorate your piped cookies with colorful sprinkles or coarse sugar just before baking to make them truly festive.
This small addition brings a playful element to your holiday cookie tray, and who can resist a sprinkle of joy? -
Citrus Zest: For a bright flavor boost, incorporate orange or lemon zest into your dough for a refreshing twist.
The zesty aroma will fill your kitchen, offering a beautiful contrast to the rich butteriness. -
Chocolate Drizzle: Dive into decadence by drizzling melted chocolate over cooled cookies for an extra indulgence.
This chocolatey blanket adds a lovely touch of richness that complements the buttery base. -
Mini Sugar Cookies: If you’re looking for a smaller treat, pipe mini versions of these cookies for bite-sized delights.
Perfect for sharing or as a sweet addition to any dessert table, they pack all the buttery flavor in a petite form! -
Matcha Powder: For a unique green twist, incorporate matcha powder into the dough.
This not only adds color but lends a mild earthiness that beautifully balances the sweetness.
Feeling inspired to bake? If you’re interested in exploring other cookie recipes, you might enjoy my delightful Double Chocolate Peppermint Cookies or perhaps you’d like to make some Mini Sugar Cookies to go alongside these decadent Danish delights!
Expert Tips for Danish Butter Cookies
-
Use Room Temperature Ingredients: Ensure your butter and egg yolks are at room temperature for optimal mixing, leading to a smooth dough that’s easy to pipe.
-
Chill, Chill, Chill: Don’t skip the chilling step! This prevents overspreading, ensuring your cookies keep their beautiful shapes during baking.
-
Watch Baking Time: Keep a close eye on your cookies in the oven; baking times vary based on shapes. Look for light golden edges for that perfect texture.
-
Don’t Over Mix: Over mixing can create tough cookies due to gluten development. Mix just until combined for melt-in-your-mouth Danish butter cookies.
-
Experiment with Shapes: Try different piping shapes or add festive sprinkles before baking to personalize your cookies and make them even more appealing.
How to Store and Freeze Danish Butter Cookies
Room Temperature: Store cookies in an airtight container at room temperature for up to 5 days to maintain their delightful texture and flavor.
Fridge: If you prefer a longer shelf life, refrigerate cookies in a sealed container for up to 1 week. Allow them to come to room temperature before enjoying.
Freezer: For extended storage, freeze cookies in an airtight container or a heavy-duty freezer bag for up to 3 months. Thaw in the fridge overnight or at room temperature before serving.
Reheating: To refresh the cookies, briefly warm them in a preheated oven at 250°F (120°C) for about 5 minutes. Enjoy these melt-in-your-mouth Danish butter cookies any time!
Make Ahead Options
These melt-in-your-mouth Danish butter cookies are perfect for busy home cooks looking to save time! You can prepare the cookie dough and refrigerate it for up to 2 days without sacrificing quality. Simply pipe the desired shapes onto parchment-lined baking sheets, then cover with plastic wrap and chill in the fridge. If you’re planning further ahead, the uncooked dough can be frozen for 2-3 months; just make sure to wrap portions tightly in plastic wrap and place them in an airtight container. When you’re ready to bake, simply preheat your oven and bake directly from the freezer, adding an extra minute or two to the baking time. Enjoy freshly baked cookies with minimal effort!
What to Serve with Danish Butter Cookies
Imagine an evening surrounded by loved ones, where the aroma of freshly baked cookies mingles with delightful companion dishes, enhancing the festive atmosphere.
- Rich Hot Chocolate: A warm, creamy cup of cocoa perfectly complements the buttery flavors, inviting cozy conversations and sweet moments.
- Eggnog: This holiday classic, with its creamy, spiced notes, pairs beautifully with the delicate texture of Danish Butter Cookies, making every sip and bite a seasonal delight.
- Fresh Berries: The tartness of strawberries or raspberries offers a refreshing contrast to the cookies’ sweetness, balancing the flavors on your palate delightfully.
- Vanilla Ice Cream: A scoop of smooth vanilla ice cream alongside these melt-in-your-mouth cookies creates a delightful dessert experience that’s creamy and soothing.
- Coffee: A freshly brewed cup enhances the buttery richness and provides a perfect way to enjoy a sweet afternoon treat or evening gathering.
- Spiced Nuts: The crunch of spiced nuts adds texture and flavor contrast, providing a savory element to balance the sweetness of the cookies.
- Fruit Tart: Serving a colorful fruit tart adds freshness and vibrancy to your spread, making your dessert table an inviting feast.
- Sparkling Cider: This bubbly beverage adds a festive touch to your gathering, enhancing the joy of sharing sweet treats with friends and family.
- Cheese Board: Incorporate mild cheeses for a unique twist; their creaminess counteracts the sweetness while adding rich flavor, creating a well-rounded platter.
Danish Butter Cookies Recipe FAQs
What kind of butter should I use for Danish butter cookies?
I recommend using European salted butter for its rich, buttery flavor and tender texture. If you only have unsalted butter, that’s fine too; just add 1/4 teaspoon of salt to your dough to enhance the flavor.
How should I store leftover Danish butter cookies?
Store your cookies in an airtight container at room temperature for up to 5 days. This keeps them fresh and maintains their delightful texture. If you want to keep them for longer, refrigerate them in a sealed container for up to one week, allowing them to come back to room temperature before enjoying.
Can I freeze Danish butter cookies?
Absolutely! You can freeze cookies in an airtight container or a heavy-duty freezer bag for up to 3 months. To thaw, simply place them in the fridge overnight or let them come to room temperature for about an hour before serving. This way, you’ll always have these melt-in-your-mouth treats ready whenever a craving hits!
What should I do if my dough seems too thick?
If you find your dough is too thick to pipe smoothly, don’t worry! Just add a splash of whole milk, about a tablespoon at a time, until you reach the desired piping consistency. This little trick can really make a difference in achieving those beautiful shapes for your cookies.
Can these cookies be made gluten-free?
If you’re looking for a gluten-free option, you can replace the all-purpose flour and cake flour with a gluten-free flour blend that measures cup-for-cup. However, keep in mind that the texture may vary slightly, but you will still enjoy a buttery, melt-in-your-mouth cookie!
Are Danish butter cookies safe for pets?
While Danish butter cookies are delicious for humans, they contain ingredients like butter and sugar that aren’t recommended for pets. It’s best to keep these treats for your human family and offer your furry friends healthier alternatives made specifically for them!
Danish Butter Cookies That Melt in Your Mouth with Joy
Ingredients
Equipment
Method
- Clear space in your refrigerator and line baking sheets with parchment paper while you prepare the cookie dough.
- In the bowl of a stand mixer, add room temperature European salted butter and beat it on medium speed until it's smooth and creamy, about 2 minutes.
- Gradually sprinkle in granulated sugar and a pinch of salt, mixing until the mixture turns light and fluffy—this process should take another 2-3 minutes.
- Add two egg yolks, vanilla extract, and whole milk to the creamed butter mixture and beat on low speed just until well combined.
- In a separate bowl, whisk together all-purpose flour and cake flour until evenly blended. Gradually incorporate into the wet ingredients while mixing on low speed.
- Transfer the dough to a piping bag fitted with a star tip. Carefully pipe desired shapes onto the prepared baking sheets.
- Preheat your oven to 350°F (175°C). Once the cookies are nicely chilled, place them in the oven for 10-15 minutes.
- Allow them to cool slightly on the sheets before transferring to a wire rack.
Leave a Reply