
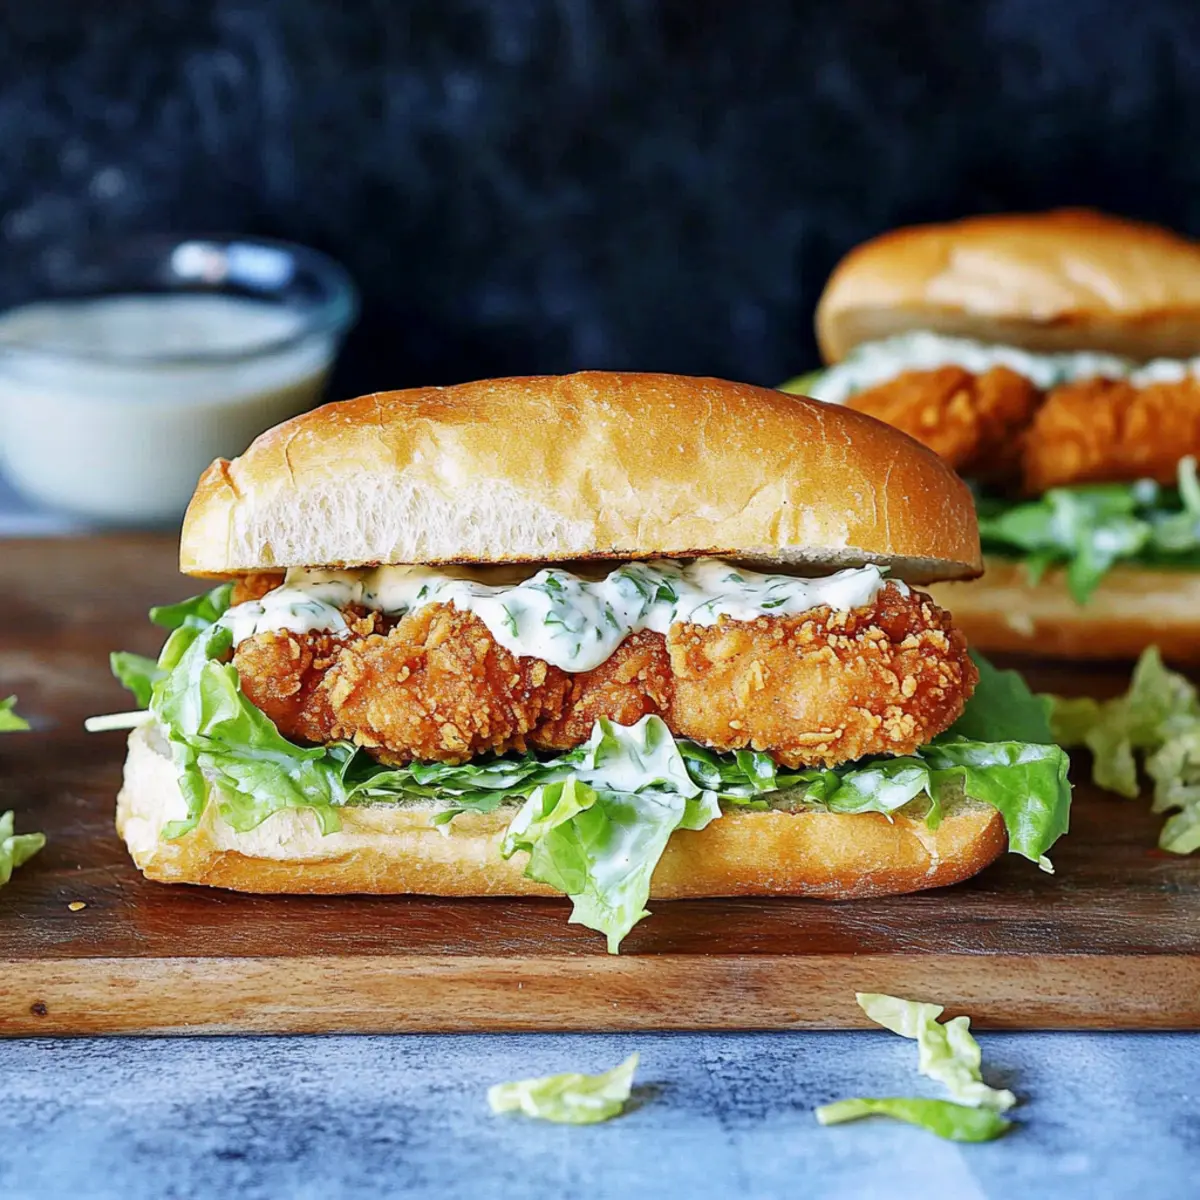
With a crisp crunch that tempts your taste buds and a creamy dressing that wraps around fresh flavors, this Crispy Chicken Caesar Sandwich is sure to steal your heart. Picture sinking your teeth into succulent, golden-fried chicken cutlets nestled in a crusty French baguette, layered with vibrant romaine lettuce and drizzled with homemade Caesar dressing. This sandwich not only makes for a quick and satisfying lunch or dinner but also offers a delightful twist on the classic Caesar salad—perfect for those busy weeknights! Plus, it’s easily adaptable—whether you want a gluten-free option or prefer a different protein, this recipe has got you covered. Are you ready to elevate your sandwich game? Let’s dive into making one of the best handheld meals you’ll ever taste!

Why is this sandwich so amazing?
Crispy crunch awaits you in every bite of this mouthwatering Chicken Caesar Sandwich. Creamy dressing adds a luxurious touch, ensuring your taste buds are pampered. Quick and easy, this recipe shines for busy nights, ready in no time! Versatile adaptations mean you can swap in your favorite greens or go gluten-free with ease. Crowd-pleaser appeal makes it perfect for gatherings or weeknight dinners—everyone will be asking for seconds! Try pairing it with a side of crispy potato wedges for a delightful meal experience.
Crispy Chicken Caesar Sandwich Ingredients
-
For the Caesar Dressing
• Full-Fat Mayonnaise – Adds creaminess to the dressing; consider low-fat for a lighter option.
• Greek Yogurt – Provides tanginess and richness, a healthier alternative than sour cream.
• Dijon Mustard – Enhances flavor with a slight kick; feel free to use yellow mustard if needed.
• Worcestershire Sauce – Gives depth to the dressing; tamari can be used for a gluten-free option.
• Lemon Juice – Brightens the flavors of the dressing; fresh juice is preferred for vibrant taste.
• Parmesan Cheese – Adds a nutty note and richness; try pecorino Romano for a twist.
• Minced Garlic – Infuses the dressing with robust flavor; garlic powder can substitute in a pinch.
• Black Pepper – A simple seasoning that complements all the flavors; use freshly ground for best taste.
• Sea Salt – Enhances flavors; adjust to your taste. -
For the Chicken Cutlets
• Chicken Cutlets – The heart of the sandwich that provides a satisfying crunch; ensure even thickness for cooking.
• Salt and Pepper – Basic seasonings for bringing out the flavor of the chicken. -
For the Breading
• All-Purpose Flour – Forms the base layer of the breading; swap for gluten-free flour to adapt the recipe.
• Eggs – Binds the breading to the chicken; use flax eggs for a vegan option.
• Panko Breadcrumbs – Creates a crunchy coating; regular breadcrumbs can be mixed in for different textures.
• Regular Breadcrumbs – Use alongside panko for an even crust; seasoned varieties can add extra flavor. -
For Frying
• Oil for Frying – Essential for achieving a crispy exterior; canola or vegetable oil works beautifully. -
For Assembly
• Romaine Hearts – Adds freshness and a delightful crunch; always dress just before serving.
• French Baguettes – The perfect vessel for this sandwich; ciabatta or sourdough also work well.
This Crispy Chicken Caesar Sandwich is not only delectable but also allows for personal touches to meet your tastes and dietary needs!
Step‑by‑Step Instructions for Crispy Chicken Caesar Sandwich
Step 1: Prepare Caesar Dressing
In a medium bowl, whisk together full-fat mayonnaise, Greek yogurt, Dijon mustard, Worcestershire sauce, lemon juice, grated Parmesan cheese, minced garlic, black pepper, and sea salt until smooth. Save a portion of the dressing for later; mix in chopped romaine lettuce and refrigerate to let the flavors meld while you prep the chicken cutlets.
Step 2: Prep Chicken
Take your chicken cutlets and place them between two sheets of plastic wrap. Use a meat mallet to pound them to an even thickness of about half an inch, which helps them cook evenly. Once flattened, season both sides generously with salt and pepper, ensuring each bite of your Crispy Chicken Caesar Sandwich will be bursting with flavor.
Step 3: Set Up Breading Station
Arrange three shallow dishes on your countertop: one with all-purpose flour seasoned with salt and smoked paprika, another with whisked eggs, and a third with a mix of panko and regular breadcrumbs seasoned with garlic powder and dried parsley. This breading station will ensure that your chicken gets a perfectly crisp coating.
Step 4: Fry Chicken
In a large skillet, heat enough oil to cover the bottom over medium heat until shimmering, approximately 350°F (175°C). Dredge each seasoned chicken cutlet in the flour, then dip it in the egg, followed by an even coating of breadcrumbs. Fry the cutlets in hot oil for about 4-5 minutes on each side, or until they are golden brown and cooked through, reaching an internal temperature of 165°F (74°C).
Step 5: Assemble Sandwich
Slice your crispy baguettes in half and spread a generous layer of the homemade Caesar dressing on each side. Place a hot fried chicken cutlet inside, then top with the dressed romaine lettuce and a sprinkle of extra Parmesan cheese. The delightful combination of flavors in your Crispy Chicken Caesar Sandwich is ready to enjoy, so serve it immediately for the best experience.

Expert Tips for the Best Chicken Caesar Sandwich
-
Freshly Made Dressing: Always whip up your homemade Caesar dressing just before assembling. This ensures the flavors are vibrant and the dressing is creamy, enhancing your crispy Chicken Caesar Sandwich delightfully.
-
Proper Chicken Pounding: For even cooking and maximum tenderness, make sure to pound your chicken cutlets evenly. This prevents undercooked or dry spots, ensuring each bite in your sandwich is juicy.
-
Oil Temperature Magic: Maintain your oil temperature around 350°F (175°C) for optimal frying. Too hot and the breading burns; too cool and you’ll end up with greasy chicken. Use a thermometer for precision!
-
Prep Ahead: Portion out and set up your breading station before you begin frying. This keeps your workflow smooth and efficient, minimizing mess and time when you’re ready to cook the crispy Chicken Caesar Sandwich.
-
Avoid Sogginess: Assemble your sandwiches right before serving to keep the bread crusty and the lettuce crisp. This ensures a delightful crunch with every delectable bite.
Make Ahead Options
Preparing your Crispy Chicken Caesar Sandwich ahead of time can be a real lifesaver for busy weeknights! You can effortlessly make the Caesar dressing and store it in the refrigerator for up to 3 days, ensuring maximum flavor. Additionally, the chicken cutlets can be seasoned and breaded, then stored in an airtight container in the fridge for up to 24 hours before frying. This way, you can just heat the oil and fry your cutlets when you’re ready to assemble. To maintain that delightful crisp, fry the chicken right before serving and dress the romaine lettuce just before adding it to the sandwich to avoid sogginess. Enjoy a quick, delicious meal with all the satisfaction!
What to Serve with Crispy Chicken Caesar Sandwich
When you’re ready to elevate your lunch or dinner table, consider these delightful pairings that perfectly complement each crispy, flavorful sandwich.
-
Crispy French Fries: The ultimate sidekick, their golden crunch mirrors the chicken’s texture and is perfect for dipping in extra dressing.
-
Refreshing Coleslaw: Bright and tangy, this cool slaw adds a delightful crunch and balances the richness of the sandwich beautifully.
-
Garlic Butter Roasted Asparagus: Earthy and savory, the tender asparagus elevates the meal, bringing freshness that cuts through the sandwich’s flavors.
-
Seasoned Potato Wedges: Thick and crispy, these hearty wedges are satisfying and pair wonderfully with the creamy dressing left on your plate.
-
Creamy Potato Salad: A cool, creamy counterpoint to the warm sandwich, this classic dish adds comfort and flavor, making each bite enjoyable.
-
Iced Tea or Lemonade: Refreshing drinks that cleanse the palate between bites, their sweetness and acidity complement the savoriness beautifully.
-
Caesar Salad Bites: For an extra touch of Caesar worship, an appetizer with romaine and croutons drizzled with leftover dressing makes for a flavorful teaser.
Indulging in these savory sides ensures your crispy Chicken Caesar Sandwich steals the show on any dinner table!
Crispy Chicken Caesar Sandwich Variations
Feel free to make this delightful recipe your own with these tasty twists and adjustments!
-
Gluten-Free: Swap all-purpose flour and breadcrumbs for gluten-free alternatives like almond flour or gluten-free panko to cater to gluten sensitivities.
-
Spicy: Add cayenne pepper or your favorite hot sauce to the breading for a fiery kick that will escalate the flavor in each bite. It’s a delightful way to bring heat to your lunch!
-
Healthier Option: Use grilled chicken instead of fried for a lighter dish that maintains the savory flavors of the classic Caesar. Sizzling on the grill brings in a totally different deliciousness.
-
Vegetarian Delight: Opt for crispy eggplant or zucchini slices instead of chicken cutlets. Breading and frying the vegetables creates a satisfying crunch that pairs beautifully with the creamy dressing.
-
Cheesy Variations: Substitute Parmesan with crumbled feta or blue cheese in the dressing for a unique flavor twist that adds an unexpected gourmet touch.
-
Herbal Boost: Mix in fresh herbs like basil or cilantro into the Caesar dressing for an exciting herbaceous layer that will uplift the entire sandwich.
-
Mixed Greens: Try using arugula or spinach instead of romaine lettuce. They will impart distinct flavors and a delightful texture that transform this sandwich completely.
-
Savory Extras: Add crispy bacon or avocado slices inside the sandwich for an indulgent touch. These additions can elevate your Chicken Caesar Sandwich into something extraordinary and decadent.
Explore these variations to find what your taste buds love most! If you’re curious about other flavorful chicken recipes, check out our Mediterranean Tzatziki Chicken or enjoy the delightful crunch of our Asian Chicken Cranberry Salad. The kitchen is your canvas—let’s get creative!
How to Store and Freeze Crispy Chicken Caesar Sandwich
Fridge: Store leftover components separately in airtight containers for up to 3 days to maintain crispness; keep chicken and dressing apart to prevent sogginess.
Freezer: Freeze cooled, breaded chicken cutlets in a single layer on a baking sheet, then transfer to an airtight container or freezer bag for up to 2 months.
Reheating: Reheat frozen chicken in the oven at 375°F (190°C) for about 15-20 minutes until heated through and crispy.
Assembly Tip: Assembling the Crispy Chicken Caesar Sandwich just before serving ensures the freshest taste and texture!
Crispy Chicken Caesar Sandwich Recipe FAQs
How do I choose the best chicken cutlets?
Absolutely! Look for chicken cutlets that are plump and pink without dark spots. If you’re buying whole chicken breasts, you can easily slice them into cutlets and pound to even thickness—a crucial step for ensuring uniform cooking and tenderness.
How should I store leftovers?
Very! For the best experience, store leftover components separately. Place the fried chicken in an airtight container in the fridge, where it should last for up to 3 days. Keep the Caesar dressing stored in another container to preserve its creaminess. This way, you can easily assemble your Crispy Chicken Caesar Sandwich when you’re ready to enjoy it again!
Can I freeze the breaded chicken cutlets?
Absolutely! To freeze, lay cooled, breaded chicken cutlets on a baking sheet in a single layer and freeze until firm. Then, transfer them to an airtight container or freezer bag for up to 2 months. For the best results, bake the frozen chicken cutlets at 375°F (190°C) for 15-20 minutes to ensure they become crispy again after thawing.
What’s the best way to reheat the chicken for my sandwich?
Certainly! Preheat your oven to 375°F (190°C). Place the frozen or refrigerated chicken cutlets on a baking sheet and cook for about 15-20 minutes, or until they’re heated through and crispy. This method helps retain that wonderful crunch!
Can I make this recipe gluten-free?
Yes! If you’re looking for a gluten-free option, simply substitute all-purpose flour with a gluten-free flour blend and use gluten-free breadcrumbs in the breading process. This way, you can still enjoy a delicious Crispy Chicken Caesar Sandwich without the gluten!
Is there a way to make this sandwich healthier?
Absolutely! You can grill the chicken instead of frying it for a lighter option. Season it as usual, then cook on a preheated grill for about 5-6 minutes per side or until fully cooked. This will give you a delicious, healthier option while maintaining the essence of the Crispy Chicken Caesar Sandwich!

Crispy Chicken Caesar Sandwich That Will Brighten Your Day
Ingredients
Equipment
Method
- In a medium bowl, whisk together full-fat mayonnaise, Greek yogurt, Dijon mustard, Worcestershire sauce, lemon juice, Parmesan cheese, minced garlic, black pepper, and sea salt until smooth.
- Save a portion of the dressing for later; mix in chopped romaine lettuce and refrigerate to let the flavors meld while you prep the chicken cutlets.
- Place chicken cutlets between plastic wrap and pound them to an even thickness of about half an inch.
- Season both sides generously with salt and pepper.
- Set up three shallow dishes: one with flour, another with whisked eggs, and a third with a mix of panko and regular breadcrumbs.
- Heat oil in a skillet over medium heat until shimmering.
- Dredge each chicken cutlet in flour, dip in egg, and coat in breadcrumbs, then fry for about 4-5 minutes on each side until golden brown.
- Slice baguettes in half, spread Caesar dressing, place fried chicken cutlet, top with dressed romaine lettuce, and sprinkle extra Parmesan cheese.
Leave a Reply