
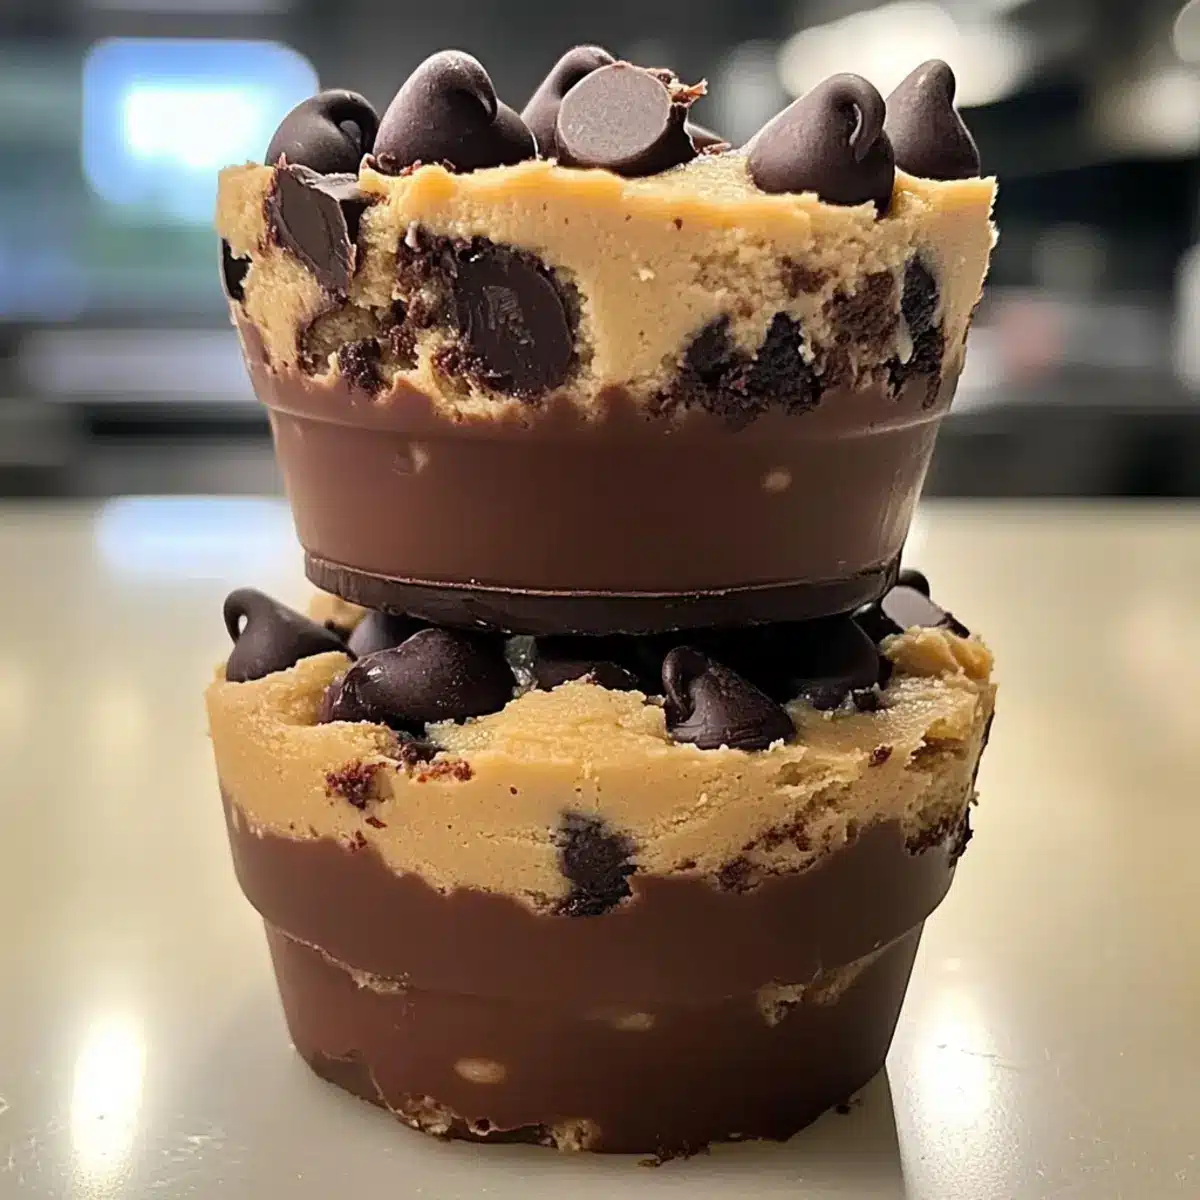
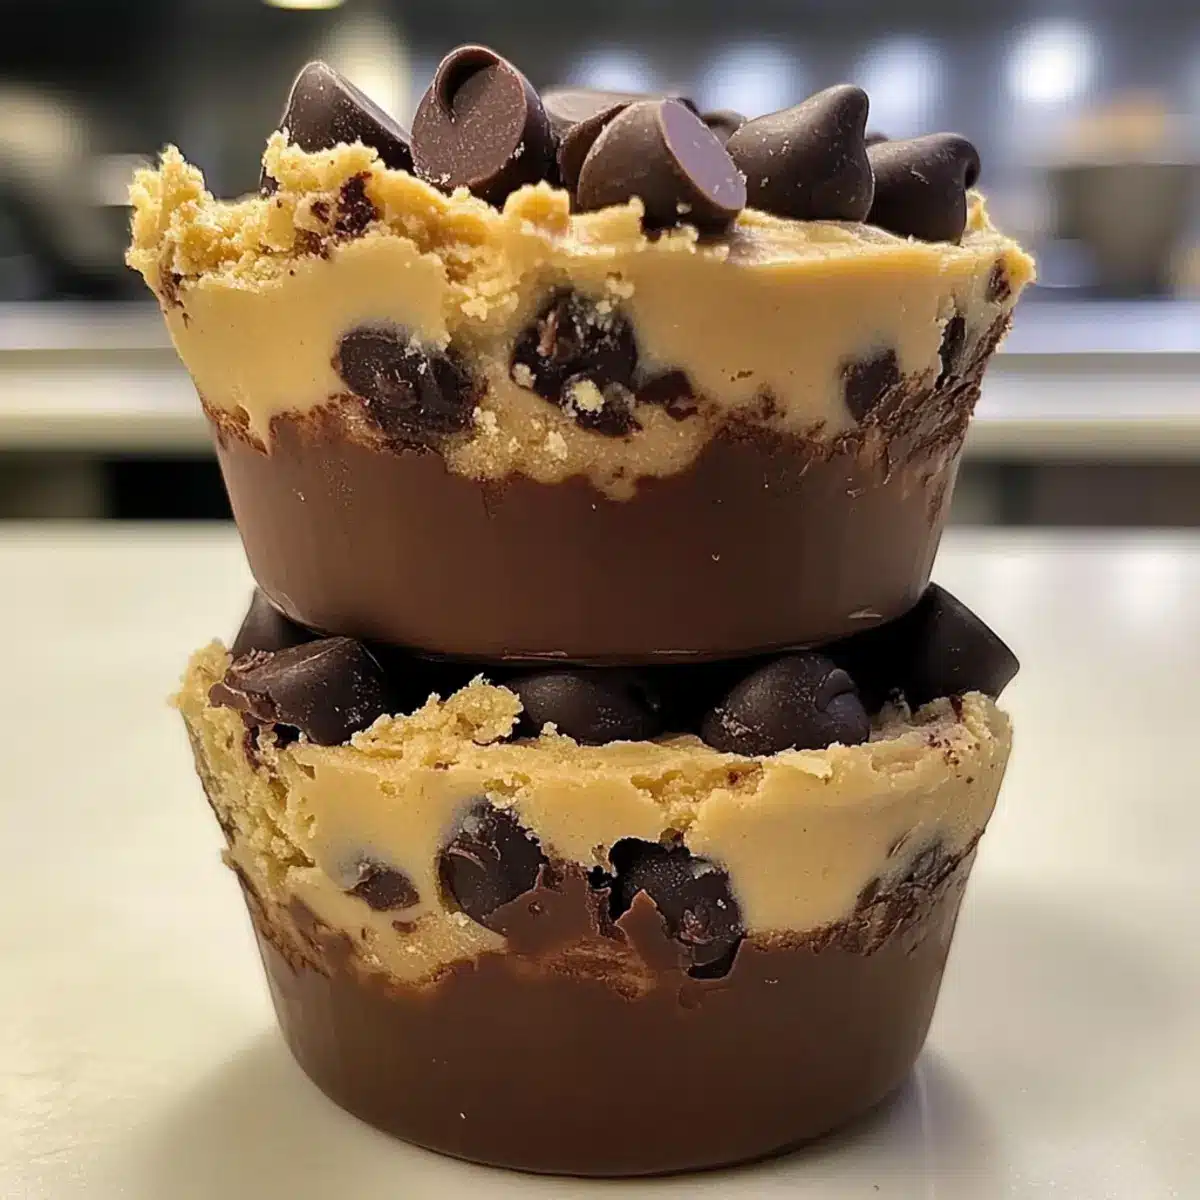
You wouldn’t think that making dessert could be this simple, yet here I am, whipping up a batch of no-bake Chocolate Chip Cookie Dough Cups that taste like they came straight from a gourmet bakery. These little delights are not only a joy to create but also a crowd-pleaser, making them the perfect treat for parties or cozy family nights. With their crunchy cookie crust, rich chocolate layer, and creamy, egg-free cookie dough topping, you’ll be amazed at how quickly they come together. Plus, they’re completely customizable—feel free to toss in your favorite mix-ins for a personal touch! Who’s ready to indulge in a sweet, no-bake adventure?
Why are these cookie cups irresistible?
Irresistible Flavors: The blend of rich chocolate and creamy dough makes these cups a standout treat.
Quick & Easy: With minimal prep time, even novice bakers can whip these up in no time!
Customizable Delight: Feel free to add nuts, sprinkles, or even go for a peanut butter dough twist for extra flair.
Perfect for Any Occasion: Whether it’s a birthday party or a cozy family movie night, these cups are a guaranteed hit.
No-Bake Convenience: Beat the heat and the hassle—just chill and serve these delightful creations.
You’ll also love pairing them with a scoop of vanilla ice cream for an indulgent dessert experience! And if you’re a fan of Butter Chocolate Cookies or Chocolate Peppermint Cookies, get ready to add this recipe to your must-make list!
Chocolate Chip Cookie Dough Cup Ingredients
For the Crust
- Crushed Chocolate Chip Cookies – Provides the crust; a base layer that adds a sweet crunch. Note: Gluten-free cookies can be used for a gluten-free version.
- Melted Butter – Binds the cookie crumbs together for a solid crust structure. Note: Use unsalted butter for better control over salt levels.
For the Chocolate Layer
- Semi-Sweet Chocolate Chips – Forms the rich chocolate layer, imparting deep chocolate flavor.
- Coconut Oil or Butter – Used to melt with the chocolate chips for a smooth texture; can substitute with any neutral oil.
For the Cookie Dough Filling
- Unsalted Butter (softened) – Adds creaminess and helps in making the dough fluffy.
- Brown Sugar – Provides moisture and a deep caramel flavor to the cookie dough.
- Granulated Sugar – Adds sweetness; can be reduced if desired.
- Vanilla Extract – Enhances flavor; consider using pure vanilla for best results.
- Heat-Treated All-Purpose Flour – Ensures the dough is safe to eat without baking; vital for the cookie dough component. Note: Substitute with almond or oat flour for gluten-free needs.
- Milk – Adds moisture to the dough; non-dairy milk can be used as a substitute.
- Mini Chocolate Chips – For a burst of chocolate in the cookie dough; any chocolate chips can be used.
- Extra Chocolate Chips – For garnish, adding decoration and additional chocolate flavor.
Step‑by‑Step Instructions for Chocolate Chip Cookie Dough Cups
Step 1: Prepare the Crust
Begin by crushing chocolate chip cookies into fine crumbs using a food processor or a sealed plastic bag and rolling pin. In a bowl, mix the cookie crumbs with melted butter until fully combined. Press the mixture firmly into the bottom of silicone muffin molds, creating a sturdy base. Place the molds in the freezer for 10-15 minutes to set the crust.
Step 2: Make the Chocolate Layer
While the crust is chilling, melt semi-sweet chocolate chips with coconut oil or butter in a microwave-safe bowl. Heat in 30-second intervals, stirring between each, until the mixture is completely smooth and glossy. Once the crust has set, pour the melted chocolate over it, ensuring an even layer. Return the molds to the freezer for another 10-15 minutes, allowing the chocolate to firm up.
Step 3: Prepare the Cookie Dough
In a large mixing bowl, beat the softened unsalted butter with brown and granulated sugars until light and fluffy, about 2-3 minutes. Stir in the vanilla extract and milk until well blended. Gradually add the heat-treated all-purpose flour, mixing until just combined. Fold in mini chocolate chips for delicious bursts throughout the cookie dough.
Step 4: Assemble the Cups
Once the chocolate layer is fully set, scoop the prepared cookie dough onto the chocolate layer in each cup, spreading it evenly with a spatula. Ensure the cookie dough sits smoothly on top of the chocolate. Generously sprinkle extra chocolate chips on top for added texture and visual appeal.
Step 5: Chill and Serve
Refrigerate the assembled Chocolate Chip Cookie Dough Cups for at least 20 minutes to allow everything to firm up beautifully. This chilling will enhance the texture of the cookie dough and ensure your dessert holds together perfectly. Once chilled, carefully remove the cups from the silicone molds, and enjoy your delightful no-bake treats!
What to Serve with No-Bake Chocolate Chip Cookie Dough Cups
Elevate your dessert experience by pairing these creamy delights with complementary treats that enhance their sweet profile.
-
Vanilla Ice Cream: The cold, creamy texture balances the rich cookie dough, creating a delightful contrast that’s oh-so-satisfying.
-
Fresh Berries: Juicy strawberries or raspberries add a refreshing, fruity note that cuts through the sweetness and adds vibrant color.
-
Whipped Cream: Light and airy, a dollop of freshly whipped cream can add a luxurious touch, making each bite even more indulgent.
-
Chocolate Sauce: Drizzle warm chocolate over the cups for an extra layer of richness that chocolate lovers will adore.
-
Coffee or Espresso: Enjoy with a cup of coffee or espresso to provide a lovely depth of flavor that matches the sweet treats beautifully.
-
Nutty Bark: Serve with a piece of dark chocolate nut bark for a crunchy contrast that complements the creamy cookie layers.
-
Malibu Rum Cocktail: Pair with a tropical coconut-infused cocktail for a fun party treat that adds a refreshing twist to your dessert table.
-
Peppermint Hot Chocolate: Especially lovely in winter, this cozy drink creates a comforting pairing that’s perfect for holiday gatherings.
Let these suggestions inspire you to create a delightful dessert spread that’s sure to impress friends and family!
How to Store and Freeze Chocolate Chip Cookie Dough Cups
Fridge: Store the Chocolate Chip Cookie Dough Cups in an airtight container for up to 7 days. Make sure they are completely cool to maintain their perfect texture.
Freezer: For longer storage, freeze the cups in an airtight container for up to 3 months. Separate layers with parchment paper to prevent sticking.
Thawing: When ready to enjoy, thaw in the fridge overnight or at room temperature for a couple of hours for the best results.
Serving Suggestion: Serve chilled for the ideal combination of flavors and textures, or pair with a scoop of ice cream for an indulgent treat!
Expert Tips for Chocolate Chip Cookie Dough Cups
-
Freeze Properly: Ensure the crust is frozen long enough to prevent sogginess from the melted chocolate layer. Take the time—it’s worth it!
-
Heat-Treat Flour: Don’t skip this step for safety. Spread all-purpose flour on a baking sheet and bake at 350°F for 5 minutes to eliminate any bacteria.
-
Use Silicone Molds: They’re your best friend for easy removal. The flexibility makes popping out your cookie cups a breeze, so choose silicone!
-
Customize Wisely: While the chocolate chip cookie dough recipe is delicious as-is, feel free to personalize with your favorite mix-ins. Just remember not to overload it!
-
Cool for Texture: Refrigerate the assembled cups for at least 20 minutes to achieve a delightful texture that balances the creamy dough and crunchy crust.
These tips will help ensure that your Chocolate Chip Cookie Dough Cups turn out irresistible every time!
Make Ahead Options
These delicious Chocolate Chip Cookie Dough Cups are perfect for meal prep enthusiasts! You can prepare the cookie crust and chocolate layer up to 24 hours in advance. Simply follow the first two steps, allowing them to chill properly. For the cookie dough filling, you can mix it up to 3 days ahead and store it in an airtight container in the refrigerator to maintain freshness. Just be sure to fold in the mini chocolate chips right before assembly to keep them vibrant and intact. When you’re ready to serve, all you have to do is scoop the chilled cookie dough onto the chocolate layer and let it set in the refrigerator for 20 minutes. This way, you’ll have an irresistible dessert ready with minimal fuss, perfect for busy weeknights or spontaneous gatherings!
Chocolate Chip Cookie Dough Cups Variations
Feel free to get creative with your cookie cup creations and elevate their deliciousness!
- Nutty Delight: Add 1/4 cup of chopped nuts to the cookie dough for a satisfying crunch. Walnuts or pecans work beautifully!
- Peanut Butter Swirl: Replace half of the butter in the dough with peanut butter for a rich, nutty twist. The combination of flavors will be heavenly.
- Colorful Sprinkles: Toss in 2 tablespoons of sprinkles for a festive and fun touch. They’re perfect for birthdays or special occasions!
- Oatmeal Base: Use crushed oatmeal cookies instead of chocolate chip cookies for an oatmeal twist on the crust. It’s a hearty and delightful alternative.
- Minty Freshness: Add a few drops of mint extract to the chocolate layer. This will bring a refreshing minty flavor that complements the chocolate perfectly.
- S’mores Magic: Layer crushed graham crackers in place of half the cookie crust for a s’mores-inspired treat. Don’t forget the mini marshmallows on top!
- Espresso Boost: Mix in 1 tablespoon of instant espresso powder into the chocolate layer for a caffeinated kick. The rich taste will have coffee lovers swooning.
- Spicy Kick: Stir in a pinch of cayenne pepper to the cookie dough for a surprising spicy note. It’s an unexpected yet daring flavor combination.
Don’t forget to enjoy your delightful creations while they last! And if you’re also a fan of other sweet treats, check out these tasty options: Snowball Cookies Melt or Caramel Apple Dessert Cups for more delightful inspirations!
Chocolate Chip Cookie Dough Cups Recipe FAQs
What type of cookies should I use for the crust?
Absolutely! For the crust, you can use traditional chocolate chip cookies, but feel free to get creative with the type of cookies used. For a gluten-free version, I highly recommend gluten-free cookies—they work wonderfully, providing the same sweet crunch and great taste.
How should I store Chocolate Chip Cookie Dough Cups?
Store your delicious Chocolate Chip Cookie Dough Cups in an airtight container in the refrigerator for up to 7 days. Make sure they are completely chilled to maintain their delightful texture! If you’re thinking of making a big batch, you can also freeze them—more on that in the next question!
Can I freeze these cookie dough cups?
Certainly! To freeze your Chocolate Chip Cookie Dough Cups, place them in a single layer in an airtight container, separating layers with parchment paper to prevent sticking. They will stay fresh for up to 3 months. When you’re ready to enjoy, simply thaw them in the fridge overnight or at room temperature for a couple of hours. Perfectly chilled, they’ll taste just as delightful!
What if my cookie dough is too crumbly?
If you find your cookie dough is a bit crumbly, don’t worry! This usually happens due to the flour’s moisture content. Simply add a tablespoon of milk or melted butter until the dough holds together better. Mix in increments—this way, you avoid making it too wet. Remember, a bit of adjustment can lead to a perfect texture!
Are these cookie cups safe for people with certain allergies?
Great question! The Chocolate Chip Cookie Dough Cups are egg-free, making them suitable for those with egg allergies. However, be mindful of the ingredient choices for added inclusions—like nuts or dairy in chocolate chips—if you have any nut allergies or dairy sensitivities. Always check labels to ensure they meet specific dietary needs!
Can I make the cookie dough in advance?
Yes, you can! I often make the cookie dough ahead of time. Just prepare it without assembling it into the cups. Store the cookie dough in an airtight container in the fridge for up to 3 days, and when you’re ready to assemble, simply follow the steps starting from the crust preparation. That way, you can treat friends and family with a fresh, homemade dessert on short notice!
Irresistible Chocolate Chip Cookie Dough Cups You’ll Love
Ingredients
Equipment
Method
- Begin by crushing chocolate chip cookies into fine crumbs using a food processor or a sealed plastic bag and rolling pin. In a bowl, mix the cookie crumbs with melted butter until fully combined. Press the mixture firmly into the bottom of silicone muffin molds, creating a sturdy base. Place the molds in the freezer for 10-15 minutes to set the crust.
- While the crust is chilling, melt semi-sweet chocolate chips with coconut oil or butter in a microwave-safe bowl. Heat in 30-second intervals, stirring between each, until the mixture is completely smooth and glossy. Once the crust has set, pour the melted chocolate over it, ensuring an even layer. Return the molds to the freezer for another 10-15 minutes, allowing the chocolate to firm up.
- In a large mixing bowl, beat the softened unsalted butter with brown and granulated sugars until light and fluffy, about 2-3 minutes. Stir in the vanilla extract and milk until well blended. Gradually add the heat-treated all-purpose flour, mixing until just combined. Fold in mini chocolate chips for delicious bursts throughout the cookie dough.
- Once the chocolate layer is fully set, scoop the prepared cookie dough onto the chocolate layer in each cup, spreading it evenly with a spatula. Ensure the cookie dough sits smoothly on top of the chocolate. Generously sprinkle extra chocolate chips on top for added texture and visual appeal.
- Refrigerate the assembled Chocolate Chip Cookie Dough Cups for at least 20 minutes to allow everything to firm up beautifully. This chilling will enhance the texture of the cookie dough and ensure your dessert holds together perfectly. Once chilled, carefully remove the cups from the silicone molds, and enjoy your delightful no-bake treats!
Leave a Reply