
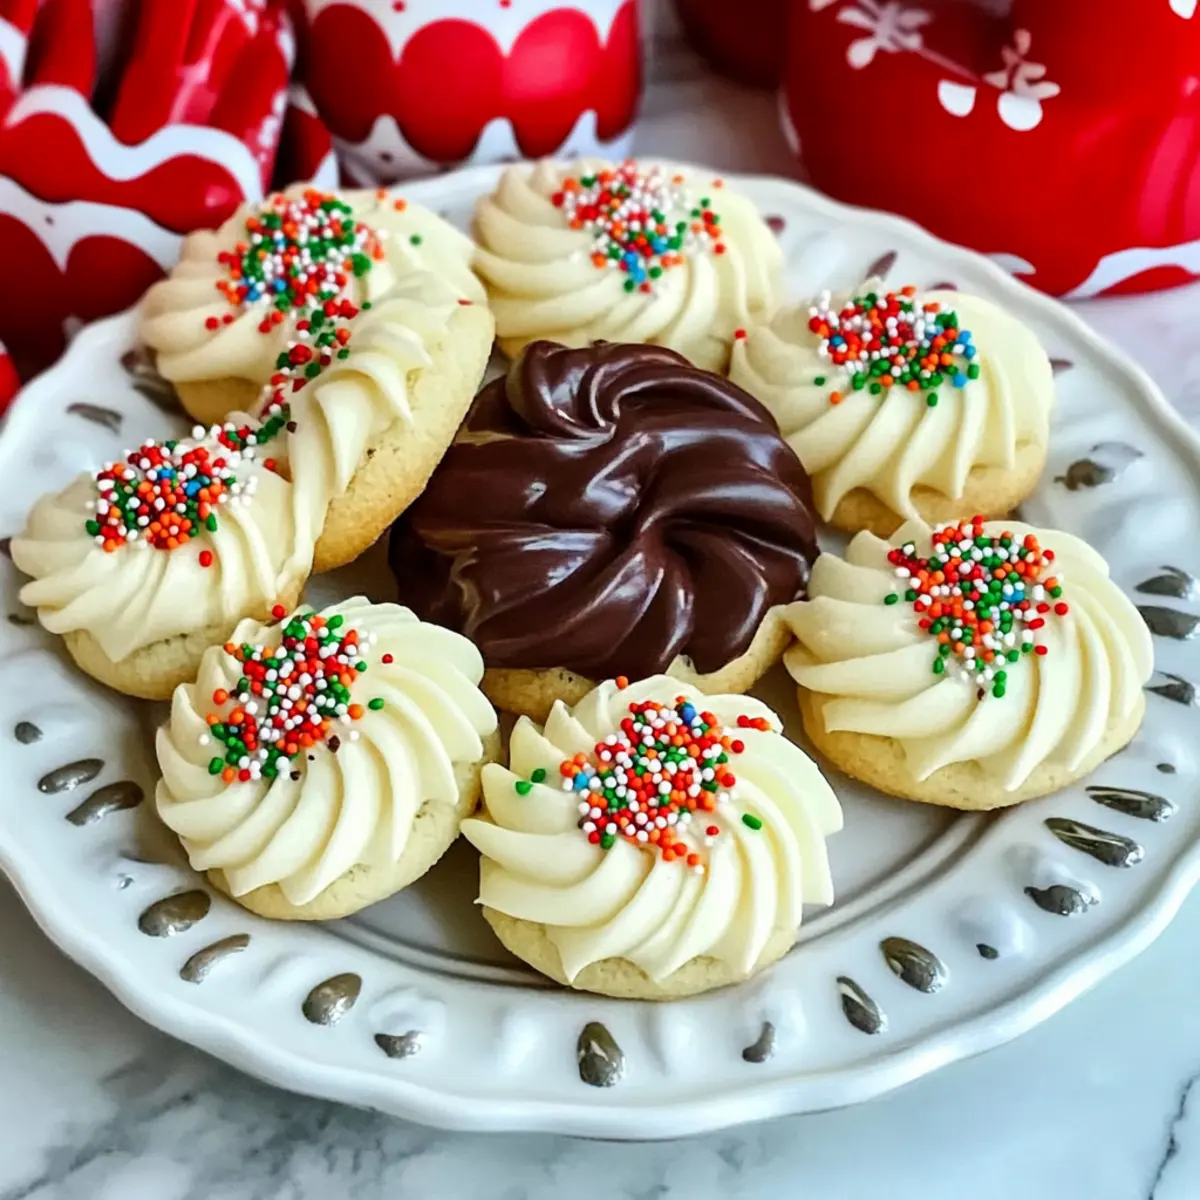
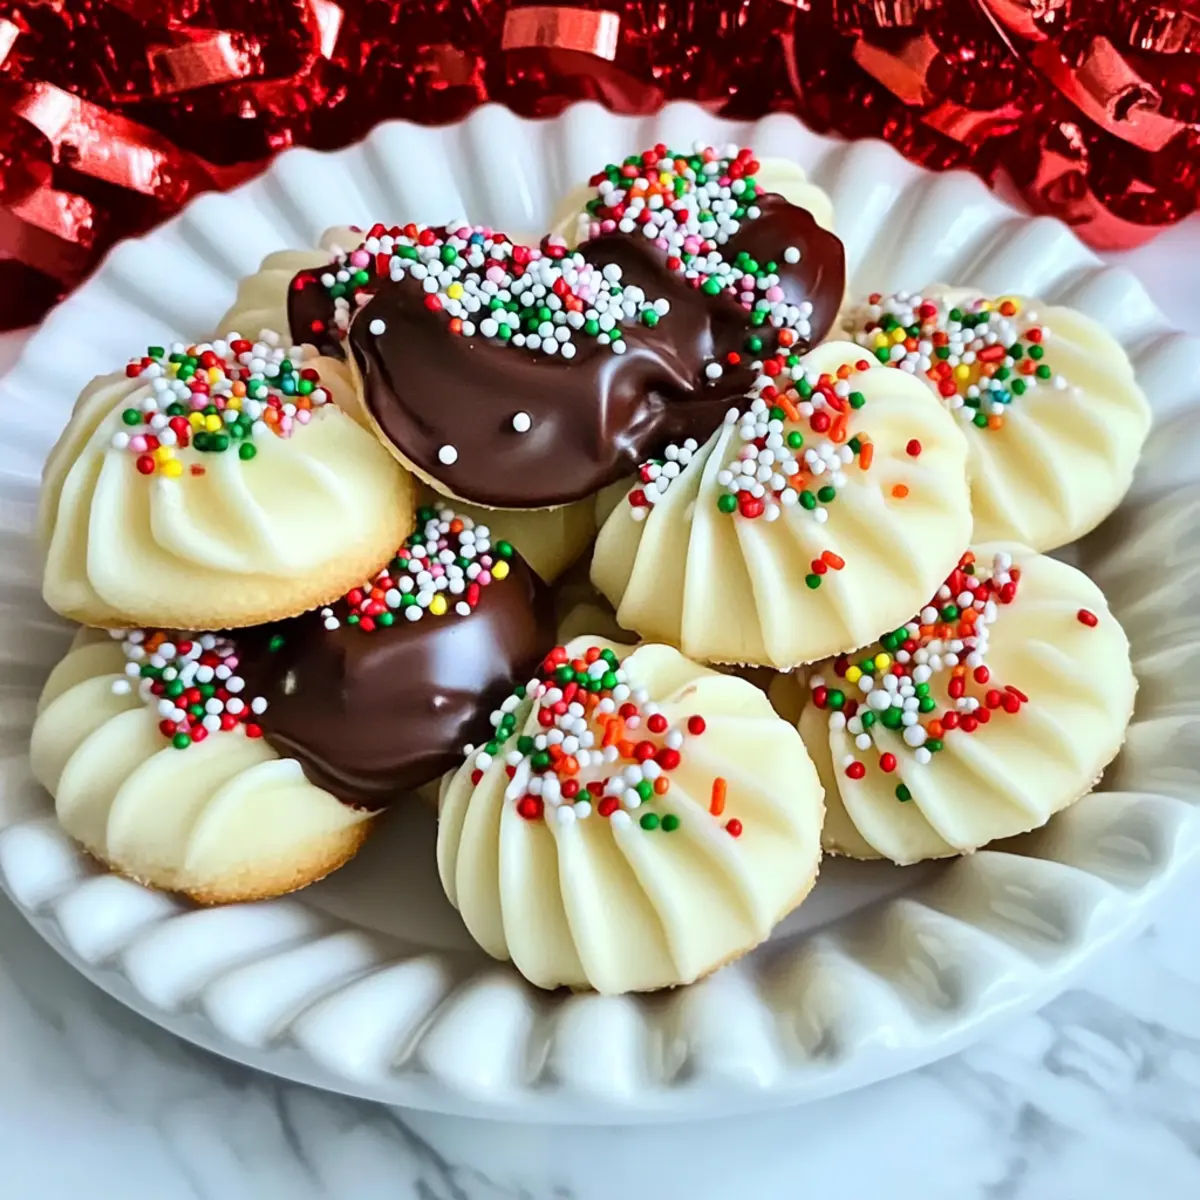
There’s something truly magical about the scent of freshly baked cookies wafting through the kitchen, especially during the festive season. These Classic Butter Cookies are the embodiment of simplicity and joy, perfect for both seasoned bakers and those just starting out—trust me, the rich buttery flavor combined with a delicate, melt-in-your-mouth texture is impossible to resist. This recipe is not only quick to whip up but also allows for fun customization with delicious toppings like chocolate dip and colorful sprinkles, making them a surefire hit on your Christmas cookie tray. Plus, they’re a delightful way to share a touch of holiday spirit with family and friends. Ready to create a batch of these delightful treats that will fill your home with warmth and cheer? Let’s jump right into it!
Why Are Butter Cookies So Irresistible?
Buttery Bliss: These cookies melt in your mouth, offering a rich flavor that’s hard to resist.
Easy to Make: Perfect for both beginners and seasoned bakers, this simple recipe requires minimal hands-on time.
Customizable: Dip in chocolate or add sprinkles for a festive touch, making them as unique as your celebrations!
Crowd-Pleaser: Serve them at holiday gatherings, alongside a cup of coffee or tea, and watch them disappear!
Versatile Satisfaction: From classic vanilla to nutty almond variations, these cookies adapt to your flavor cravings.
Experience the joy of baking with these delightful Snowball Cookies Melt or try your hand at Double Chocolate Peppermint Cookies for an extra festive twist!
Butter Cookies Ingredients
For the Dough
- All-purpose flour – Provides structure; can substitute with a gluten-free blend for those with dietary restrictions.
- Salt – Enhances flavor; using sea salt adds a delightful crunch.
- Unsalted butter – Key for tenderness; make sure it’s softened, as no substitutions are recommended for the best taste.
- Granulated sugar – Adds sweetness and improves texture; light brown sugar gives a nice caramel note if substituted.
- Vanilla extract – A flavor enhancer; pure vanilla is preferred for the best results, but imitation can work in a pinch.
- Large egg – Binds ingredients and provides moisture; for a vegan option, use a flax egg instead.
- Milk – Adjusts the dough consistency if needed; any milk alternative, such as almond milk, works well.
For the Chocolate Dipping (optional)
- Chocolate chips – Great for dipping; choose between white chocolate or semi-sweet based on your taste preference.
- Coconut oil – Thins chocolate for easier dipping; can be replaced with vegetable oil if you run out.
For Decoration
- Sprinkles – Adds a festive flair; opt for colorful sprinkles to match your holiday themes.
These deliciously buttery Butter Cookies will not only elevate your baking game but will also fill your home with the heavenly aroma of fresh cookies!
Step‑by‑Step Instructions for Butter Cookies
Step 1: Prepare the Dough
In a mixing bowl, whisk together 2 cups of all-purpose flour and 1/4 teaspoon of salt; set this aside. In a separate bowl, cream 1 cup of softened unsalted butter and 3/4 cup of granulated sugar using a hand or stand mixer on medium speed for about 2 minutes until the mixture is light and fluffy. Add 1 teaspoon of vanilla extract and 1 large egg, mixing until just combined. Gradually incorporate the flour mixture, blending until the dough forms.
Step 2: Test Dough Consistency
Once your dough is mixed, check its consistency to ensure it can be piped. If it feels too stiff, add milk, one teaspoon at a time, mixing well until the dough reaches a smooth, pipeable texture. You want it to be malleable but not overly wet; this perfect balance will help with shaping your delicious butter cookies.
Step 3: Pipe Cookies
Prepare your baking sheets by leaving them ungreased, then transfer the dough into a piping bag fitted with a star or round tip. Pipe your desired shapes onto the sheets, making sure to leave about 2.5 inches of space between each cookie. Once shaped, refrigerate the cookies uncovered for 30 to 40 minutes; this step prevents spreading during baking, ensuring your butter cookies maintain their lovely shapes.
Step 4: Bake
Preheat your oven to 350°F (175°C). Once heated, place your chilled cookie sheets in the oven and bake for 12 to 15 minutes. Keep an eye on them—you’re looking for a light golden color on the edges. Once baked, allow the cookies to rest on the sheets for about 5 minutes before transferring them to a wire rack to cool completely.
Step 5: Decorate
After your butter cookies are completely cooled, it’s time to add a festive touch! Melt 1 cup of chocolate chips with 1 tablespoon of coconut oil in a microwave-safe bowl, heating in 30-second intervals, stirring until smooth. Dip the cooled cookies halfway into the chocolate, allowing excess to drip off. Finally, sprinkle your favorite colorful decorations or sprinkles on top, and let the chocolate set before storing or serving.

How to Store and Freeze Butter Cookies
Room Temperature: Store cookies in an airtight container at room temperature for up to 1 week to maintain their delightful texture and flavor.
Fridge: If you want to extend their freshness, you can refrigerate the cookies in an airtight container for up to 2 weeks, though they may lose some of their crispness.
Freezer: For long-term storage, freeze the butter cookies for up to 3 months. Place parchment paper between layers to prevent sticking, and seal them in a freezer-safe bag.
Reheating: To enjoy your frozen cookies, let them thaw at room temperature. For a warm treat, reheat in a preheated oven at 350°F for 5-7 minutes.
Expert Tips for Perfect Butter Cookies
- Chill Your Dough: Properly refrigerate the piped dough for 30-40 minutes to prevent spreading—this ensures beautifully shaped butter cookies.
- Watch Your Timing: Keep an eye on baking times; overbaking can lead to dry cookies. Aim for a light golden edge for the perfect texture.
- Adjust Milk as Needed: If your dough feels overly stiff, add milk gradually until it reaches the right pipeable consistency—this is key for great results!
- Choose Quality Ingredients: Opt for pure vanilla extract and high-quality butter; these elevate the flavor and make your butter cookies truly shine.
- Be Patient While Cooling: Allow cookies to cool completely before dipping in chocolate; this prevents melting and gives a refined finish.
Enjoy the delightful experience of baking these classic Butter Cookies, and watch them become a cherished favorite in your home!
Butter Cookies Variations & Substitutions
Get ready to unleash your creativity in the kitchen with these delightful twists on the classic recipe!
-
Nutty Flavor: Use almond extract instead of vanilla for a warm, nutty aroma. This simple switch can bring a whole new dimension to your cookies.
-
Citrus Burst: Incorporate citrus zest, such as orange or lemon, to add a refreshing and vibrant twist to the classic buttery flavor. Your taste buds will dance with excitement!
-
Gluten-Free: Replace all-purpose flour with a gluten-free blend to accommodate dietary needs while keeping the cookies deliciously tender and satisfying.
-
Sweet Swaps: Swap granulated sugar for brown sugar for a deeper, caramel-like taste. It’s a subtle change that can elevate your cookies to another level!
-
Chocolate Dipped: Use white chocolate chips for a sweeter, creamier coating or mix in semi-sweet chocolate for a classic touch. Either option brings a delightful contrast to the buttery base.
-
Textural Variety: Add crushed nuts, like pecans or walnuts, or even dried fruit for an explosion of flavors and textures in each bite. It’s a fantastic way to make each cookie unique!
-
Spicy Kick: Sprinkle in a hint of cinnamon or nutmeg for a warm, festive spice that complements the rich butter well. Your cookie creation will not only taste good but also smell heavenly!
Why not pair these cookies with a batch of Minty Peppermint Swirl Cookies for a festive treat or try out some charming Mini Sugar Cookies for a fun evening of baking? Enjoy customizing and transforming these butter cookies into your own signature delights!
What to Serve with Classic Butter Cookies
There’s nothing quite like a warm kitchen full of delightful aromas to enhance your gathering atmosphere while savoring sweet treats.
- Rich Hot Chocolate: A perfect pairing that heightens the cookies’ buttery flavor while adding a cozy aura to your festive celebrations.
- Classic Tea: The subtle notes of Earl Grey or herbal teas provide a refreshing contrast to the richness of the cookies, making each bite feel like a hug.
- Creamy Cheesecake: The velvety texture of cheesecake balances the lightness of butter cookies, making for an indulgent dessert experience.
- Festive Fruit Platter: Fresh fruits like strawberries and mandarin oranges add a pop of color and a refreshing balance to the buttery sweetness of the cookies.
- Sparkling Cider: Pour some bubbly cider to elevate the occasion, as its fizz complements the cookies wonderfully, adding a celebratory touch.
- Ice Cream Sandwiches: Use the cookies to create an indulgent ice cream sandwich filled with vanilla or chocolate ice cream; it’s a treat that’s sure to delight!
- Nutty Biscotti: Pair with these crunchy companions for a textural contrast and a lovely treat to dip in your coffee or tea.
- Caramel Sauce: Drizzle warm caramel sauce for added sweetness and richness, making every bite feel extra special.
- Chocolate-Covered Strawberries: The juicy sweetness from the berries complements the richness of butter cookies, creating a delightful dessert duo.
Make Ahead Options
These Classic Butter Cookies are perfect for meal prep, allowing you to enjoy homemade delights with ease! You can prepare the dough up to 24 hours in advance by following the first two steps of the recipe and then refrigerating it wrapped tightly in plastic wrap. This prevents the dough from drying out and maintains its perfect texture. If you want to take it a step further, you can pipe the cookies onto baking sheets and then refrigerate them uncovered for 30-40 minutes, before covering and storing them in the fridge for up to 3 days. When you’re ready to bake, simply preheat your oven and pop them in for delicious, fresh cookies that will impress everyone!
Butter Cookies Recipe FAQs
How can I tell if my butter is at the right temperature for making cookie dough?
Absolutely! For the best results, your unsalted butter should be softened, not melted. It should be cool to the touch but yield slightly when pressed. If you press your finger into the butter and it leaves a slight indent without being too soft or greasy, it’s perfect for creaming with sugar.
What’s the best way to store leftover cookies?
I recommend storing your butter cookies in an airtight container at room temperature for up to 1 week to keep them fresh and tasty. If you’d like them to last longer, you can refrigerate them in a similar manner for up to 2 weeks, but be aware they may lose a bit of their crispness.
Can I freeze butter cookies, and if so, how?
Of course! You can freeze butter cookies for up to 3 months, making them a fantastic option for prepping ahead of time. Here’s how: layer the cookies with parchment paper between them in a freezer-safe container or plastic bag, ensuring they’re well-sealed to prevent freezer burn. When you’re ready to enjoy them, let them thaw at room temperature or reheat them quickly in a preheated oven at 350°F for 5-7 minutes for that fresh-baked taste.
What if my cookie dough is too stiff to pipe?
Very! If your dough is too stiff to pipe, don’t worry; just add milk one teaspoon at a time while mixing until the dough reaches the right pipeable consistency. You want it to be smooth enough to easily squeeze out of the piping bag, but not so wet that it loses its shape.
Are these cookies safe for pets, or do they contain any allergens?
Great question! These butter cookies contain common allergens such as gluten (from the flour), dairy (from the butter), and eggs. Always check with your veterinarian before sharing any baked goods with your furry friends, as many human foods can be harmful to pets.
Can I customize these cookies for different occasions?
Absolutely! The joy of making butter cookies is in their versatility. You can easily switch up the flavors by using almond extract instead of vanilla, adding citrus zest for a refreshing twist, or substituting chocolate chips with crushed nuts or dried fruits to match your celebration theme!

Deliciously Buttery Cookies to Elevate Your Baking Game
Ingredients
Equipment
Method
- Whisk together 2 cups of all-purpose flour and 1/4 teaspoon of salt in a mixing bowl; set aside.
- Cream 1 cup of softened unsalted butter and 3/4 cup of granulated sugar using a mixer until light and fluffy.
- Add 1 teaspoon of vanilla extract and 1 large egg, mixing until just combined.
- Gradually incorporate the flour mixture, blending until the dough forms.
- Check the dough's consistency, and add milk as needed for a smooth, pipeable texture.
- Transfer the dough to a piping bag and pipe shapes onto ungreased baking sheets.
- Refrigerate shaped cookies uncovered for 30 to 40 minutes to prevent spreading.
- Preheat your oven to 350°F (175°C). Bake cookies for 12 to 15 minutes until edges are light golden.
- Allow cookies to rest on sheets for about 5 minutes before transferring to a wire rack to cool.
- Melt 1 cup of chocolate chips with 1 tablespoon of coconut oil in intervals until smooth.
- Dip cooled cookies in chocolate and sprinkle your favorite decorations on top.
Leave a Reply