
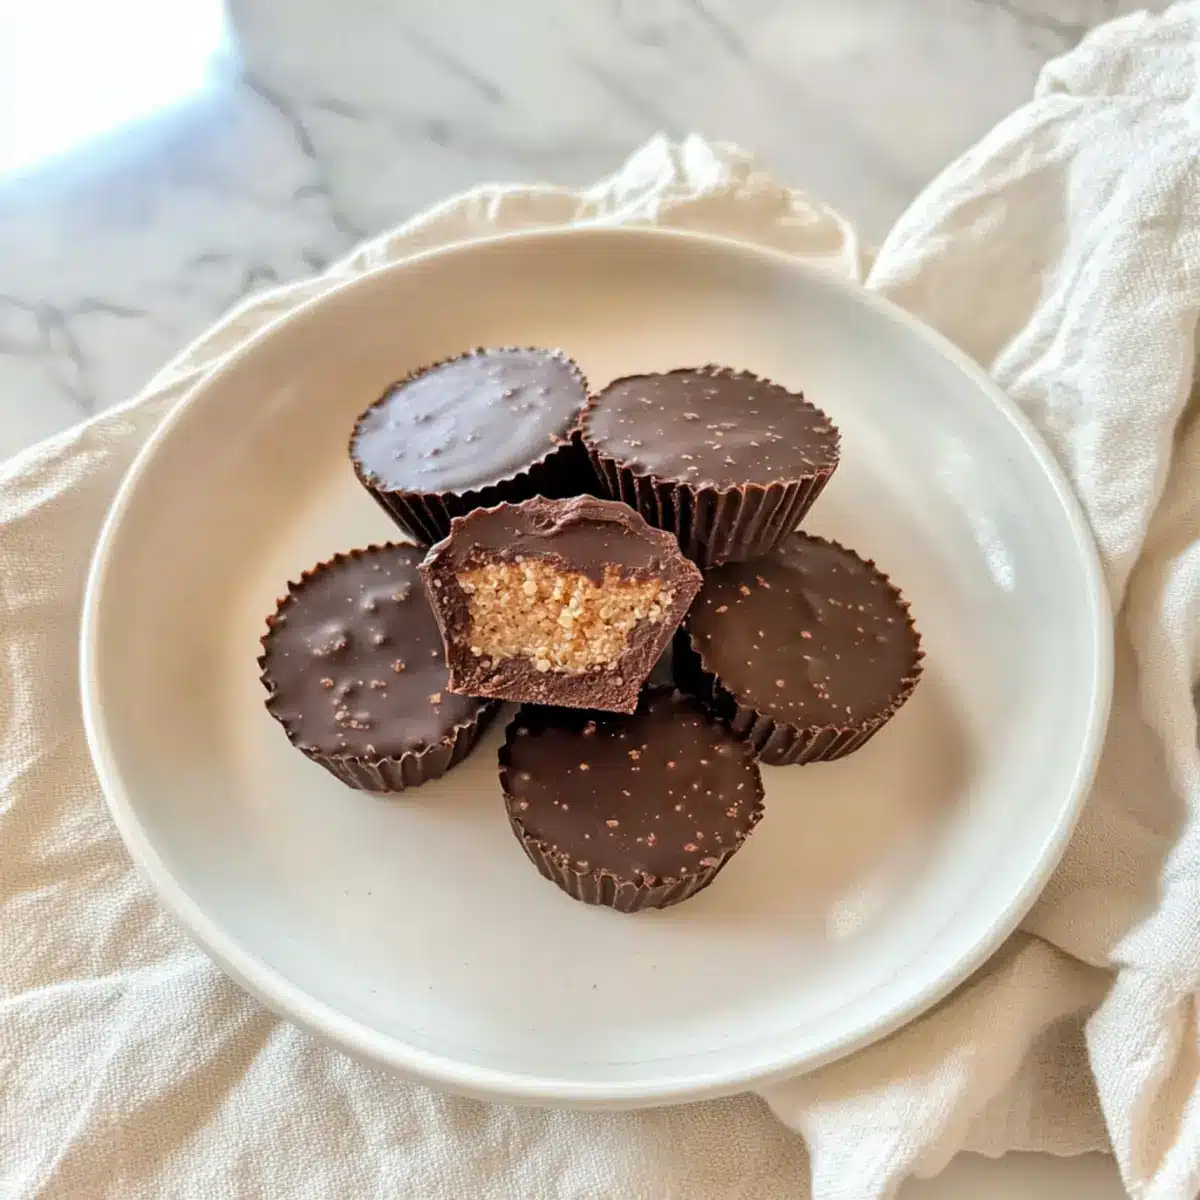
There’s something incredibly satisfying about combining simplicity with indulgence, and these Quinoa Crunch Peanut Butter Cups do just that. Crafted with rich dark chocolate, crunchy quinoa crisps, and creamy peanut butter, this vegan no-bake treat is not only easy to whip up but also gluten-free! Perfect for those moments when you crave a little sweetness without the guilt, these cups will keep you away from fast food temptations. They’re quick to prepare, making them a perfect fit for your busy lifestyle, and they pack a delightful crunch that will impress friends and family alike. Are you ready to create a delectable dessert that’s both satisfying and surprisingly healthy? Let’s dive in!
Why are these cups a must-try?
Indulgent flavor without the guilt: These Quinoa Crunch Peanut Butter Cups are a sweet treat that won’t derail your healthy eating goals. Quick and simple to prepare, they fit perfectly into busy schedules without the need for baking. Unique texture combinations of creamy peanut butter and crunchy quinoa make each bite a delightful surprise. Vegan and gluten-free, they cater to multiple dietary needs, ensuring everyone can enjoy them. For more delectable treats, don’t miss out on my Peanut Butter Chocolate or Buttery Cheese Garlic recipes!
Quinoa Crunch Peanut Butter Cups Ingredients
For the Chocolate Layer
- Dark Chocolate – Ensure it’s vegan to maintain dietary preferences.
- Coconut Oil – Melts beautifully with chocolate for a smooth finish; any neutral oil can substitute.
For the Filling
- Peanut Butter – Adds rich creaminess; opt for a natural brand for optimal flavor.
- Maple Syrup – Provides just the right sweetness; feel free to swap with honey or agave syrup if desired.
- Coconut Flour – Thickens the filling for perfect consistency; almond flour is a great alternative if needed.
For the Crunch
- Quinoa Crisps – These give the cups a delightful crunch; easily sourced at health food stores or online.
Enjoy making your Quinoa Crunch Peanut Butter Cups, your new go-to guilt-free treat!
Step‑by‑Step Instructions for Quinoa Crunch Peanut Butter Cups
Step 1: Melt the Chocolate
In a medium microwave-safe bowl, combine dark chocolate and coconut oil. Heat them in the microwave on medium power for 30 seconds at a time, stirring in between until the mixture is completely smooth and glossy, which should take about 1-2 minutes total. This is the base for your rich chocolate layer in the Quinoa Crunch Peanut Butter Cups.
Step 2: Prepare the Chocolate Mixture
Once smooth, stir in 2 tablespoons of peanut butter and add the quinoa crisps into the chocolate mixture. Mix well until all the crisps are evenly coated in the chocolate. Set this delightful mixture aside for a few minutes to cool slightly; this will help it hold its shape better when layered in your cups.
Step 3: Make the Peanut Butter Filling
In a separate small bowl, combine the remaining peanut butter with maple syrup. Using a spatula, gently fold in the coconut flour until the mixture thickens and is well combined, achieving a play-dough-like consistency. This will create a creamy and sweet filling to layer inside your Quinoa Crunch Peanut Butter Cups.
Step 4: Assemble the Cups
Spoon about half a tablespoon of the chocolate mixture into each silicon cupcake liner, pressing it down gently for an even layer. Make sure they are filled to about halfway. This forms the bottom layer of your delicious cups, ready to hold the peanut butter filling.
Step 5: Add the Peanut Butter Layer
Roll a teaspoon of the peanut butter mixture into a small ball, then flatten it slightly with your hands. Place this disc right in the center of each chocolate-filled liner, ensuring it’s nicely pressed into the chocolate below. This sweet surprise in your Quinoa Crunch Peanut Butter Cups will blend beautifully with the surrounding layers.
Step 6: Top with More Chocolate
Cover the peanut butter discs with the remaining chocolate mixture, making sure to completely encapsulate the filling. Smooth the top with a spatula for an even appearance, and ensure the chocolate reaches the edges of the liners. This step will create a beautiful finish for your Quinoa Crunch Peanut Butter Cups.
Step 7: Chill Until Firm
Place the assembled cups in the freezer for about 30 minutes or until they are completely set and firm to the touch. This chilling process solidifies the layers, ensuring each bite is a perfect mix of chocolate and peanut butter crunch when you’re ready to enjoy them.
Step 8: Final Touch and Enjoy
Once set, carefully remove the Quinoa Crunch Peanut Butter Cups from the silicon liners. They should release easily due to the liners. Serve immediately or store them in an airtight container in the refrigerator. Enjoy this deliciously crunchy and creamy treat as a guilt-free dessert or snack!
Expert Tips for Quinoa Crunch Peanut Butter Cups
- Silicon Liners: Always use silicon cupcake liners to make removing your Quinoa Crunch Peanut Butter Cups a breeze without sticking.
- Chocolate Melting: Pay close attention while melting the chocolate; stir every 30 seconds to prevent burning and achieve a smooth, glossy finish.
- Peanut Butter Texture: For a perfect peanut butter filling, make sure to fold in the coconut flour gently; overmixing can result in a gritty texture.
- Flavor Variations: Don’t hesitate to experiment! Add a splash of vanilla extract or a pinch of sea salt to the peanut butter filling for an extra flavor kick.
- Storage Solutions: Store your cups in an airtight container in the fridge for up to 30 days or in the freezer for up to 60 days to maintain their deliciousness.
How to Store and Freeze Quinoa Crunch Peanut Butter Cups
Fridge: Store your Quinoa Crunch Peanut Butter Cups in an airtight container for up to 30 days; this will help maintain their delightful texture and flavor.
Freezer: For longer storage, keep them in the freezer in an airtight container for up to 60 days. This makes it easy to pull out a treat whenever you want!
Thawing: When ready to enjoy, simply thaw the cups in the refrigerator for a couple of hours or at room temperature for about 30 minutes before serving.
Reheating: There’s no need to reheat these treats; enjoy them chilled for a refreshing snack!
Make Ahead Options
These Quinoa Crunch Peanut Butter Cups are perfect for meal prep enthusiasts! You can prepare the chocolate mixture and the peanut butter filling up to 3 days in advance, which saves you precious time during busy weeknights. Simply melt the chocolate and mix in the quinoa crisps, then refrigerate it in an airtight container. For the filling, combine peanut butter, maple syrup, and coconut flour, then store it separately. When you’re ready to assemble, simply layer the chocolate and peanut butter mixtures in the cupcake liners and freeze for about 30 minutes until firm. This way, you’ll still enjoy the same delicious taste and texture without any hassle!
What to Serve with Quinoa Crunch Peanut Butter Cups
Indulging in these delightful treats is only half the fun; let’s elevate your snacking experience!
- Creamy Coconut Yogurt: The lightness of yogurt contrasts beautifully with the sweetness of the cups, providing a cool, creamy balance.
- Fresh Fruit Salad: Juicy berries or sliced bananas add a refreshing burst of flavor, enhancing the snack’s sweetness and providing vibrant color.
- Roasted Nuts: A sprinkle of lightly salted nuts adds a savory crunch that complements the creamy and sweet layers perfectly!
- Decadent Hot Chocolate: Warm cocoa creates a cozy pairing, with its rich chocolate flavor harmonizing beautifully with the peanut butter bites.
- Matcha Latte: The earthy tones of matcha provide a unique contrast, enhancing the overall experience with its subtle bitterness against the sweet cups.
- Chocolate Drizzle: Drizzling more melted dark chocolate on top adds an extra touch of decadence and showcases your culinary creativity!
- Coffee or Espresso: A rich coffee balances the sweetness of the cups, offering a delightful pairing for an energized treat!
- Almond Butter Dip: A spoonful of creamy almond butter can create a dreamy experience when enjoyed side by side with the cups.
- Homemade Granola: Pair these treats with a crunchy granola topping, adding texture and flavor diversity to your snack time!
Quinoa Crunch Peanut Butter Cups Variations
Feel free to customize these delightful cups to suit your tastes and dietary needs with these easy swaps!
-
Nut-Free: Substitute peanut butter with sunflower seed butter for a delicious nut-free option. This will still keep the creamy filling intact while catering to those with nut allergies.
-
Sugar-Free: Use a sugar alternative, such as erythritol or stevia, to sweeten the filling. This swap keeps your treats low-calorie while still satisfying your sweet tooth with flavor!
-
Flavor-Infused: Add a dash of cinnamon or a sprinkle of espresso powder to the chocolate layer for an unexpected flavor kick. These subtle enhancements will elevate your Quinoa Crunch Peanut Butter Cups to new heights!
-
Texture Twist: Play with the texture by adding chia seeds or flaxseeds to the peanut butter mixture. Not only do they add nutrition, but they also create a delightful crunch that complements the quinoa crisps.
-
Spicy Kick: If you love a little heat, mix in a pinch of cayenne pepper to the chocolate mixture for a surprising element. The contrast of heat and sweetness creates an unforgettable experience!
-
Coconutty Delight: Enhance your cups further by incorporating shredded coconut into the chocolate layer or as a topping. This adds a chewy texture and a lovely tropical flair.
-
Fruit Melody: Top your peanut butter filling with a layer of fresh raspberries or crushed strawberries before sealing with chocolate. The burst of fruitiness will balance perfectly with the rich flavors of chocolate and peanut butter.
For even more sweet inspiration, check out my Apple Dessert Cups and the hearty flavor of Butternut Squash Pasta. Enjoy experimenting and creating your perfect version of these Quinoa Crunch Peanut Butter Cups!
Quinoa Crunch Peanut Butter Cups Recipe FAQs
What type of dark chocolate should I use?
Absolutely choose a vegan dark chocolate to keep your Quinoa Crunch Peanut Butter Cups compliant with dietary preferences. Look for chocolate labeled as dairy-free without any animal-derived ingredients. A chocolate with a higher cocoa content (70% or more) will typically give a richer flavor without added sugars that you might want to avoid.
How should I store these peanut butter cups?
To maintain the delightful taste and texture, store your Quinoa Crunch Peanut Butter Cups in an airtight container in the refrigerator for up to 30 days. If you’re feeling generous—or if you made a large batch—freezing them is a wonderful option! They can last in the freezer for up to 60 days, making them a great treat to have on hand.
Can I freeze the Quinoa Crunch Peanut Butter Cups? If so, how?
Very! To freeze your Quinoa Crunch Peanut Butter Cups, simply place them in an airtight container, ensuring they’re not squished together. Lay a sheet of parchment paper between layers if stacking them. They should be placed in the freezer for up to 60 days. When you want to enjoy a cup, just take it out of the freezer and let it thaw in the refrigerator for about 2 hours or at room temperature for about 30 minutes.
Are there any ingredient substitutions I can make for allergies?
Definitely! If you have a nut allergy, you can swap peanut butter with sun butter or soy nut butter. For those avoiding gluten, be sure to check that your quinoa crisps are certified gluten-free. Also, if you have a sensitivity to coconut, you can substitute coconut oil with any neutral oil like canola or grapeseed oil, and use a different flour like oat flour in place of coconut flour.
What can I do if my chocolate isn’t melting smoothly?
If your chocolate isn’t melting smoothly, it can be frustrating, but no worries! Ensure you’re microwaving at medium power and stirring every 30 seconds. If it seems too thick or grainy, it may be overheating. You can add a teaspoon of coconut oil into the mixture to help it thin out and become glossy. If it looks burnt, it’s likely too late to save it; start fresh with a new batch for the best results!
Quinoa Crunch Peanut Butter Cups - Delightful No-Bake Indulgence
Ingredients
Equipment
Method
- In a medium microwave-safe bowl, combine dark chocolate and coconut oil. Heat them in the microwave on medium power for 30 seconds at a time, stirring until smooth.
- Once smooth, stir in peanut butter and add the quinoa crisps. Mix well and set aside to cool slightly.
- In a separate bowl, combine the remaining peanut butter with maple syrup. Gently fold in coconut flour until thick and well combined.
- Spoon about half a tablespoon of the chocolate mixture into each cupcake liner for the bottom layer.
- Roll a teaspoon of the peanut butter mixture into a small ball and place it in the center of each chocolate-filled liner.
- Cover the peanut butter discs with the remaining chocolate mixture, smoothing the top.
- Place the assembled cups in the freezer for about 30 minutes or until set.
- Remove from the silicon liners and serve immediately or store in an airtight container.
Leave a Reply