
The aroma of simmering dashi wafted through my kitchen like a warm hug on a cold day, instantly transporting me to a cozy Japanese eatery. That’s the magic of homemade miso soup—a delightful blend of umami and comfort that’s as nourishing as it is delicious. In just 20 minutes, you can whip up this traditional favorite, perfect for a light lunch or a soothing dinner. Not only is this miso soup vegetarian-friendly, but it’s also packed with probiotics that support gut health. With simple yet wholesome ingredients, this recipe stands out in both flavor and ease. Are you ready to savor the essence of Japanese comfort food right at home?

Why is Miso Soup a Must-Try?
Comforting Warmth: The savory aroma of homemade miso soup wraps around you like a warm embrace—perfect for chilly evenings.
Quick & Easy: With just 20 minutes of prep time, this dish effortlessly fits into your busy schedule.
Umami Delight: Its rich flavors, thanks to ingredients like white miso and kombu, offer a depth that will tantalize your taste buds.
Health Benefits: Packed with probiotics, this soup nourishes your gut while being low in calories, making it a guilt-free choice.
Versatile Options: Feel free to add your favorite veggies or serve it with rice for a heartier meal. Whether you’re exploring Japanese cuisine or just need a comforting bowl, this homemade miso soup checks all the boxes!
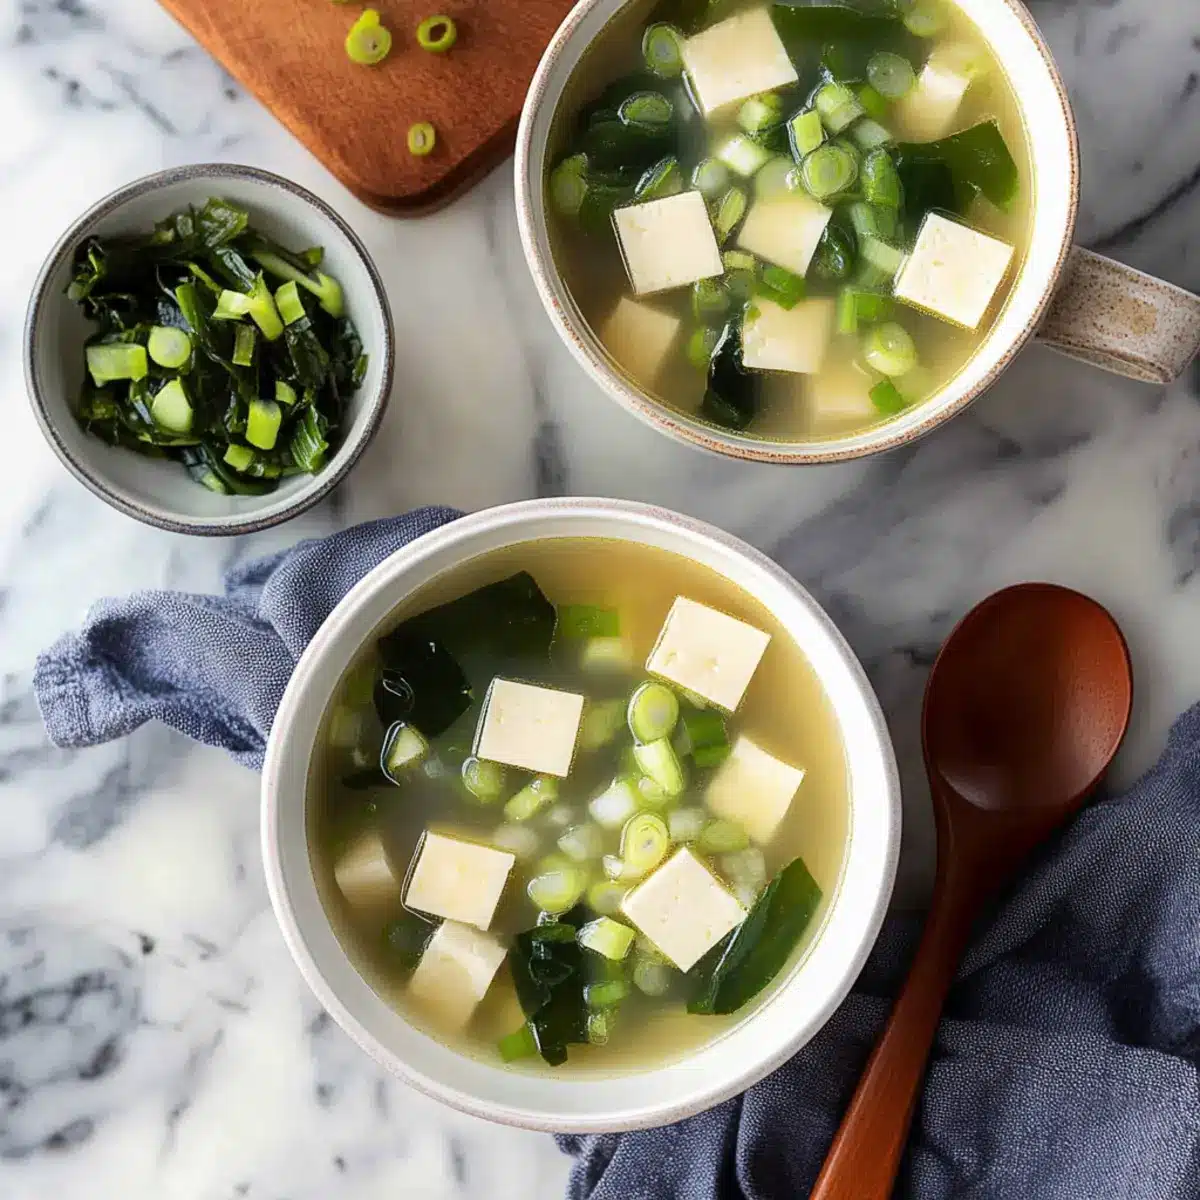
Homemade Miso Soup Ingredients
-
For the Broth
-
Kombu – Seaweed essential for a truly authentic dashi flavor; remember to rinse gently before using!
-
Water – The base liquid that brings all the flavors together.
-
For the Soup
-
Wakame – Dried seaweed that adds a delightful texture; you can substitute with other seaweeds, but note that it will change the flavor profile.
-
White Miso Paste – The star ingredient that brings richness and sweetness; you might try yellow miso as a substitute, but expect a different taste.
-
Chopped Green Onion – Adds a burst of freshness; scallions work great as an alternative.
-
Silken Tofu – This ingredient enhances creaminess and provides protein; opt for firm tofu if you prefer a denser bite.
-
Tamari – A gluten-free seasoning that deepens the umami flavor; feel free to use soy sauce if gluten is not a concern.
Bring these ingredients together to enjoy a comforting bowl of homemade miso soup that’s not only delicious but also rich in probiotics!
Step‑by‑Step Instructions for Homemade Miso Soup
Step 1: Prepare Dashi
Begin by rinsing the kombu gently under cold water to remove any impurities. In a medium pot, combine this rinsed kombu with 4 cups of water. Bring the water to a gentle simmer over low heat, allowing the flavors to infuse for about 10 minutes. Watch for small bubbles as your dashi develops its savory depth. Once ready, remove the kombu and set it aside.
Step 2: Rehydrate Wakame
While your dashi simmers, take a small bowl and soak the dried wakame in warm water for at least 5 minutes, or until it expands and becomes tender. As the wakame rehydrates, it will bloom into soft green strands, ready to elevate the texture and flavor of your homemade miso soup.
Step 3: Make Miso Slurry
In a separate bowl, ladle a cup of your hot dashi to make the miso slurry. Add 3 tablespoons of white miso paste to this dashi and whisk vigorously until smooth and well combined. This helps prevent lumps in your soup, allowing the miso to blend seamlessly into the broth for that rich umami flavor that defines homemade miso soup.
Step 4: Combine Ingredients
Return the dashi pot to low heat and gently stir in the miso slurry, taking care not to boil the soup as this can harm the probiotics. Allow the mixture to combine for about 2 minutes over low heat, watching the colors meld beautifully. This is where the comforting essence of your homemade miso soup starts to come together.
Step 5: Add Vegetables
Now, drain the rehydrated wakame and add it to the pot along with finely chopped green onions and cubed silken tofu. Gently stir these fresh ingredients into the soup and let them simmer for another 1-2 minutes on low heat. This brief cooking time will warm the ingredients without overcooking them, ensuring the vibrant flavors remain intact.
Step 6: Season and Serve
Finally, taste your homemade miso soup and adjust the seasoning with tamari to enhance the umami flavors. Serve the soup warm in cozy bowls, garnished with additional green onions if desired. Enjoy the soothing essence of this traditional dish, perfect for bringing comfort to any meal.

What to Serve with Homemade Miso Soup
The gentle steam rising from a bowl of miso soup invites you to build a complete meal full of warm flavors and satisfying textures.
-
Steamed Jasmine Rice: Fluffy grains soak up the savory broth, creating a delightful contrast that enhances the umami experience.
-
Japanese Pickles (Tsukemono): The crunchy, tangy notes of pickles provide a refreshing balance to the rich miso flavors, adding layers of taste.
-
Tempura Vegetables: Lightly battered and fried veggies introduce a crispy texture that complements the smoothness of the soup—simply irresistible!
-
Soba Noodles: Serve a side of cold or warm soba noodles to enrich the meal; their nutty flavor pairs beautifully with the miso’s depth.
-
Sesame Cucumbers: Thinly sliced, these bright and refreshing cucumbers tossed in sesame oil offer a crisp contrast that cuts through the richness of the soup.
-
Green Tea: A warm cup of green tea not only feels delightful but also adds a delightful herbal note that cleanses the palate after each sip of your miso soup.
-
Mochi for Dessert: End your meal on a sweet note; the chewy texture of mochi adds a playful finish to your traditional Japanese dining experience.
-
Seaweed Salad: Light and slightly tangy, this dish brings an exciting texture and taste that enhances the oceanic elements in your miso soup.
These pairings will create a beautifully balanced Japanese-inspired table, celebrating the comfort and flavor of your homemade miso soup!
Make Ahead Options
These homemade miso soup components are perfect for meal prep, enabling you to whip up a comforting bowl in no time during busy nights! You can prepare the dashi and miso slurry up to 24 hours in advance; simply store them separately in the refrigerator. Rehydrate the wakame and chop green onions ahead of time as well, keeping them in airtight containers for freshness. When you’re ready to serve, combine the prepped ingredients, gently reheat without boiling, and add your freshly cubed silken tofu and tamari to taste. This way, you can enjoy a warm, umami-rich soup that feels just as comforting and delicious as if it were freshly made!
Homemade Miso Soup Variations
Feel free to customize your homemade miso soup and let your creativity shine through!
- Dairy-Free: Replace silken tofu with firm tofu or omit it altogether for a lighter broth.
- Vegetable Boost: Add mushrooms, spinach, or bok choy for extra nutrition and vibrant colors.
Tossing in fresh greens will not only elevate the flavor but also bring a delightful texture to your soup. - Spicy Kick: Stir in a teaspoon of chili paste or a few slices of fresh chili for heat.
This simple adjustment can turn your comforting bowl into a fiery delight, perfect for those who enjoy a flavor explosion! - Soba Noodles: Include cooked soba noodles for a heartier meal that’s perfect for lunch or dinner.
The nutty flavor of soba paired with the umami-rich broth creates a delightful duo that will make you want seconds. - Flavor Swap: Use yellow miso instead of white for a slightly different taste.
While this minor switch alters the profile, it remains delicious and true to the essence of miso soup. - Seafood Addition: Add shrimp or fish for a protein-packed version bursting with flavor.
This twist not only enhances the dish but also celebrates the ocean’s bounty—a perfect pairing with the umami notes! - Herb Infusion: Try incorporating fresh herbs like cilantro or basil just before serving for a fresh burst of flavor.
This simple herbaceous touch will brighten your soup and add a refreshing contrast.
For those who want to explore more comforting choices, consider trying this delightful French Onion Soup or bowled-up goodness with our Tortellini Soup Cozy. With each variation, your homemade miso soup can continue to delight your family and friends in new ways!
How to Store and Freeze Homemade Miso Soup
Fridge: Store your homemade miso soup in an airtight container for up to 1-2 days. Make sure to let it cool to room temperature before refrigerating to maintain flavor.
Freezer: If you need to store your soup for longer, freeze it in a freezer-safe container for up to 3 months. Leave room at the top for expansion as it freezes.
Reheating: Gently reheat in a pot over low heat. Avoid boiling to preserve the beneficial probiotics in the miso.
Leftovers Tip: If possible, keep tofu and wakame separate until you’re ready to serve. This helps maintain the best texture in your homemade miso soup!
Expert Tips for Homemade Miso Soup
- Miso Mastery: Use a miso slurry: Always combine miso paste with some hot dashi before adding it to the pot to prevent lumps in your homemade miso soup.
- Gentle Heating: Preserve probiotics: Never boil your soup after adding miso, as high heat can destroy its beneficial probiotics.
- Flavor Enhancements: Experiment freely: Feel free to add vegetables like mushrooms or bok choy to enrich your homemade miso soup with extra flavors and nutrients.
- Right Texture: Select your tofu: Silken tofu yields a creamy consistency; for a firmer bite, use cubed firm tofu instead.
- Seaweed Choices: Watch flavor changes: While you can substitute wakame with other seaweeds, be prepared for a noticeable difference in flavor profile.

Homemade Miso Soup Recipe FAQs
How do I choose the right kombu for my homemade miso soup?
Absolutely! When selecting kombu, look for pieces that are dark green to brown in color, free of dark spots or excessive salt. Fresh kombu will have a slightly glossy appearance. Make sure to rinse it gently before use to remove any surface impurities, ensuring the best flavor for your dashi broth.
How long can I store homemade miso soup in the fridge?
You can store your homemade miso soup in an airtight container in the refrigerator for 1-2 days. Be sure to let it cool to room temperature before sealing it, as this helps preserve the rich flavors. If you notice any discoloration or off smells, it’s best to discard it to ensure safety.
Can I freeze homemade miso soup?
Yes, you can absolutely freeze your homemade miso soup! Pour it into a freezer-safe container, leaving a little room at the top for expansion. It can be frozen for up to 3 months. To reheat, gently warm it on the stove over low heat without boiling, which will help preserve the probiotics in the miso.
What should I do if my miso soup becomes too salty?
If you find that your miso soup is too salty, don’t worry! You can balance the flavors by adding more water or low-sodium vegetable broth to dilute it slightly. If you prefer, incorporating additional cubed silken tofu can also mellow the saltiness while providing creamy texture. Just make sure to adjust the seasoning accordingly.
Is this homemade miso soup safe for my gluten-sensitive friend?
Yes, indeed! By using tamari instead of traditional soy sauce, your homemade miso soup can easily be made gluten-free. Just double-check the label on your miso paste, as some brands may contain gluten. Opt for a gluten-free variety to ensure everyone can enjoy this delicious, probiotic-rich soup.
Can I add extra vegetables to my miso soup?
The more the merrier! You can definitely add extra vegetables like shiitake mushrooms, bok choy, or carrots to enhance the nutrition and flavor of your miso soup. Just chop them into smaller pieces and add them along with the wakame and tofu during the cooking process to give them a chance to soften and meld with the rich umami flavors.
Authentic Homemade Miso Soup: Cozy Umami in Just 20 Minutes
Ingredients
Equipment
Method
- Rinse kombu gently under cold water. Combine rinsed kombu with 4 cups of water in a medium pot. Bring to a gentle simmer over low heat for 10 minutes. Remove kombu and set aside.
- Soak dried wakame in warm water for at least 5 minutes until it expands and becomes tender.
- In a separate bowl, ladle a cup of hot dashi and add 3 tablespoons of white miso paste. Whisk until smooth.
- Return the dashi pot to low heat and gently stir in miso slurry. Heat for about 2 minutes.
- Add rehydrated wakame, chopped green onions, and cubed silken tofu. Simmer for 1-2 minutes on low heat.
- Adjust seasoning with tamari to enhance umami. Serve warm, garnished with additional green onions if desired.
Leave a Reply