
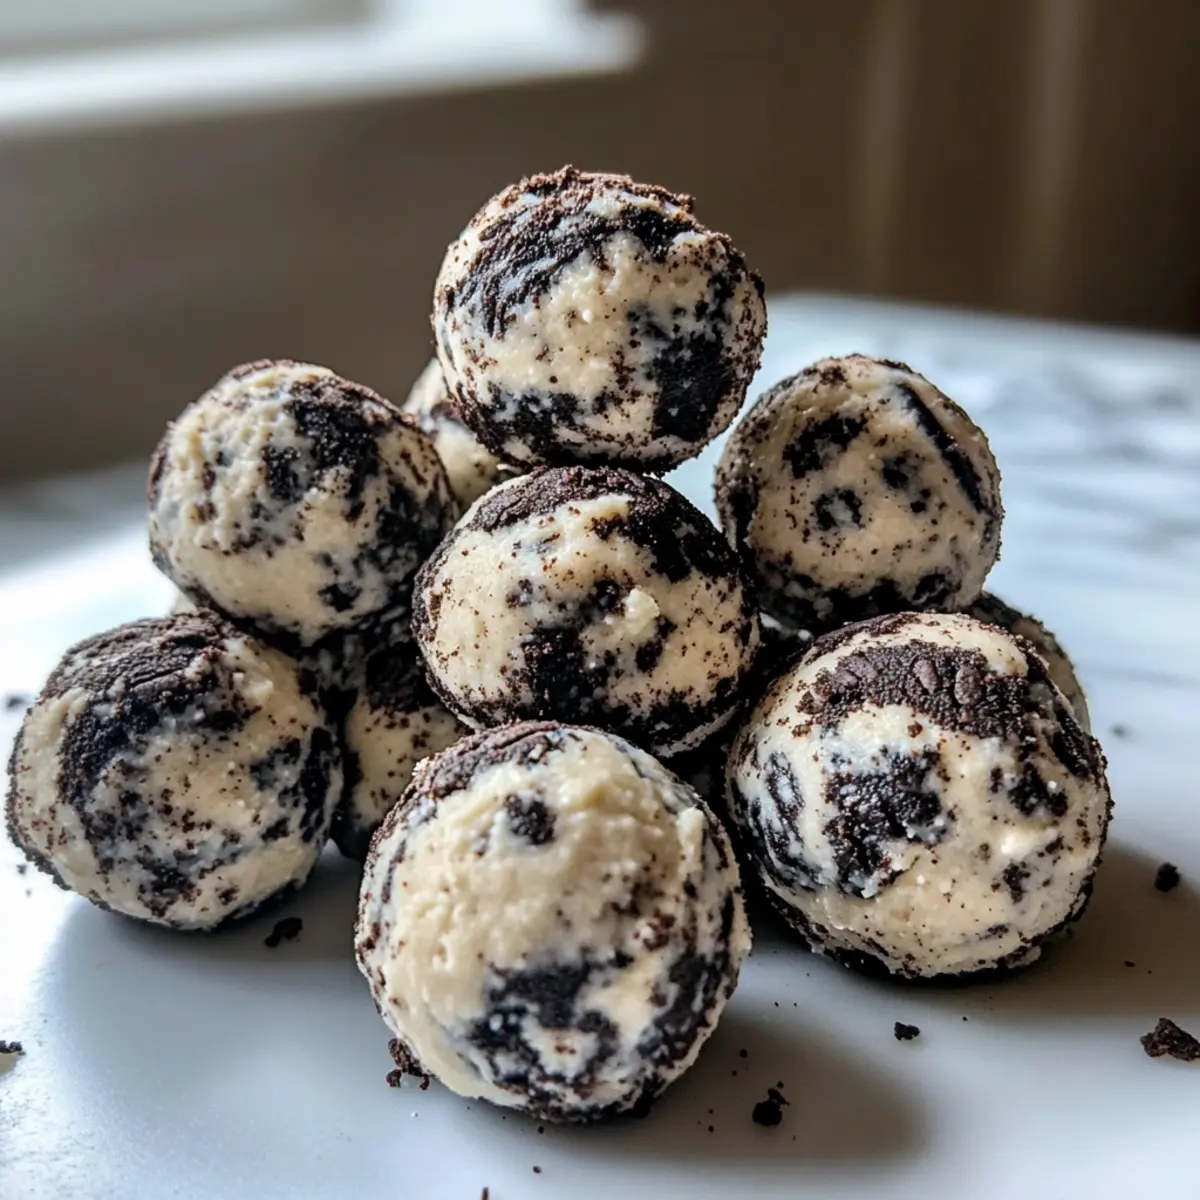
With a satisfying crunch giving way to creamy bliss, these Cream Cheese Oreo Protein Balls became my go-to treat when the craving for something sweet strikes. Imagine indulging in a delicious cookie-and-cream experience that not only satisfies your sweet tooth but also delivers a powerful protein punch. These no-bake delights are perfect for busy lives, allowing you to whip up a batch in under 15 minutes! Whether you’re looking for a quick post-workout refuel or a midday pick-me-up, they’re both guilt-free and customizable to your taste preferences. Ready to transform your snack game with a treat that brings together nostalgia and nutrition? Let’s dive into this simple, decadent recipe!
Why are these protein balls a must-try?
Deliciously Decadent: With the classic flavors of cookies and cream, these Cream Cheese Oreo Protein Balls satisfy sweet cravings while keeping your health goals intact.
Quick and Easy: Ready within 15 minutes, these no-bake treats are perfect for busy lifestyles.
Customizable: Feel free to experiment with different cookie flavors or add-ins like nuts or chocolate chips for a personal twist.
Nutrient-Dense: Each ball packs approximately 10g of protein, making them an ideal post-workout snack or energy booster, just like my Cottage Cheese Chickpea salad.
Diet-Friendly: Gluten-free and vegan options are available, ensuring everyone can enjoy this delightful treat.
Crowd-Pleaser: Whether for a gathering or simply indulging solo, these bites are sure to impress friends and family alike!
Cream Cheese Oreo Protein Balls Ingredients
Get ready to indulge in a delightful treat packed with flavor!
For the Base
• Oreo Cookies – The essential ingredient that brings a cookies-and-cream flavor; opt for reduced-fat or low-carb versions for a lighter touch.
• Cream Cheese – Provides a creamy texture and holds everything together; make sure it’s at room temperature for easy mixing, or substitute vegan cream cheese for a dairy-free option.
For the Protein Boost
• Protein Powder – Adds approximately 10g of protein per ball; choose your favorite flavor to personalize each bite.
• Milk – Adjusts the mixture’s consistency; you can use dairy or plant-based milk based on your preference.
Flavor Enhancers
• Vanilla Extract – A little splash enhances the overall flavor of the protein balls; it’s optional but recommended for depth.
• Salt – Just a pinch balances the sweetness beautifully.
Optional Mix-Ins
• Nuts or Coconut – Add these for extra crunch and flavor variety; feel free to experiment with what you have on hand!
• Additional Oreo Cookies – Crushed pieces can elevate the texture and taste, offering more of that beloved Oreo experience.
Now that you have all your ingredients ready, it’s time to savor the process of making and enjoying your very own Cream Cheese Oreo Protein Balls!
Step‑by‑Step Instructions for Cream Cheese Oreo Protein Balls
Step 1: Prepare the Cookies
Begin by placing your Oreo cookies in a zip-top bag or food processor. Crush them gently until they reach a fine crumb texture, leaving a few larger bits for added crunch. This should take about 2-3 minutes. Set your crushed cookies aside while you get the cream cheese ready.
Step 2: Soften the Cream Cheese
To ensure a smooth mixture, remove your cream cheese from the refrigerator and let it sit at room temperature for about 15 minutes. Alternatively, you can microwave it for 10-15 seconds to make it soft and spreadable. This step is crucial for crafting creamy Cream Cheese Oreo Protein Balls without clumps.
Step 3: Mix the Base
In a large mixing bowl, combine your softened cream cheese with the crushed Oreo cookies. Using a spatula or a hand mixer, blend these ingredients until they form a smooth, consistent mixture, which should take around 2-3 minutes. The result should look like a thick, creamy dough with visible flecks of cookie.
Step 4: Add Protein Powder
Gradually sprinkle in your choice of protein powder, mixing thoroughly after each addition. If the mixture feels too dry to form into balls, add a splash of milk to help it come together. Aim for a pliable dough that holds its shape when rolled; this process should take about 2 minutes to achieve the perfect consistency.
Step 5: Shape the Balls
Using a tablespoon or cookie scoop, take portions of the mixture and roll them into bite-sized balls using your palms. Each ball should be about the size of a golf ball. Place each formed ball onto a parchment-lined tray, ensuring they have a little space between them. This shaping process should take approximately 5 minutes.
Step 6: Chill the Protein Balls
Once all your Cream Cheese Oreo Protein Balls are shaped, place the tray in the refrigerator. Allow them to chill for at least 1 hour, or for a quicker option, freeze them for 30 minutes. Chilling helps them firm up and enhances the flavors, resulting in the ultimate no-bake treat.
Step 7: Optional Coating
If you want to add a finishing touch, roll the chilled protein balls in crushed Oreos, cocoa powder, or shredded coconut before serving. This step is optional but adds an extra layer of flavor and a bakery-style appeal. Enjoy your deliciously indulgent Cream Cheese Oreo Protein Balls, perfect for any occasion!
What to Serve with Cream Cheese Oreo Protein Balls
These delightful treats can elevate any snack time or casual gathering, providing perfect harmony with a medley of flavors and textures.
-
Fresh Fruit Salad: The natural sweetness and juicy textures of seasonal fruits provide a refreshing balance to the rich flavor of the protein balls.
-
Greek Yogurt Parfait: Creamy yogurt layered with berries and granola offers a satisfying crunch, making for a delightful contrast with the soft protein balls.
-
Nut Butter Dipper: Pairing these bites with almond or peanut butter creates a delicious mix of flavors, adding a nutty richness that complements the sweetness of the protein balls.
-
Chocolate Coconut Energy Bites: For a double dose of indulgence, serve alongside similar no-bake energy bites; their chewy texture and chocolate flavor work wonders together.
-
Nutty Granola Bars: Enjoying these protein balls with a chewy granola bar sets the stage for a crunchy yet satisfying protein-packed snack combo.
-
Cold Brew Coffee: The smooth notes of a chilled coffee drink can enhance the sweetness of the protein balls, creating a perfect afternoon pick-me-up.
-
Lightly Sweetened Iced Tea: Quench your thirst with a glass of iced tea, offering a refreshing contrast that keeps everything light and balanced.
-
Coconut Chia Pudding: This creamy, lightly sweet pudding serves as a delightful side, pairing beautifully with the rich texture of the protein balls.
-
Protein Shake: Enjoy these protein balls with a homemade protein shake for an extra boost and a fulfilling workout snack.
-
Mini Cheesecake Bites: For dessert lovers, mini cheesecakes share a creamy foundation, making them a playful pairing that enhances your sweet experience.
How to Store and Freeze Cream Cheese Oreo Protein Balls
Fridge: Store your protein balls in an airtight container in the refrigerator for up to 5 days, ensuring they remain fresh and delicious.
Freezer: If you’d like to keep them longer, these Cream Cheese Oreo Protein Balls can be frozen for up to 2 months. Just place them in a freezer-safe bag or container, separating layers with parchment paper.
Thawing: When ready to enjoy, simply transfer the frozen balls to the fridge for a few hours or let them sit at room temperature for about 30 minutes before serving.
Reheating: There’s no need to reheat; these protein balls are best enjoyed chilled or at room temperature!
Expert Tips for Cream Cheese Oreo Protein Balls
-
Room Temperature Cheese: Make sure your cream cheese is softened to room temperature. Cold cream cheese can cause clumping, making it hard to mix smoothly.
-
Protein Powder Choice: Select a protein powder flavor you genuinely enjoy, as this will significantly affect the taste of your Cream Cheese Oreo Protein Balls.
-
Texture Control: If the mixture feels too dry and crumbly, add a splash of milk gradually until you reach the desired consistency for rolling the balls.
-
Chill for Firmness: Don’t skip the chilling step; refrigerating or freezing the balls helps them firm up, making them easier to enjoy without falling apart.
-
Experiment with Add-Ins: Add variety by incorporating different mix-ins like mini chocolate chips or dried fruits. Just remember to keep the balance for a perfect texture!
Cream Cheese Oreo Protein Balls Variations
Feel free to get creative and customize your Cream Cheese Oreo Protein Balls with these delightful suggestions!
-
Dairy-Free: Use vegan cream cheese and plant-based protein powder for a delicious dairy-free treat. Enjoy the same creamy texture without compromise.
-
Flavor Twist: Swap Oreo cookies for chocolate chip or peanut butter cookies to reinvent the flavor profile entirely. Every bite will have a unique taste that satisfies your cravings!
-
Sweetness Adjustment: Try adding a drizzle of honey or maple syrup to boost the sweetness if your sweet tooth is calling. This little enhancement elevates the flavor to a new level.
-
Crunch Factor: Incorporate chopped nuts or seeds for additional texture and nutrition. Walnuts or almonds could provide a satisfying crunch and a healthy fat boost.
-
Chocolate Lovers: Mix in mini chocolate chips or chopped dark chocolate for an added indulgence. The melty chocolate complements the creamy base beautifully!
-
Fruit Infusion: Add dried fruits like cranberries or apricots for a fruity twist. This will not only enhance the flavor but also add a delightful chewiness.
-
Protein Boost: Use flavored protein powders, such as chocolate or vanilla cake batter, to infuse your protein balls with extra flavor that matches your preference. Just like you can find in my Mac Cheese Ready for a unique savory treat.
-
Spicy Kick: For those who enjoy a little heat, mix in a pinch of cayenne or chili powder. It’s an unexpected twist that adds a fun edge to the sweet treats!
Each of these variations allows you to tailor your Cream Cheese Oreo Protein Balls to your personal tastes, making them even more irresistible. Let your creativity shine!
Make Ahead Options
These Cream Cheese Oreo Protein Balls are perfect for meal prep, saving you time on busy weeknights! You can easily prepare the mixture up to 24 hours in advance; simply combine the softened cream cheese and crushed Oreos, then mix in your protein powder. Once mixed, shape the balls and refrigerate for up to 3 days. To maintain their quality, store them in an airtight container to prevent them from drying out. When you’re ready to enjoy, simply take them out of the fridge and, if desired, roll in your choice of toppings like crushed Oreos or cocoa powder for an indulgent finishing touch. These no-bake treats will be just as delicious and ready to satisfy your cravings!
Cream Cheese Oreo Protein Balls Recipe FAQs
How do I select the right Oreo cookies?
Absolutely! The base of your Cream Cheese Oreo Protein Balls should be fresh, crunchy Oreo cookies. Look for cookies that are firm and free of any dark spots that may indicate staleness. If you’re looking to be healthier, consider using reduced-fat or low-carb options—they can give you the same great flavor with less sugar!
What’s the best way to store Cream Cheese Oreo Protein Balls?
You can store your delicious protein balls in the refrigerator for up to 5 days, which keeps them fresh and easy to grab for a snack. For longer storage, place them in an airtight container or freezer-safe bag and keep them in the freezer for up to 2 months. Just be sure to separate layers with parchment paper to prevent sticking!
Can I freeze these protein balls?
Yes! Freezing your Cream Cheese Oreo Protein Balls is a great way to keep them on hand for longer. To freeze, simply place the formed balls in a single layer on a baking sheet and freeze until solid. Then transfer them to a freezer-safe bag or container. When you’re ready to enjoy them, let them thaw in the refrigerator for a few hours or at room temperature for about 30 minutes.
What should I do if my mixture is too dry to form balls?
If you find your mixture is too dry, don’t worry! Start by adding a tablespoon of milk at a time—this can be dairy or plant-based—mixing well after each addition. You want to aim for a pliable consistency that holds together easily. This process should take just a few minutes, ensuring your Cream Cheese Oreo Protein Balls take shape smoothly.
Are there any dietary considerations I should keep in mind?
Definitely! For those with dietary restrictions, you can easily customize the recipe. Using vegan cream cheese and plant-based protein powder makes this a delicious treat for vegan diets. Also, be cautious about cookie selection if you have allergies—Oreo cookies may contain allergens like wheat or dairy. Always check labels to accommodate any dietary needs.
Can I customize the flavor?
The more the merrier! For extra excitement, feel free to explore different cookie flavors, such as chocolate chip or even gluten-free cookies. You can also mix in fun ingredients like mini chocolate chips, nuts, or dried fruits for a delightful twist on your Cream Cheese Oreo Protein Balls. Enjoy experimenting!
Cream Cheese Oreo Protein Balls for Guilt-Free Indulgence
Ingredients
Equipment
Method
- Begin by placing your Oreo cookies in a zip-top bag or food processor. Crush them gently until they reach a fine crumb texture, leaving a few larger bits for added crunch. Set aside.
- Remove your cream cheese from the refrigerator and let it sit at room temperature for about 15 minutes. Alternatively, microwave it for 10-15 seconds.
- In a large mixing bowl, combine your softened cream cheese with the crushed Oreo cookies. Blend until a smooth mixture forms.
- Gradually sprinkle in your choice of protein powder, mixing thoroughly. Add milk if the mixture feels too dry to form into balls.
- Using a tablespoon, take portions of the mixture and roll them into bite-sized balls. Place on a parchment-lined tray.
- Once all balls are shaped, place the tray in the refrigerator for at least 1 hour to firm up.
- Optional: Roll the chilled protein balls in crushed Oreos, cocoa powder, or shredded coconut before serving.
Leave a Reply