
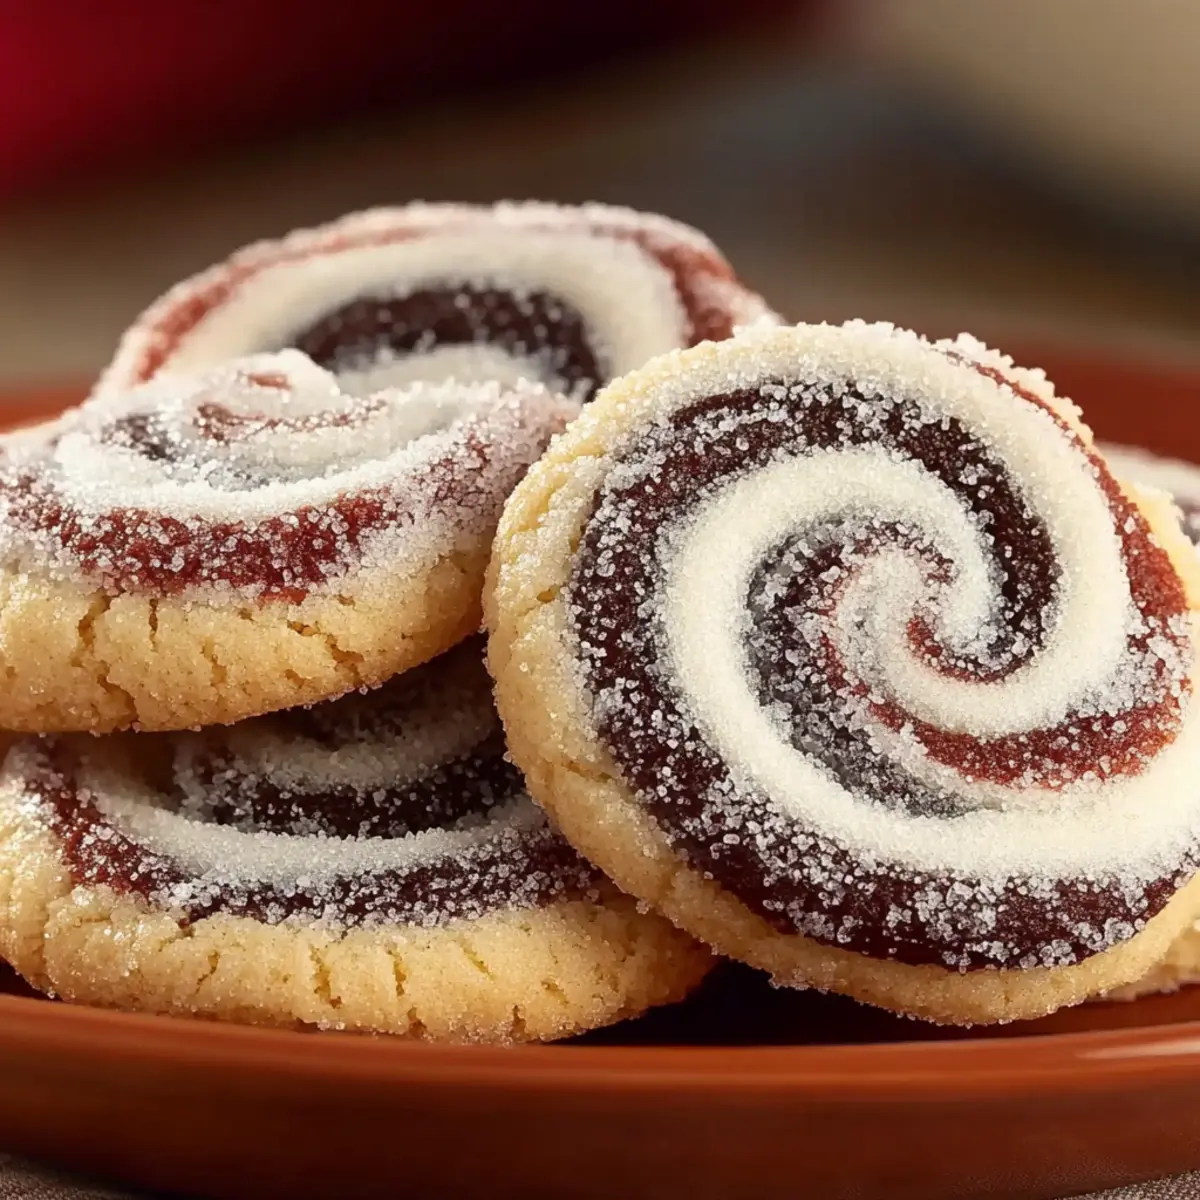
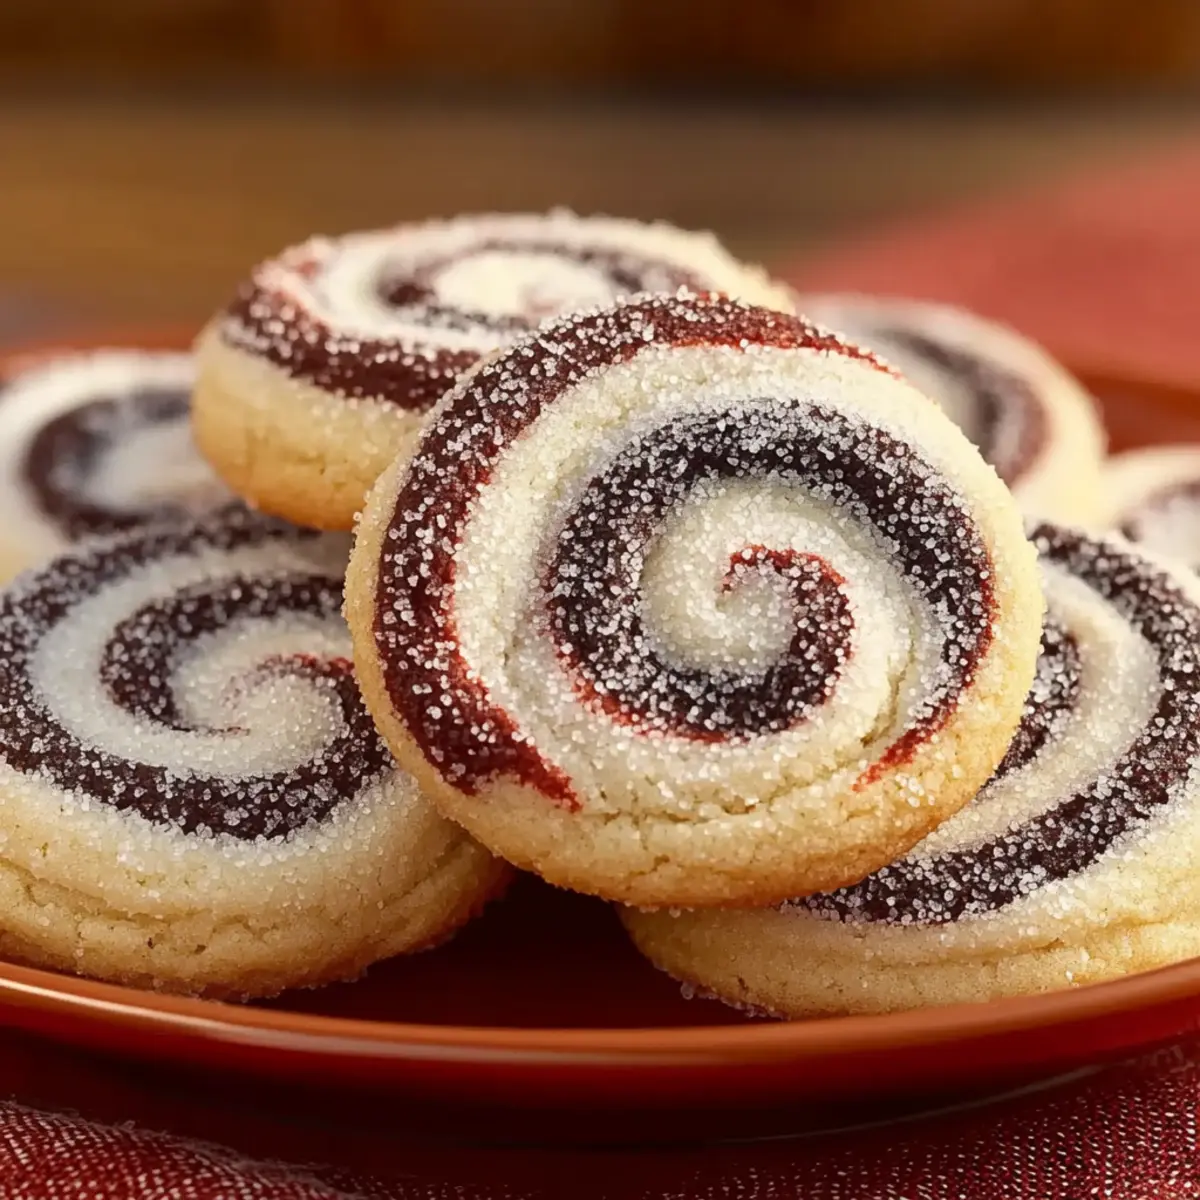
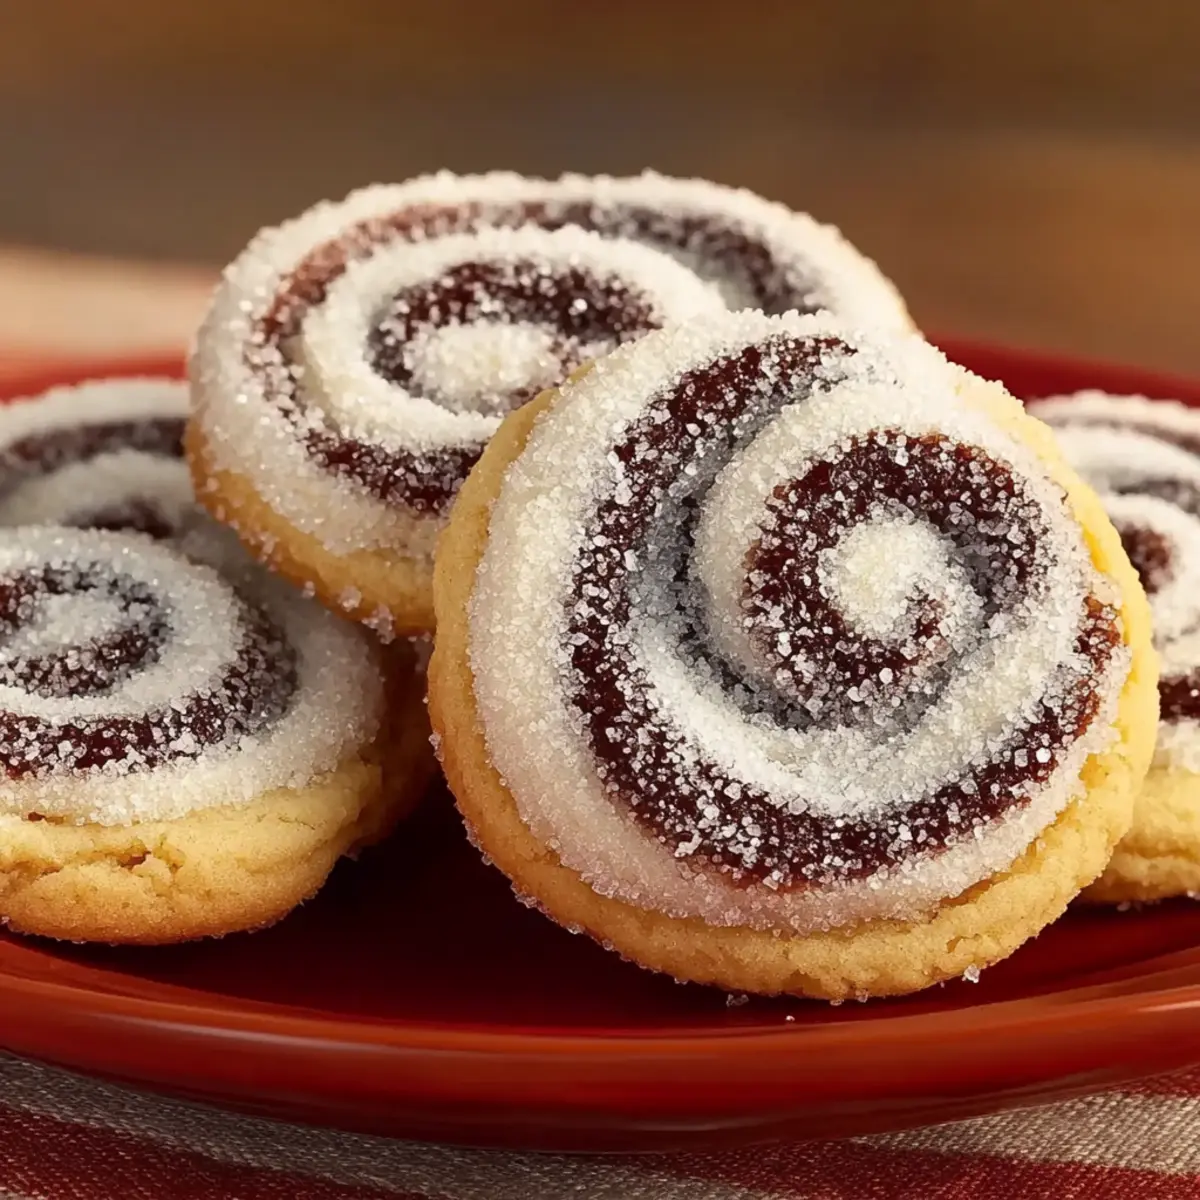
As the holiday season approaches, nothing brightens up a gathering quite like the sight of a colorful platter filled with freshly baked goodies. Enter the mesmerizing Peppermint Swirl Cookies—colorful spirals that are as delightful to behold as they are to taste. With this recipe, I’ll guide you through simple yet effective techniques to create bakery-quality swirls at home, ensuring that your cookies are not only visually stunning but also soft and full of refreshing minty goodness. Perfect for festive occasions, these treats are quick to whip up and are bound to impress family and friends alike. Ready to give your cookie game a fun, festive twist? Let’s dive in!
Why Are Peppermint Swirl Cookies Irresistible?
Festively Eye-Catching: The vibrant red and white swirls make these cookies a stunning centerpiece for any holiday gathering.
Fresh Minty Flavor: With refreshing peppermint extract, they embody the spirit of the season, providing a delightful burst of flavor in every bite.
Simple Techniques: Using the double-chilling method ensures clean, professional-looking cuts, making it easier than ever to achieve those impressive swirls.
Versatile Fun: Feel free to experiment with different flavor extracts or holiday themes to suit your unique taste and festive mood. They also make a great companion for your favorite hot beverages!
Crowd-Pleasing Treat: These cookies are bound to impress, making them perfect for holiday parties or cozy family gatherings, as everyone will be reaching for seconds!
Peppermint Swirl Cookies Ingredients
• For the sweetest holiday treat, let’s gather the essentials!
For the Cookies
- All-purpose flour – Provides structure for these delightful peppermint swirl cookies; swap with a gluten-free blend, adjusting liquid as needed.
- Baking powder – Acts as a leavening agent, giving your cookies that perfect rise.
- Salt – Enhances the overall flavor, making each bite irresistible.
- Unsalted butter – Softened to room temperature; it’s crucial for a tender crumb and smooth creaming.
- Granulated sugar – Adds sweetness and contributes to a light, fluffy texture when creamed with butter.
- Large egg – Binds everything together and adds a touch of moisture.
- Vanilla extract – Balances the mint flavor, bringing warmth and depth to your cookie recipe.
- Peppermint extract – Delivers the signature cool, refreshing mint flavor, making these cookies truly festive.
- Red gel food coloring – Provides vibrant coloring for those striking swirls without adding moisture; steer clear of liquid colorants!
For Coating
- Coarse sugar or crushed peppermint candies – Adds a festive sparkle and delightful texture, elevating the visual appeal of your peppermint swirl cookies.
Happy baking!
Step‑by‑Step Instructions for Peppermint Swirl Cookies
Step 1: Prepare Dry Ingredients
In a medium bowl, whisk together 2 cups of all-purpose flour, 1 teaspoon of baking powder, and 1/2 teaspoon of salt until evenly combined. This mixture provides the foundation for your Peppermint Swirl Cookies, ensuring they rise beautifully and have a well-balanced flavor. Set this aside while you work on the wet ingredients.
Step 2: Cream Butter and Sugar
In a large mixing bowl, use an electric mixer to cream together 1 cup of softened unsalted butter and 1 cup of granulated sugar. Beat on medium speed for about 3-5 minutes until the mixture is light and fluffy, which is crucial for achieving a tender texture in your cookies. This step introduces air, which will help create the perfect bite.
Step 3: Combine Wet Ingredients
Add 1 large egg along with 1 teaspoon of vanilla extract and 1/2 teaspoon of peppermint extract to the creamed butter and sugar. Beat the mixture on low speed until everything is fully combined and smooth, ensuring the rich flavors meld together. You should see a creamy, uniform consistency that adds moisture to your Peppermint Swirl Cookies.
Step 4: Mix Dough
Gradually incorporate the dry ingredients into the wet mixture while mixing on low speed. Do this just until the flour disappears, taking care not to overmix, as this can toughen the cookies. Once the dough comes together, you should have a cohesive and slightly sticky dough, ready for its colorful transformation.
Step 5: Split and Color Dough
Divide the dough evenly into two parts; leave one portion white and add red gel food coloring to the second half. Use your hands to knead the color into the dough until it’s well combined and forms a vibrant, uniform shade. This step is key to achieving those show-stopping swirls in your finished Peppermint Swirl Cookies.
Step 6: Chill Dough
Wrap both portions of dough in plastic wrap and refrigerate for at least 30 minutes. Chilling is essential as it firms up the butter and helps the cookies maintain their shape during baking. When you’re ready to roll, the dough should be firm but pliable, making it easier to work with.
Step 7: Roll Dough
After chilling, take one portion of dough and roll it out on a lightly floured surface into a rectangle approximately 10×12 inches in size, ensuring even thickness throughout. Repeat with the second portion of dough. Aim for a smooth surface, as this will affect the neatness of the swirls in your Peppermint Swirl Cookies.
Step 8: Layer and Roll
Gently stack the red dough on top of the white dough, pressing them together carefully to ensure they stick. Starting from one end, roll the layered dough into a tight log. This process creates the beautiful spiral effect that makes your Peppermint Swirl Cookies so visually appealing, bringing holiday cheer to your cookie tray.
Step 9: Second Chill
Wrap the dough log securely in plastic wrap and place it back in the refrigerator for at least 2 hours. This second chilling step is crucial to allow the dough to firm up further, making it much easier to slice cleanly into perfectly round cookies. The longer the chilling, the neater your swirls will appear.
Step 10: Preheat Oven
While the log is chilling, preheat your oven to 375°F (190°C) and line your baking sheets with parchment paper. This ensures the Peppermint Swirl Cookies will bake evenly and not stick, allowing for easy removal once they’re done. You’ll want to have everything ready for when the dough is ready to be sliced.
Step 11: Slice and Coat
After the log has chilled, remove it from the refrigerator and brush the surface with a little water or egg white. Roll the log in coarse sugar or crushed peppermint candies, coating it thoroughly. Then, slice the log into 1/4-inch rounds, revealing the beautiful swirls of white and red that characterize your Peppermint Swirl Cookies.
Step 12: Bake
Carefully place the sliced cookies on the prepared baking sheets, spacing them about 2 inches apart. Bake them in your preheated oven for 8-10 minutes, or until the edges turn lightly golden. Keep a close eye on them as they bake; they will continue to set once removed from the oven, so you want them to be tender and just set.

How to Store and Freeze Peppermint Swirl Cookies
Airtight Container: Store your cookies in an airtight container at room temperature for up to 5-7 days. Adding a slice of bread helps absorb moisture and keeps them crisp!
Refrigeration: If you want to enjoy them longer, place your cookies in the fridge, where they’ll stay fresh for about 1 week!
Freezer: For up to 1 month of deliciousness, freeze the cookies in a single layer, then transfer to a freezer-safe bag or container, keeping them airtight.
Thawing: When you’re ready to indulge, thaw your Peppermint Swirl Cookies at room temperature for about 30 minutes before enjoying their delightful minty goodness!
What to Serve with Bakery-Perfect Peppermint Swirl Cookies
Nothing completes a festive gathering quite like the delightful addition of complementary treats to your peppermint swirl cookies.
-
Hot Cocoa: The rich, creamy flavors of hot cocoa balance the refreshing mint in your cookies, creating a warm and cozy experience. Enjoying a cookie with a sip of cocoa wraps you in a delightful holiday embrace.
-
Coffee: A smooth cup of coffee enhances the minty sweetness of the cookies, making for a delightful pairing that awakens your senses. The bitterness of coffee beautifully contrasts with the sugary cookie, making each bite a memorable moment.
-
Eggnog: This classic holiday drink brings creamy, spiced flavors that harmonize wonderfully with the peppermint. Sipping on eggnog while indulging in these cookies adds a festive flair to your celebration.
-
Whipped Cream Cheese Dip: A softened, sweetened cream cheese dip provides a tangy counterpoint to the cookies’ sweetness, inviting you to dunk and savor each bite. This dynamic pairing adds a new layer of flavor to your holiday spread.
-
Fruit Platter: Fresh fruits like strawberries or pomegranate seeds can offer a refreshing balance to the rich dough. Their juicy sweetness cuts through the mint flavor, adding brightness alongside your cookies.
-
Chocolate Milk: A glass of chocolate milk serves as a nostalgic throwback that pairs perfectly with the cool mint of the cookies. The sweetness of the chocolate milk creates a comforting, kid-friendly experience.
-
Ice Cream: A scoop of vanilla or peppermint ice cream transforms your cookies into a fabulous dessert sandwich, making every bite feel extra indulgent. The combination of soft and cold will have everyone asking for seconds!
-
Spiced Tea: A warm cup of spiced tea can complement the cooling mint, enriching the holiday flavors and warming your heart on cold evenings. The aromatic spices enhance the cookies’ festive essence.
Peppermint Swirl Cookies Variations
Feel free to get creative with your Peppermint Swirl Cookies and explore these fun twists that even your family will rave about!
-
Gluten-Free: Use a gluten-free all-purpose blend instead of regular flour for a delightful gluten-free treat. Ensure you adjust the liquid and chilling times for best results.
-
Flavor Twist: Experiment with almond or orange extract for a unique flavor profile that adds exciting depth to your cookies without losing the festive spirit.
-
Add-Ins: Fold in small chocolate chips or crushed nuts for extra texture and flavor. Imagine the delightful surprise of chocolate bites amidst the soft minty cookies!
-
Different Colors: Use green gel food coloring for a spin on classic holiday colors! You can combine red and green for a festive twist, making them even more visually stunning.
-
Spicy Kick: Add a pinch of ground cinnamon or pepper for an unexpected warm spice that complements the mint beautifully, a cookie that surprises with every bite!
-
Shorter Cookies: Adjust the thickness when rolling out the dough and slice wider rounds for bigger, chewy cookies filled with that delicious peppermint goodness.
-
Decorative Glaze: Drizzle a simple icing made of powdered sugar and milk over the cooled cookies for an extra layer of sweetness and an elegant look for festive gatherings.
-
Unique Crunch: Roll the sliced cookies in crushed candy canes instead of coarse sugar for an added peppermint crunch that brings delightful texture to each morsel.
Explore and enjoy these variations, and don’t forget to serve your Peppermint Swirl Cookies with a warm cup of cocoa or coffee—it’s the perfect festive pairing! Happy baking!
Make Ahead Options
These Peppermint Swirl Cookies are perfect for busy home cooks looking to save time during the festive season! You can prepare the dough up to 24 hours in advance by following steps 1 through 6 and refrigerating both portions separately. Alternatively, after rolling, wrap the log tightly in plastic wrap and refrigerate for up to 3 days; this will maintain the swirls’ integrity and ensure the dough stays fresh. Just remember, for the best results, keep the dough chilled until you’re ready to slice and bake. When it’s time to enjoy your cookies, simply proceed with the slicing, coating, and baking steps, and you’ll have delightful, bakery-quality Peppermint Swirl Cookies ready to impress your family and friends!
Helpful Tricks for Peppermint Swirl Cookies
Chill Time Matters: Ensure you chill both dough portions adequately. This helps maintain their shape and allows for cleaner slicing, crucial for achieving beautiful swirls.
Butter Temperature: Make sure your unsalted butter is fully softened, as cold butter won’t whip air into the mixture, leading to denser cookies.
Avoid Overmixing: When combining wet and dry ingredients, mix just until combined. Overmixing can develop gluten, resulting in tough Peppermint Swirl Cookies.
Sharp Knife Slice: Use a very sharp knife for slicing the dough log; this will help maintain the integrity of your swirls and create neat, beautiful cookies.
Watch the Bake Time: Keep a close eye on the cookies while baking. They should be lightly golden at the edges—undercooking slightly preserves that soft, tender texture!
Peppermint Swirl Cookies Recipe FAQs
How do I select the best ingredients for my Peppermint Swirl Cookies?
Absolutely! For the freshest and best results, choose high-quality unsalted butter, as it makes a big difference in flavor. The peppermint extract should be pure for maximum taste, while the flour should ideally be all-purpose to provide the right texture. Look for flour that’s finely milled and avoid any that appear clumpy.
What is the best way to store Peppermint Swirl Cookies?
Store your Peppermint Swirl Cookies in an airtight container at room temperature for up to 5-7 days. For optimal freshness, consider placing a slice of bread in the container to help absorb moisture and maintain their delightful crispness. Alternatively, you can refrigerate them to extend shelf life to about a week.
Can I freeze Peppermint Swirl Cookies?
Absolutely! To freeze your cookies, let them cool completely, then lay them out in a single layer on a baking sheet until firm. This helps prevent them from sticking together. Once solid, transfer them to a freezer-safe bag or container, ensuring it’s airtight. They can be frozen for up to 1 month!
What if my cookie dough is too sticky or dry?
This can happen, but don’t worry! If the dough is too sticky, you might need to chill it a bit longer before rolling it out. On the other hand, if it’s too dry, you can add a teaspoon of milk or water to bring it back together. Mixing should be gentle; overmixing can also lead to dryness, so keep it minimal to maintain that tender cookie texture.
Are Peppermint Swirl Cookies safe for pets?
No, they are not safe for pets! The cookies contain ingredients like sugar and peppermint extract, which can be harmful to many pets. Always keep your freshly baked treats out of reach of furry friends, and opt for pet-friendly treats if you’d like to share the joy of baking with them!
Delightful Peppermint Swirl Cookies for Festive Fun
Ingredients
Equipment
Method
- In a medium bowl, whisk together 2 cups flour, 1 teaspoon baking powder, and 1/2 teaspoon salt until evenly combined.
- Cream together 1 cup softened butter and 1 cup granulated sugar using an electric mixer for 3-5 minutes until light and fluffy.
- Add 1 large egg, 1 teaspoon vanilla extract, and 1/2 teaspoon peppermint extract to the creamed mixture. Beat until smooth.
- Gradually mix in dry ingredients on low speed until just combined.
- Divide the dough and leave one part white; color the other with red gel food coloring until well combined.
- Wrap both portions in plastic wrap and chill in the refrigerator for at least 30 minutes.
- Roll out the dough to a rectangle (10x12 inches) on a floured surface.
- Layer the red dough on top of the white dough and roll into a tight log.
- Wrap the log in plastic wrap and refrigerate for at least 2 hours.
- Preheat the oven to 375°F (190°C) and line baking sheets with parchment paper.
- After chilling, brush the log with water, roll in coarse sugar or crushed candies, and slice into 1/4-inch rounds.
- Bake the cookies for 8-10 minutes until edges are lightly golden.
Leave a Reply