
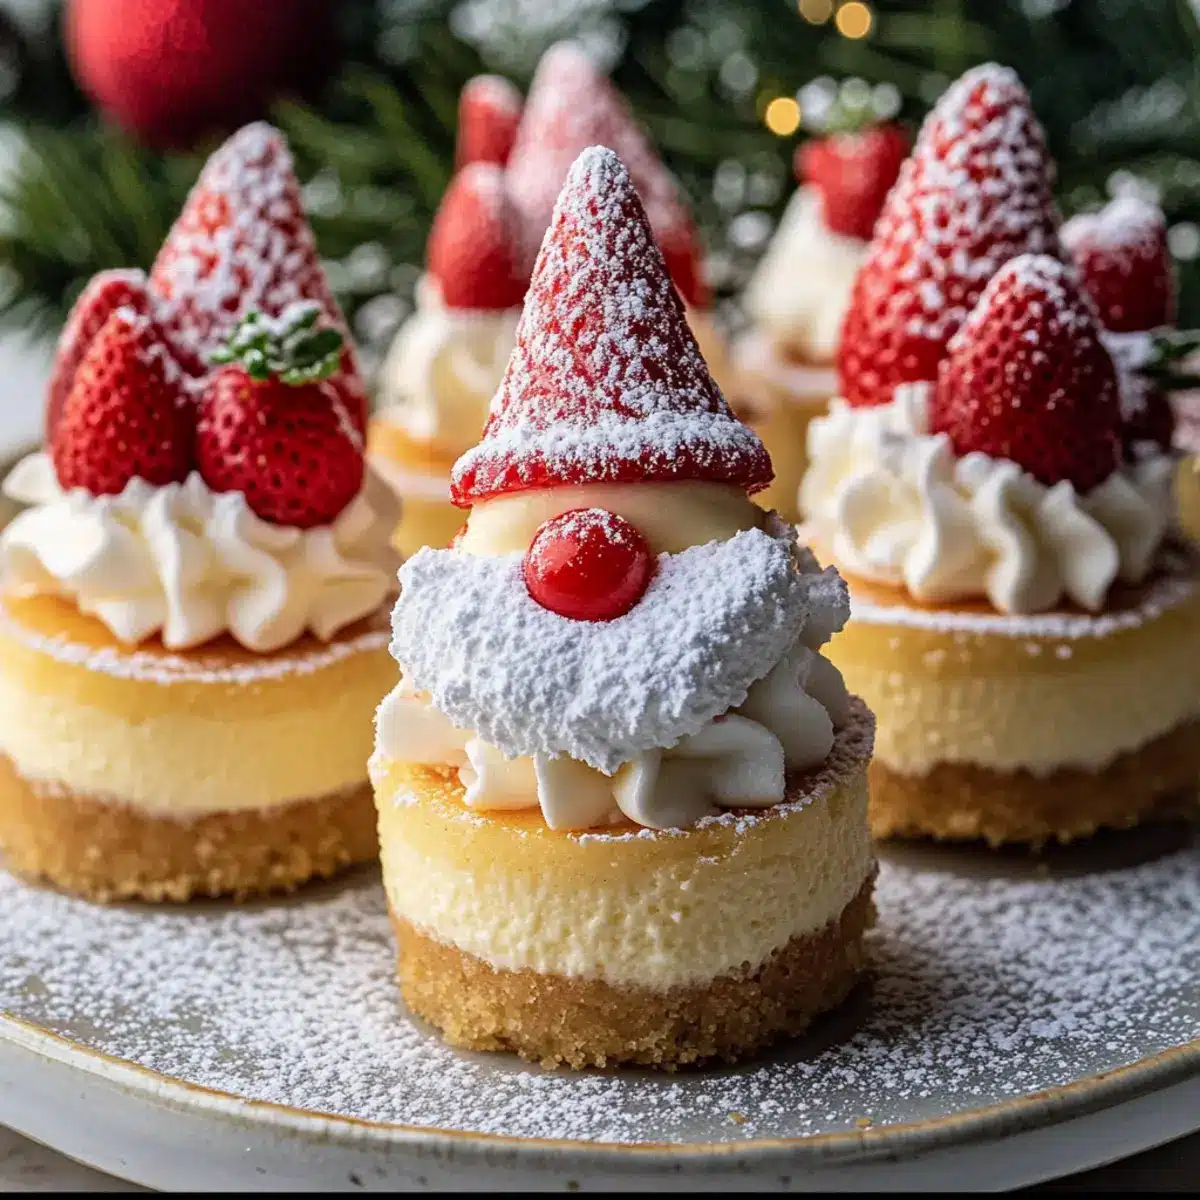
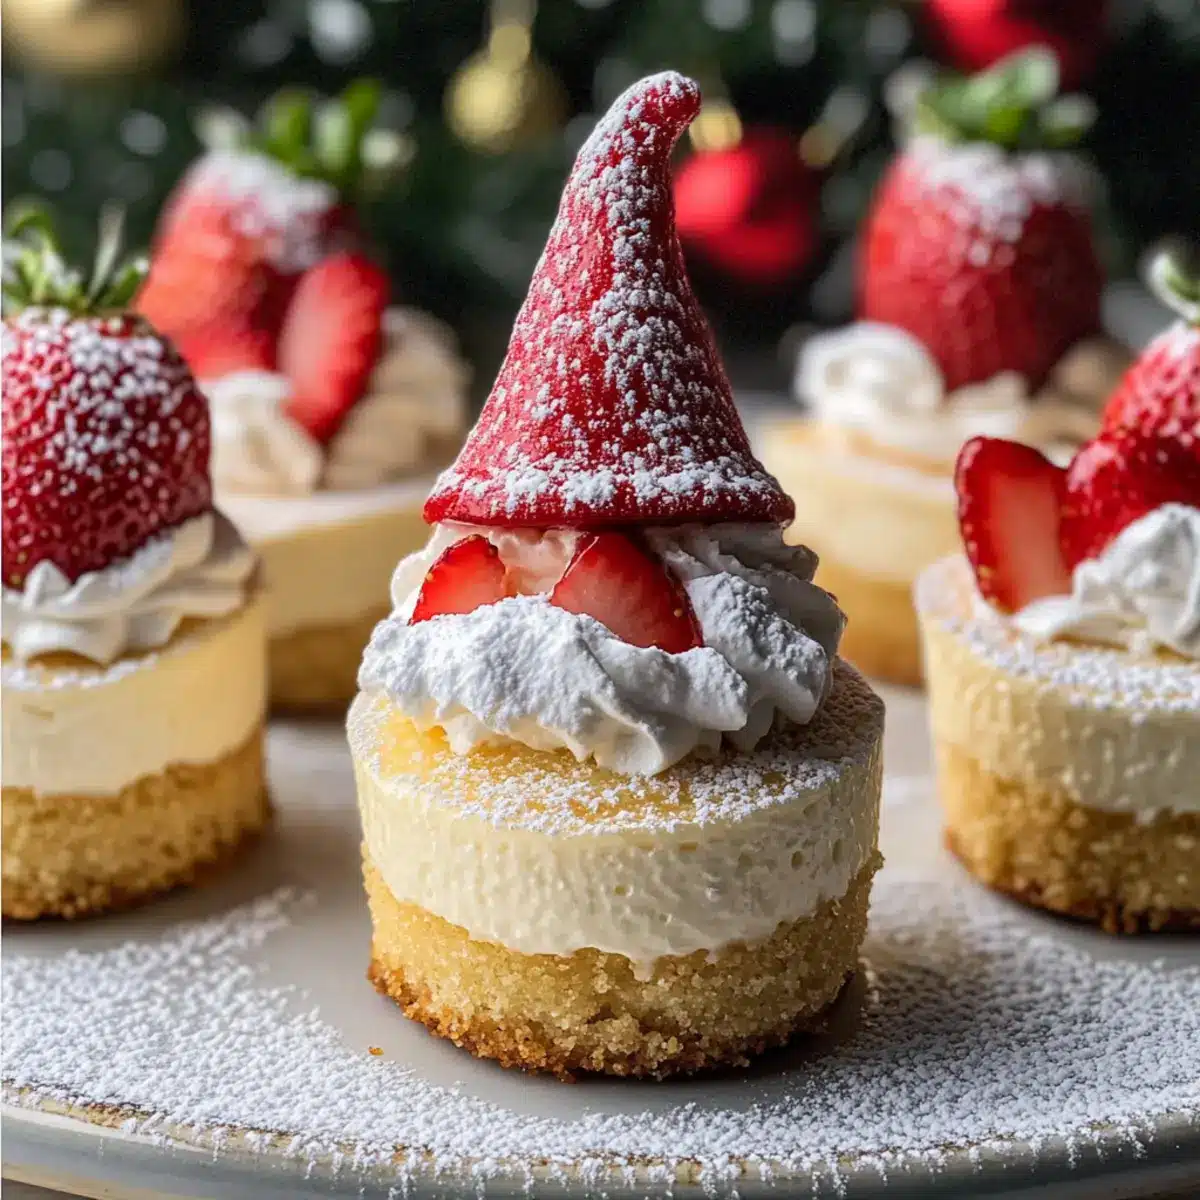
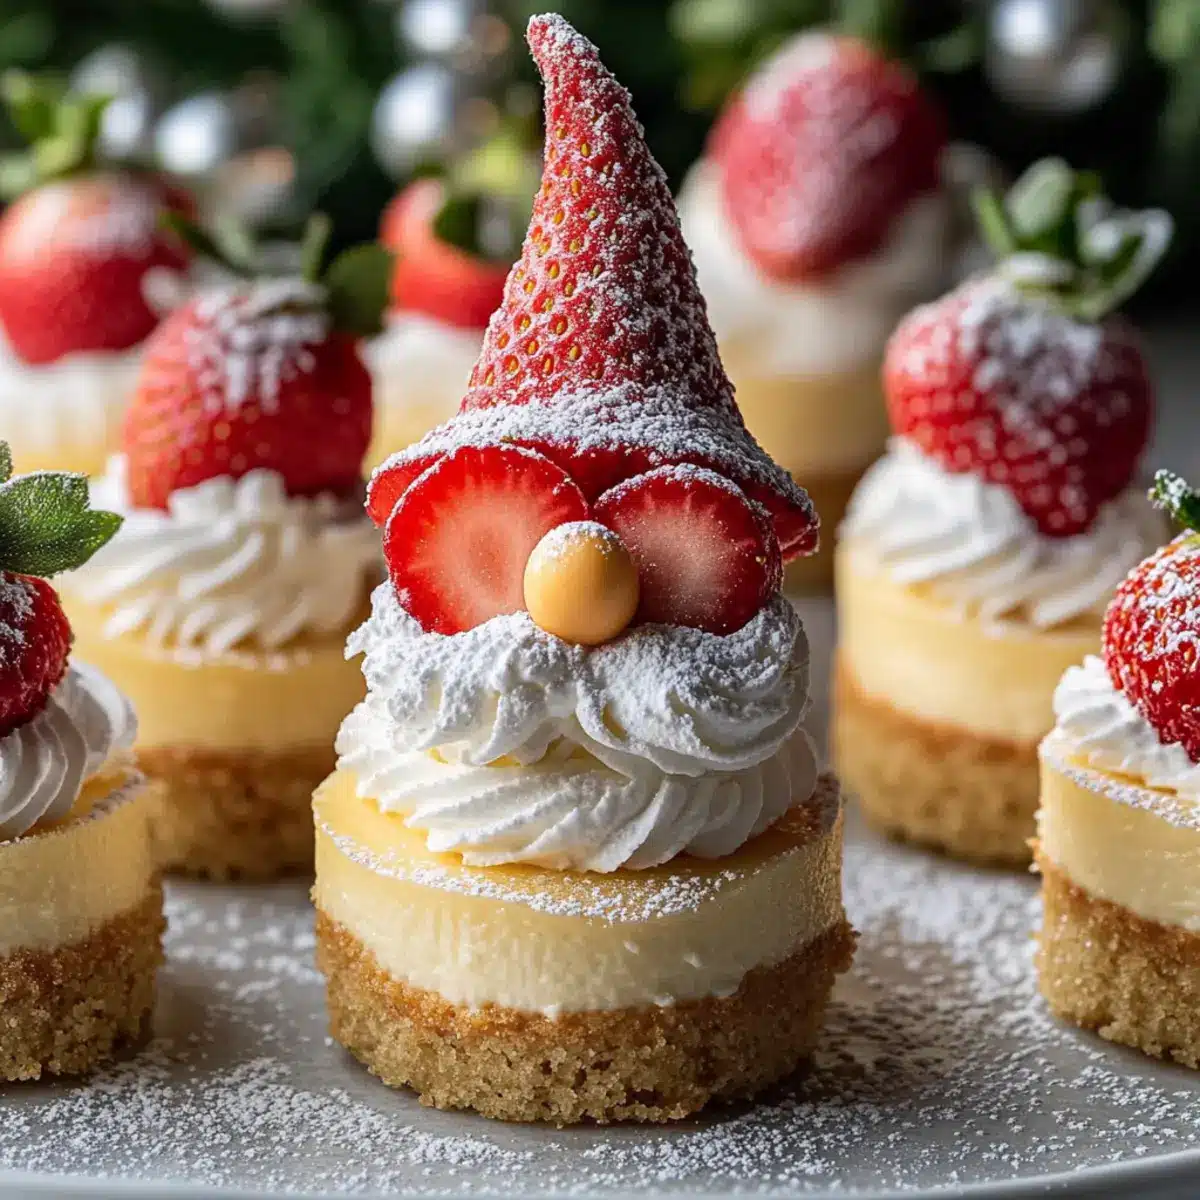
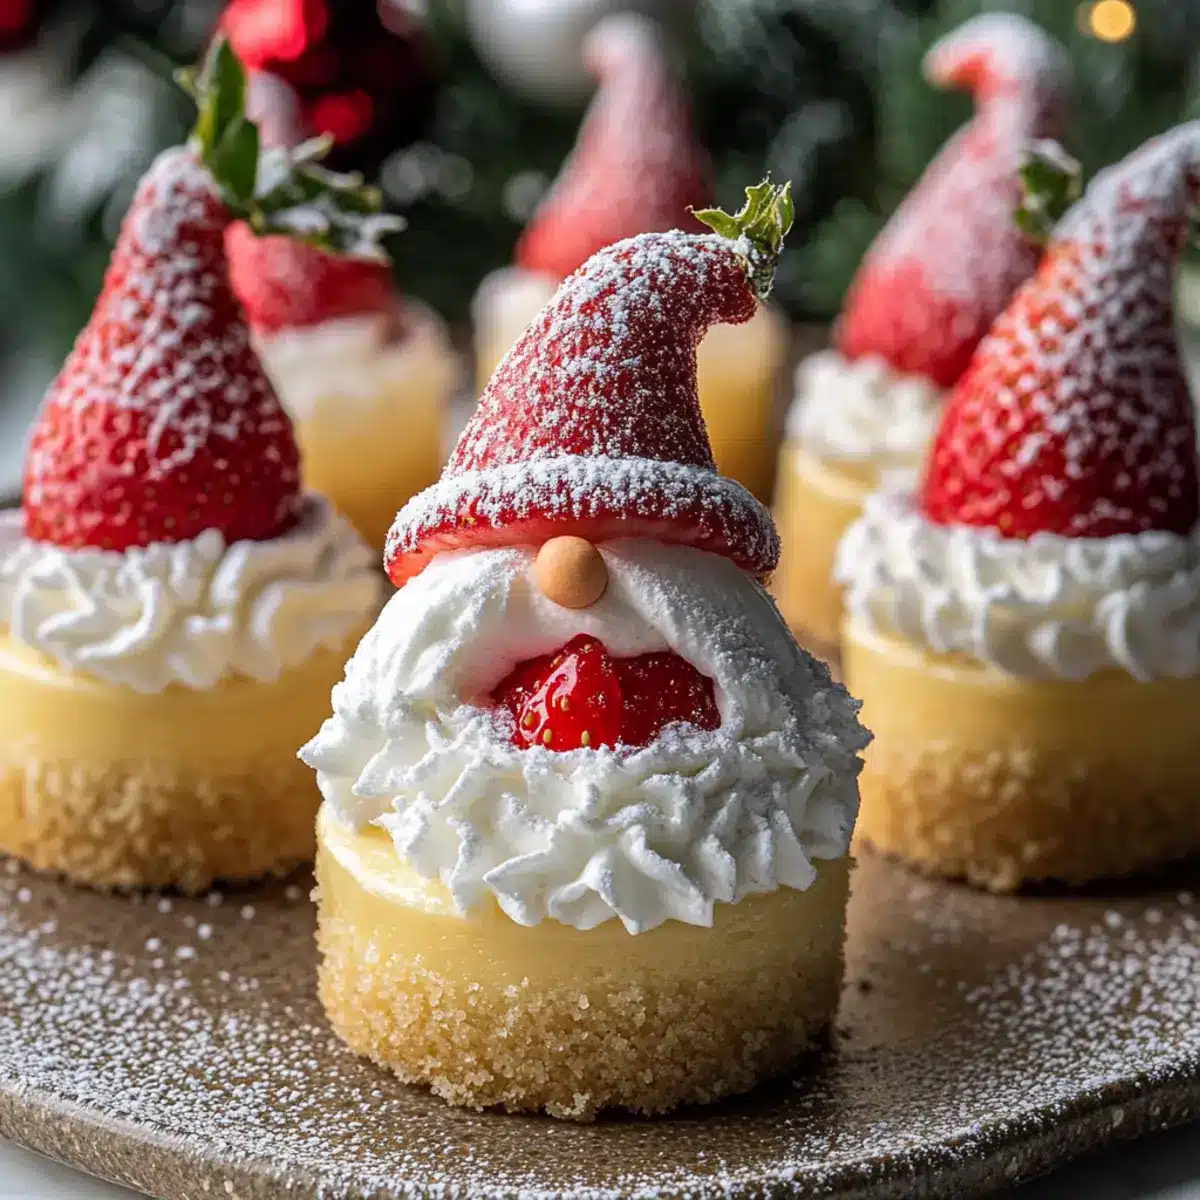
As I rummaged through my holiday recipe box, I stumbled upon a charming little treat that promises to be a crowd-pleaser: Gnome Mini Cheesecakes! These delightful desserts are not only visually appealing but also incredibly easy to whip up, making them perfect for both experienced bakers and kitchen novices alike. With their creamy cheesecake filling nestled atop a buttery graham cracker crust, topped with strawberries and fluffy whipped cream, they’re the ideal festive addition to any gathering. Plus, they’re kid-friendly and can easily be made gluten-free or as a quick no-bake version! Ready to spread some cheer and create sweet memories? Let’s dive into this whimsical recipe that will make your holiday celebrations even more special!
Why Are Gnome Mini Cheesecakes Irresistible?
Whimsical Charm: These Gnome Mini Cheesecakes bring festive fun to any gathering, instantly turning heads and sparking smiles.
Kid-Friendly: Perfect for little hands, they combine creamy cheesecake with playful decorations that kids will love helping to create.
Easy to Make: Featuring straightforward steps, this recipe is a breeze, ideal for both seasoned chefs and baking beginners.
Versatile Options: You can easily switch things up—try a gluten-free crust or a no-bake version for added simplicity.
Delightful Presentation: With their vibrant colors and adorable gnome design, they’re not just treats; they’re also the highlight of your holiday table. Don’t forget to check out my Bagel Stuffed Mini or Mini Sugar Cookies for more festive inspo!
Gnome Mini Cheesecake Ingredients
For the Crust
• Graham Cracker Crumbs – Base structure for the crust. Can substitute with vanilla wafers or Oreos.
• Granulated Sugar – Adds sweetness to both crust and filling. Adjust depending on taste preference.
• Unsalted Butter (melted) – Binds crust ingredients, adding richness. Use salted butter for a different flavor profile.
For the Cheesecake Filling
• Cream Cheese – Provides rich, creamy filling. Substitute with Neufchâtel for a lower-fat option.
• Granulated Sugar (for filling) – Sweetens cheesecake batter. Can replace with a sugar alternative for a lower-calorie option.
• Vanilla Extract – Enhances flavor of the cheesecake. Use fresh vanilla beans for a gourmet touch.
• Eggs – Acts as a binder and gives structure. Skip for a no-bake version using gelatin.
• Sour Cream or Greek Yogurt – Adds tanginess and creaminess. Can replace with heavy cream for a richer texture.
For Decorating
• Strawberries – For decoration, representing the gnome’s hat. Use raspberries or cherries as alternatives.
• Whipped Cream – Creates an adorable beard for the gnome. Cool Whip or dairy-free whipped topping can be used.
• Mini White Chocolate Chips or Candy Pearls – Acts as the gnome’s nose. Regular chocolate chips can be used instead.
• Powdered Sugar – For decoration, simulating snow. Can be omitted for less sweetness.
Step‑by‑Step Instructions for Gnome Mini Cheesecakes
Step 1: Preheat and Prepare
Begin by preheating your oven to 325°F (160°C). While it warms, line a muffin tin with cupcake liners for easy removal of your Gnome Mini Cheesecakes later. This step ensures your cheesecakes will bake evenly and release beautifully, creating an adorable presentation for your festive treat.
Step 2: Make the Crust
In a mixing bowl, combine graham cracker crumbs, granulated sugar, and melted butter. Use a fork to mix until the mixture resembles wet sand, ensuring even distribution of the butter. Once combined, take a spoonful of the mixture and press it firmly into each muffin cup, forming a solid crust that will support the creamy filling.
Step 3: Bake the Crust
Place the muffin tin in the preheated oven and bake the crusts for 5 minutes. You’re looking for a slight firming of the crust; they should be golden but not browned. Once baked, carefully remove the muffin tin from the oven and allow the crusts to cool completely while you prepare the cheesecake filling.
Step 4: Mix the Filling
In a large mixing bowl, beat the cream cheese using an electric mixer on medium speed until smooth and creamy. Gradually add in the granulated sugar and vanilla extract, blending well until fully incorporated. This should take about 2 minutes, ensuring a fluffy texture that will give your Gnome Mini Cheesecakes their signature creaminess.
Step 5: Incorporate the Eggs
Next, add the eggs one at a time, mixing on low speed until just combined after each addition. Carefully fold in the sour cream or Greek yogurt, taking care not to overmix, as excessive mixing can cause cracking during baking. Your cheesecake batter should be silky and smooth, ready to fill the cooled crusts.
Step 6: Fill the Cups
Divide the cheesecake batter evenly among the prepared muffin cups, filling each about ¾ full. This allows room for the cheesecakes to rise slightly without overflowing. Use a spatula to smooth the tops for a neat finish, ensuring your Gnome Mini Cheesecakes will look as lovely as they taste when baked.
Step 7: Bake the Cheesecakes
Bake the filled muffin cups in the oven for 18–20 minutes. Look for a slight jiggle in the center; the edges should be set but the middle somewhat wobbly, indicating perfect doneness. Once baked, turn off the oven and let the cheesecakes cool inside for 10 minutes before transferring them to a wire rack to cool completely.
Step 8: Chill the Cheesecakes
Once cooled to room temperature, transfer your Gnome Mini Cheesecakes to the refrigerator. Chill them for at least 2 hours, as this step enhances the flavors and gives them a firm, delightful texture. Don’t rush this part; the waiting will be worth it when you bite into that rich, creamy filling.
Step 9: Decorate the Gnomes
After chilling, it’s time to get creative! Using whipped cream, pipe adorable “beards” on each cheesecake. Top each treat with a strawberry or other fruit to represent the gnome’s hat, and add mini chocolate chips or candy pearls for the noses. Make sure each gnome looks cheerful and whimsical!
Step 10: Final Touches
Before serving your Gnome Mini Cheesecakes, dust them lightly with powdered sugar to mimic freshly fallen snow, enhancing their festive charm. These sweet little treats will be a delightful centerpiece, spreading holiday joy and bringing smiles to your gathering. Enjoy this whimsical addition to your holiday table!
What to Serve with Gnome Mini Cheesecakes?
These whimsical treats deserve their moment on a festive table, complemented by delightful dishes that enhance the holiday spirit!
-
Festive Fruit Salad: Bursting with seasonal fruits, this bright salad balances the cheesecakes’ richness and adds a refreshing crunch. The sweetness of oranges and crispness of apples will spark joy at every bite.
-
Hot Chocolate Bar: Create an inviting hot chocolate station complete with toppings like marshmallows and peppermint sticks. This cozy drink pairs beautifully with the decadent cheesecake’s flavors, making friends and family linger longer around the dessert table.
-
Gingerbread Cookies: The spicy warmth of gingerbread cookies offers a seasonal charm that harmonizes wonderfully with cheesecake. Their festive design enhances the playful spirit of your gathering, inviting guests to indulge in both treats.
-
Spiced Apple Cider: Served warm, this fragrant beverage offers a lovely balance to the desserts. Its comforting aroma fills the air, creating a cozy atmosphere while complementing the creamy cheesecakes’ sweetness.
-
Sugar Cookie Platter: Decorative sugar cookies featuring holiday themes add a pop of color and fun to the table. Enjoying these cookies alongside your Gnome Mini Cheesecakes invites a delightful variety of textures, making for an unforgettable holiday dessert spread.
-
Mixed Nuts: Crunchy, roasted nuts offer a savory contrast to the sweet cheesecakes. Their satisfying crunch enhances the experience with each bite, providing a delightful texture alongside the smooth creaminess of the mini cheesecakes.
-
Berry Compote: Drizzle this tangy compote over the mini cheesecakes for an extra fruity kick. The lively flavors will elevate each bite, adding a fresh and delightful element that complements the rich cheesecake perfectly.
Storage Tips for Gnome Mini Cheesecakes
Fridge: Refrigerate decorated Gnome Mini Cheesecakes for up to 4 days to keep them fresh and creamy. Use an airtight container to prevent them from absorbing other odors.
Freezer: Unadorned cheesecakes can be frozen for up to 1 month. Wrap each one tightly in plastic wrap and foil, then thaw in the refrigerator before decorating.
Reheating: For serving leftovers, simply let them sit at room temperature for a bit or briefly microwave without the toppings, ensuring they remain deliciously creamy.
Make-Ahead: You can prepare them 1-2 days in advance and store them in the fridge; just add the finishing touches before serving to keep that delightful presentation intact.
Make Ahead Options
These Gnome Mini Cheesecakes are perfect for meal prep, allowing you to savor the joy of holiday baking without the last-minute rush! You can prepare the cheesecake batter and crust up to 24 hours in advance, storing them separately in the refrigerator. Once baked, cool the cheesecakes and refrigerate for up to 3 days before serving. To maintain the best quality, cover them with plastic wrap or keep them in an airtight container. Just before serving, decorate your mini cheesecakes with whipped cream, strawberries, and candy pearls to add that festive touch. This make-ahead strategy ensures these whimsical treats are just as delightful as when freshly made, saving you time for holiday cheer!
Expert Tips for Gnome Mini Cheesecakes
-
Avoid Cracks: To prevent cracking, mix the batter gently after adding eggs. Overmixing introduces excess air, which can cause unsightly cracks during baking.
-
Chill Well: Ensure you chill the Gnome Mini Cheesecakes for at least 2 hours. This step is crucial for achieving that firm, creamy texture we all adore.
-
Perfect Decoration: Use a piping bag for applying whipped cream; it makes decorating the “beard” a breeze and adds a professional touch to your festive treats.
-
Creative Alternatives: Don’t hesitate to experiment! Try different decorations or pie filling flavors in your cheesecake to match your holiday theme.
-
Storage Savvy: If you have leftovers, refrigerate them for up to 4 days. Keep them covered to maintain freshness, ensuring these delightful treats last longer for you to enjoy.
Gnome Mini Cheesecakes Variations & Substitutions
Feel free to play and customize these Gnome Mini Cheesecakes to make them your own delightful creation.
- No-Bake: Substitute the filling with a whipped topping and gelatin mixture for a simpler, chilled recipe that’s equally delicious.
- Gluten-Free: Use gluten-free cookies instead of graham crackers for the crust to accommodate dietary needs without losing flavor.
- Sugar Sensitivity: Replace granulated sugar with a natural sweetener like honey or agave syrup for a lower-calorie alternative.
- Flavor Boost: Add a splash of almond or coconut extract to the filling for a unique flavor twist that surprises the taste buds.
- Fruit Variations: Swap strawberries for other fruits like blueberries, raspberries, or even a cute kiwi hat for a colorful presentation.
- Nutty Crunch: Mix chopped nuts into the crust for added texture and flavor; pecans or almonds work wonderfully.
- Chocolate Cheesecakes: Blend in cocoa powder or melted chocolate with the cream cheese for a rich, chocolatey version of these mini delights.
- Spiced Delight: Stir in a dash of cinnamon or nutmeg into the filling to create a warm, cozy flavor that evokes holiday spirit.
These variations can further enhance your Gnome Mini Cheesecakes and add a personal touch—just like you’d do with my Mini Baked Potatoes, which can also be customized to your liking! Enjoy inventing your own special twist!
Gnome Mini Cheesecakes Recipe FAQs
What kind of graham crackers should I use for the crust?
You can use traditional graham crackers, but feel free to switch things up with vanilla wafers or even Oreos for a unique twist. These substitutes will change the flavor profile slightly, but they’ll still create a delightful crust!
How should I store leftover Gnome Mini Cheesecakes?
Refrigerate decorated Gnome Mini Cheesecakes for up to 4 days in an airtight container. This keeps them fresh while preserving that creamy texture. Ensure they’re well-sealed to prevent them from gathering any unwanted fridge aromas.
Can I freeze Gnome Mini Cheesecakes?
Absolutely! You can freeze unadorned cheesecakes for up to 1 month. Just wrap each cheesecake tightly in plastic wrap and then foil for extra protection. When you’re ready to enjoy, thaw them in the refrigerator overnight before adding your delightful decorations.
What if my cheesecake cracks during baking?
To avoid cracking, ensure you mix the batter gently once the eggs are added, as overmixing can introduce air and lead to cracks. If you do notice cracks, don’t worry too much! A generous dollop of whipped cream can cover them up beautifully in the end.
Can I make these Gnome Mini Cheesecakes gluten-free?
Definitely! Simply swap the graham cracker crumbs for gluten-free cookies or crust alternatives. This way, everyone can join in on the fun without compromising on taste or texture!
Is there a way to make these cheesecakes without eggs?
Yes! For a no-bake version, simply replace the eggs with a mixture of whipped topping and gelatin. This alternative will allow you to achieve that creamy consistency while skipping the eggs altogether, making it a great option for those avoiding them.
Gnome Mini Cheesecakes That Spark Holiday Joy and Fun
Ingredients
Equipment
Method
- Preheat your oven to 325°F (160°C) and line a muffin tin with cupcake liners.
- Combine graham cracker crumbs, granulated sugar, and melted butter in a mixing bowl until it resembles wet sand.
- Press mixture firmly into each muffin cup to form a solid crust.
- Bake in preheated oven for 5 minutes until slightly firmed.
- Beat cream cheese until smooth; gradually add granulated sugar and vanilla extract, mixing until fluffy.
- Add eggs one at a time, mixing on low speed; fold in sour cream or Greek yogurt carefully.
- Divide the cheesecake batter among muffin cups, filling each about ¾ full and smooth the tops.
- Bake for 18–20 minutes until edges are set and center slightly jiggles.
- Cool cheesecakes in the oven for 10 minutes before transferring to a wire rack.
- Chill cheesecakes in the refrigerator for at least 2 hours before decorating.
- Pipe whipped cream onto each cheesecake for a 'beard,' add strawberries as hats, and mini chocolate for noses.
- Dust with powdered sugar before serving to mimic snow.
Leave a Reply